


Part 2 - Getting Started
28
Video Display Area
Left-click on the video display area to toggle between
split screen and single screen modes.
Drag the camera screens around to rearrange them.
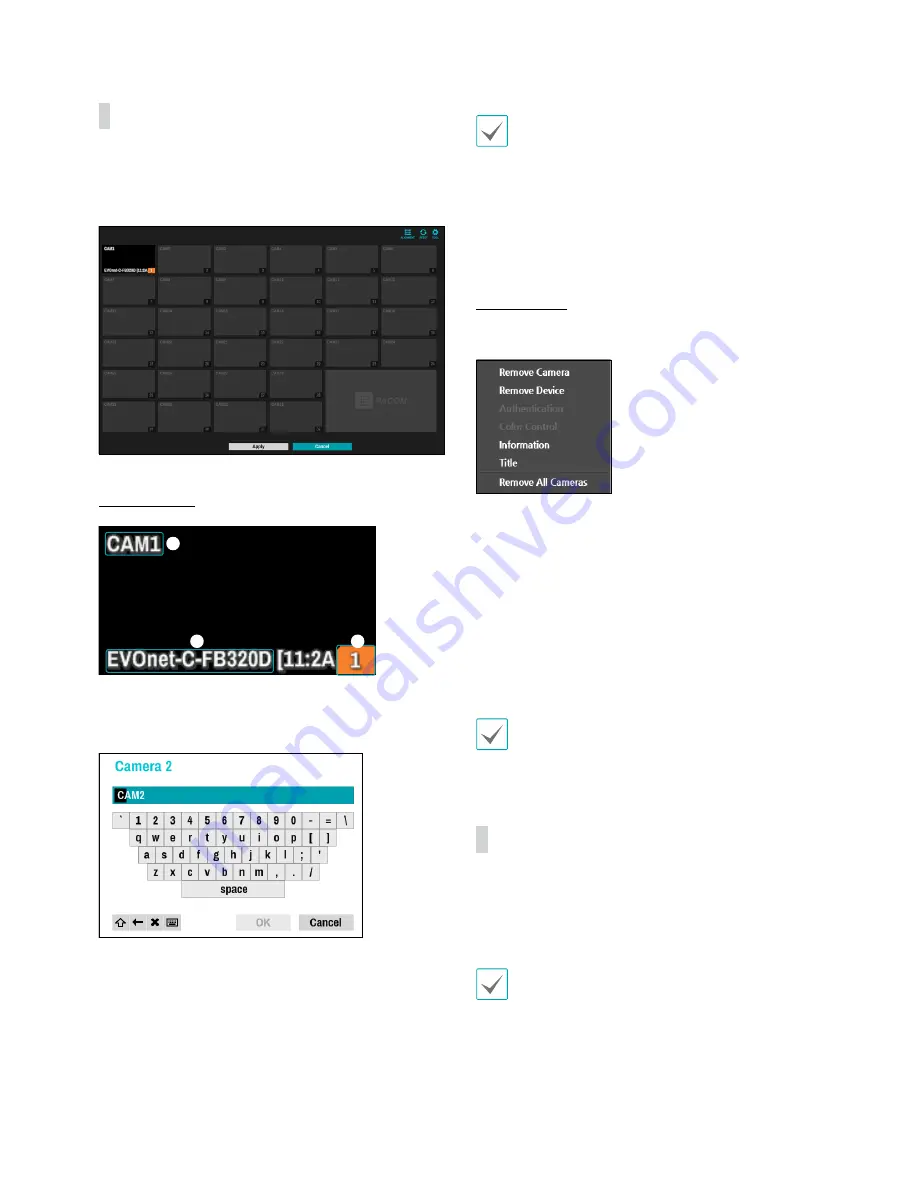
Camera Screen
1
2
3
1
Camera Title
Indicates the camera's title. Left-click on the title to
edit the camera's title.
2
MAC Address
Camera's model and MAC address are shown if the
camera has not been registered to the NVR.
3
Screen Position/Registration Info
Flashes in orange if the camera has not been
registered to the NVR.
• Information is not indicated on the bottom of the
screen for cameras already registered to the NVR,
and the Screen Position/Registration Info icon is
shown with a black background.
• Screen Position/Registration Info icon for cameras
registered to another NVR is shown with a steady
orange background on top of a grey screen.
Camera Menu
Right-click on the video display area to bring up the
camera menu.
• Remove Camera: Removes the registered camera.
• Remove Device: Removes the registered encoder.
• Authentication: Enter the necessary camera login
info.
• Color Control: Adjusts the camera's color settings.
• Information: Displays the camera's basic information.
• Title: Edits the camera's title.
• Remove All Cameras: Removes all registered
cameras.
You can drag & drop to add or remove cameras.
Apply/Cancel Buttons
While in Camera Registration mode, select Apply to
register all changes.
Select Cancel to exit Camera Registration mode without
applying the changes.
It is not possible to register a camera that has already
been registered to a different NVR.


