1. Remove the LED luminaires from the reflector.
2. Remove screws along length of the reflector and care-
fully remove the reflector. Power supplies will now be
visible (Fig. 12).
3. To replace reflector, reverse the procedure. Insert
reflector in front channel, lift into place, then replace
the screws in the reflector.
POWER SUPPLY ACCESS
Hillphoenix cases are equipped with LED luminaires. LED
power supplies operate both the canopy lights and shelf
lights and are located in the electrical junction box beneath
the case. An ON/OFF switch is located in the upper left-
hand corner of the lighting assembly.
Once cases have been properly positioned in the store and
an electrician has connected the lighting circuit, the lights
may be turned on to verify that they are connected and
functioning properly.
To ensure peak performance, run the lighting systems only
when the store climate control is on and case refrigeration
is started.
NOTE: it is highly recommended that the
ambient store temperature not exceed 80
°
F.
LIGHTING & POWER SUPPLIES
CAUTION!
Never replace a 24V DC power supply
with a T-8 or T-5 ballast, since ballasts
use alternating current (AC) and operate
at a much higher voltage than is used by
this LED system. Doing so will damage
the LED system and increases the chance
of safety issues/injury.
CAUTION!
Using improper DC power supplies may
damage the luminaires, resulting in sub-
standard operation and increased chanc-
es of safety issues/injury.
DANGER!
SHOCK HAZARD
Always disconnect power to case when
servicing or cleaning. Failure to do so
may result in serious injury or death.
Fig. 12 Clear view of the power supply once the light reflector is
removed.
POWER
SUPPLY
1. Unplug the LED luminaire (Fig. 8).
2. Pinching the latching clips inward at the ends of the lu-
minaire, rotate luminaire down at each end until hooks
are free, then remove (Fig. 9).
3. To install the new luminaire, place hook into shelf roll at
shelf front and rotate rear of luminaire toward the shelf.
4. Depress the rear clip so that luminaire can finish rota-
tion and until clip engages the shelf bracket.
REPLACING SHELF LED LUMINAIRES
REPLACING NON-SHELF LED LUMINAIRES
Fig. 9 Remove the old LED
luminaire.
Fig. 8 Unplug the LED lumi-
naire.
Fig. 11 Slide the other end to
the opening in the sheet metal
and disengage.
Fig. 10 Squeeze the latching
clips and pull the luminaire
free.
1. Squeeze plastic clips on the 4-pin connector at the end
of the luminaire, then pull free of the receptacle (Fig.
10).
2. At the other end, slide the luminaire to the opening and
disengage from the metal housing slot (Fig. 11).
3. Reverse the previous steps to install the new luminaire.
7
Summary of Contents for 3NDML-NRG
Page 16: ...BLUE WHITE BLACK 3NDML WIRING DIAGRAM B2 ...
Page 19: ...SEISMIC BRACKET 5 D2 ...
Page 20: ...SEISMIC BRACKET 7 D3 ...
Page 21: ...SEISMIC BRACKET 11 D4 ...
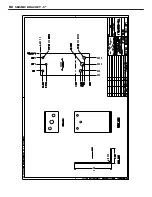
Page 22: ...SEISMIC BRACKET 15 D5 ...


