8
EN
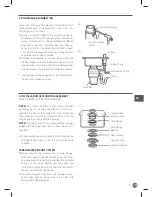
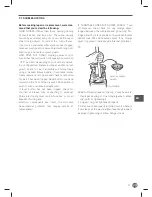
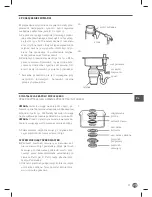
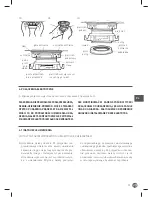
5. ATTACHING DISCHARGE ELBOW
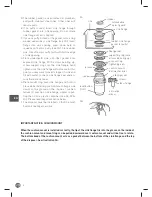
A. Connect waste elbow to the disposer (see 5A),
proceed to step 6 and then connect bottom of the
elbow by tightening the slip nut (see 5B).
B. If you are connecting to a dishwasher, return to
section 2B. If not, make sure all plumbing con-
nections are tight and in accordance with all
plumbing codes and ordinances. Run water and
check for leaks.
5A
5B
rubber
gasket
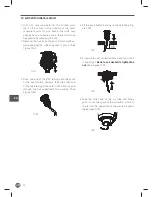
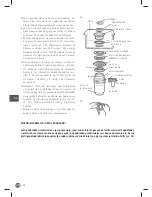
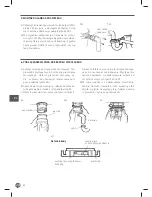
6. CONNECTING DISPOSER TO MOUNT ASSEMBLY
A. Line up disposer under mounting assembly.
Guide hopper projections into mount ring slots.
Turn mount ring about 1/4” to right so that dis-
poser is temporarily supported (see 6A).
B. Turn mount ring and disposer until disposer el-
bow lines up with trap (see 6B).
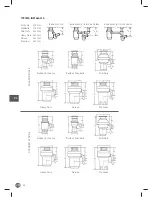
C. Turn mount ring to the right (counter-clockwise)
until it locks up tight. Tap the mount ring ears
with a hammer until the lock position is achieved.
Hopper projections must be to extreme left of
mounting slots (see 6C & 6D).
D. If mount ring is hard to turn, you may add a small
amount of petroleum jelly or liquid soap to hop-
per projections. Run water and check for leaks.
projection
slot
trap
elbow
hopper projection in
“supported“ position
Locking detail
mount ring
hopper projection
in “lock“ position
6A
6B
6D
6C


