


360137-D/D
15
Horizon Series™ Models
Section III: Horizon Series™ Models
9 Operation
9.1
Initial Start Up
1
Plug the power cord into a grounded outlet that meets the electrical requirements on the product
specification label.
2
Switch AC ON/OFF switch ON.
3
Remove the 9 V battery from the literature box and install it.
NOTE
►
For models equipped with the optional Access Control, switch the backup battery key
switch ON.
►
If an alarm condition other than High Temperature occurs, refer to the service manual
for troubleshooting.
4
Press
Down Arrow
(Mute) if high temperature alarm sounds.
9.2
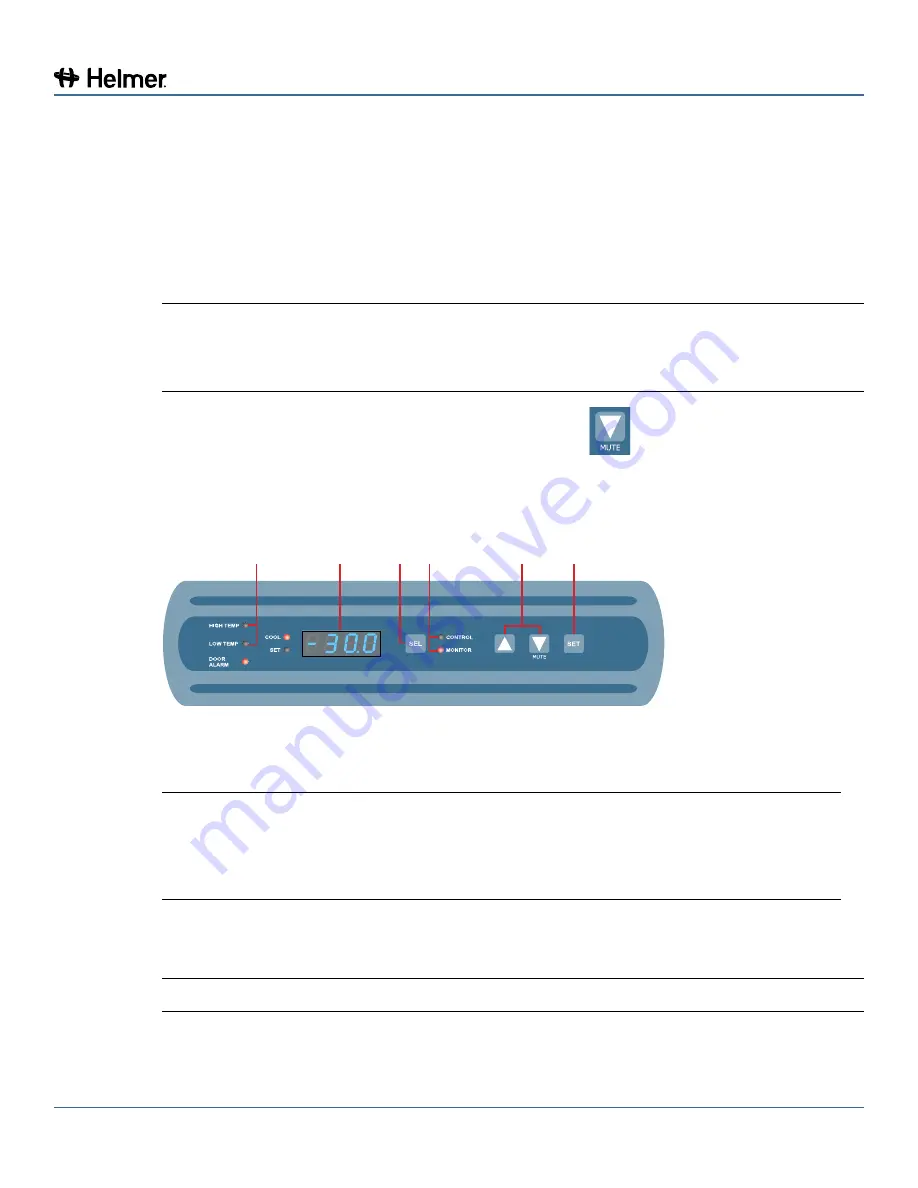
Monitor and Control interface
Horizon Series monitoring and control interface.
9.3
Display Minimum and Maximum Monitor Temperature Recordings
NOTE
►
This feature is standard on Horizon Series™ models with serial numbers of 2015494
or higher. Some exceptions may exist. For confirmation on your unit, please contact
Helmer Technical Service.
►
Units that do not include the
minimum and maximum recording feature will not display
.C or .F when entering the program mode.
The minimum and maximum recording feature allows the user to view a minimum temperature
occurrence and a maximum temperature occurrence within a given period of time. The timer provides a
time reference in which those temperatures occurred.
NOTE
The following steps only apply to the monitor probe.
1
View
minimum
temperature recording.
a
Press and hold the
Down Arrow
button for 1 second and listen for a single beep.
b
The display will alternate between
LO
and a valid temperature value five (5) times followed by a
single beep to indicate exit back to the temperature display.
High and Low
Temp Lamps
LED Display
SEL
Button
CONTROL
and
MONIT
OR Lamps
UP
and DOWN
Arrows
SET
Button


