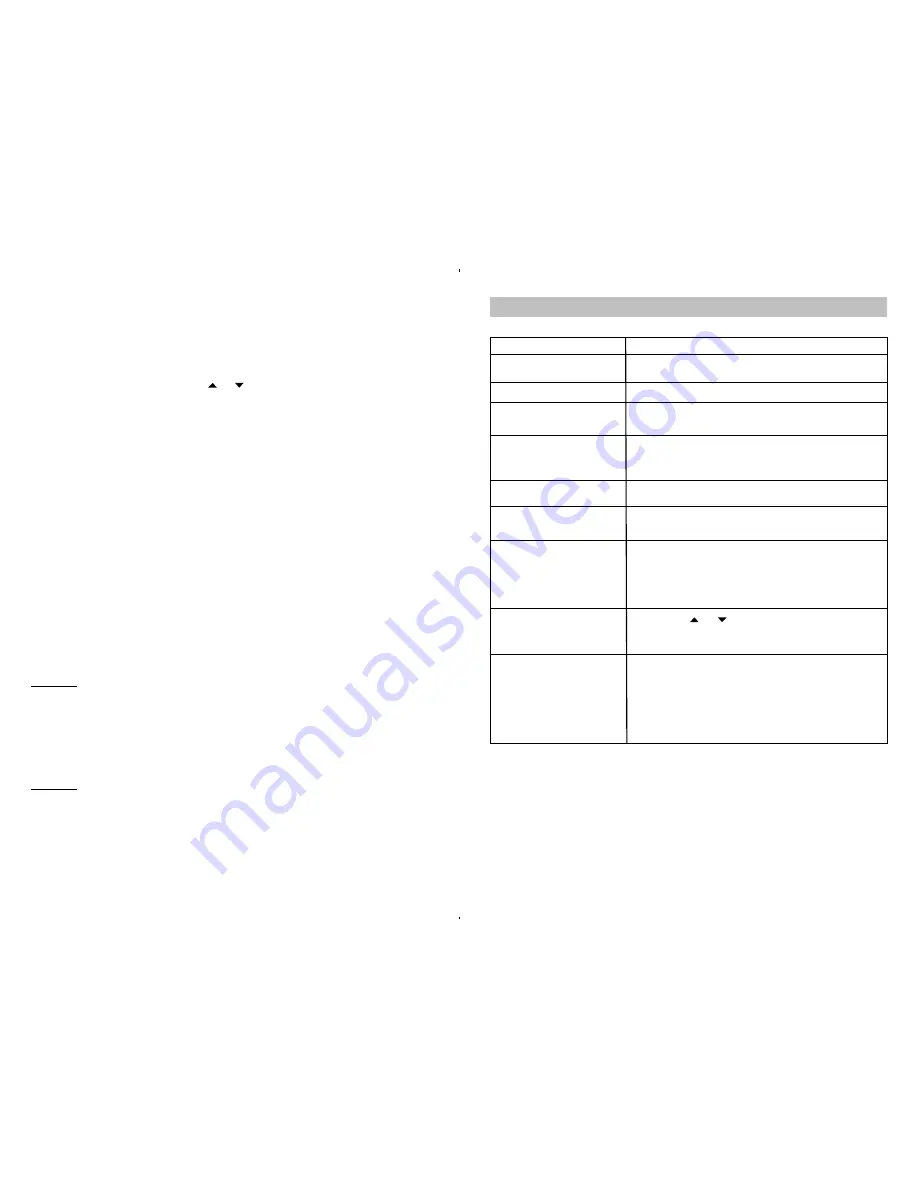
PROBLEMS
CHECK
No dial tone
Is any plug disconnected from all modular phone plugs? is
jack improperly wired?
Phone does not work
Are all cords connected properly?
Phone does not ring
Ringer Switch may be set to OFF?
Slide switch to ON position.
Cannot dial
Check the Tone/Pulse Switch setting. You may only have
PULSE service.
Switch the Tone/Pulse switch to PULSE position
Other party cannot hear you Ensure Handset cord is connected properly.
The display is faded
Adjust the contrast to a higher level by following the setup
(Numbers are hard to see)
procedure described above.
Make sure the Caller ID service is active. The phone is
connected to a working wall jack. All line cord connections
Caller ID does not work
are correct and secure. Your answering machine should be
set to answer after at least 2 rings and you should only pick
up the phone after 2 rings.
The Caller ID display is blank Press either
or
Button to see if “END OF LIST”
appears.
Check if you have received the first Caller ID record.
The Caller ID unit will not function until you have Caller ID
service from your local telephone company. Call your local
telephone company to have Caller ID installed on your
The Caller ID display does
phone line. Check your phone line connections. Make
not show the caller’s
sure all connections are secure and connected.
information
If it is a private call or a blocked call, the caller’s name
and/or phone number will not appear on the display.
The Caller ID display does
not show the caller’s
information
frequently called numbers. You can additionally store up to 10 phone numbers for two-touch
dialing. Each phone number must be stored in a specific memory location to enable your
phone to locate a number from the memory for automatic dialing. The one-touch memories
are numbered M1, M2 and M3, while the 10 two-touch memories are stored through the
memory
button and dial keys (0 – 9)
STORING CID PHONE NUMBER IN THE MEMORY LOCATIONS
1. Pick up the phone and press the or buttons until the desired call number is
displayed.
2. Press
prog
button once followed by
m1, m2 or m3
button to store the phone number in
the one- touch memory location.
3. Press
prog
button once followed by the
memory
button plus one of the numeric buttons
(0~9) to store the phone number in the two - touch memory location. If the storing is
successful E1, E2 or E3 or A0, A1...or A9 will be displayed depending on the memory
location chosen.
STORING PHONE NUMBERS IN THE ONE –TOUCH MEMORY LOCATIONS
1. Press
prog
Button (#14).
2. Tap out the phone number using the dial keys.
3. Press
m1, m2 or m3
to store the number in the one-touch memory.
STORING PHONE NUMBERS IN THE TWO-TOUCH MEMORY LOCATIONS
1. Press
prog
Button (#14).
2. Tap out the phone number using the dial keys.
3. Press
one of the 0~9 numeric to store the number in the two-touch memory.
NOTE: The previous phone number stored in a memory location will be erased and replaced
by the new input number.
RECALLING A PHONE NUMBER FROM THE ONE-TOUCH MEMORY LOCATIONS
1. Pick up the Handset.
2. Press the
m1, m2 or m3
button where your required number is stored.
3. Your call will now be dialed automatically.
EXAMPLE
To recall 76543211 which is stored in memory location “
m1
”, pick up the handset and wait for
a dial tone, then press the
m1
button. The number will be dialed automatically.
RECALLING A PHONE NUMBER FROM THE TWO-TOUCH MEMORY LOCATIONS
1. Pick up the Handset.
2. Press the
memory
button.
3. Press the location number 0, 5, 9 etc. where your number is stored.
4. Your call will now be dialed automatically.
EXAMPLE
To recall 21234678 which is stored in memory location “0”, pick up the handset, wait for the
dial tone and then press
memory
button, then the keys [0]. The phone number will be dialed
automatically.
16
17
TROUBLESHOOTING GUIDE


