background image

Setup via WIFI

 2.4 GHz

Note: if you previously set up your camera via 

ethernet connection and want to use the camera over 

WIFI, you will have to performa factory reset. See the 

factory reset page for instructions.

You can relocate your camera after you have finished 

setting up your camera. Just unplug the power and 

relocate to your desired location and reconnect the 

power. 

1.

Connect the power cable (B) to the camera (H). Insert 

the power cable into the correct USB power adapter 

(C). Connect the USB power adapter to a wall socket. 


2.

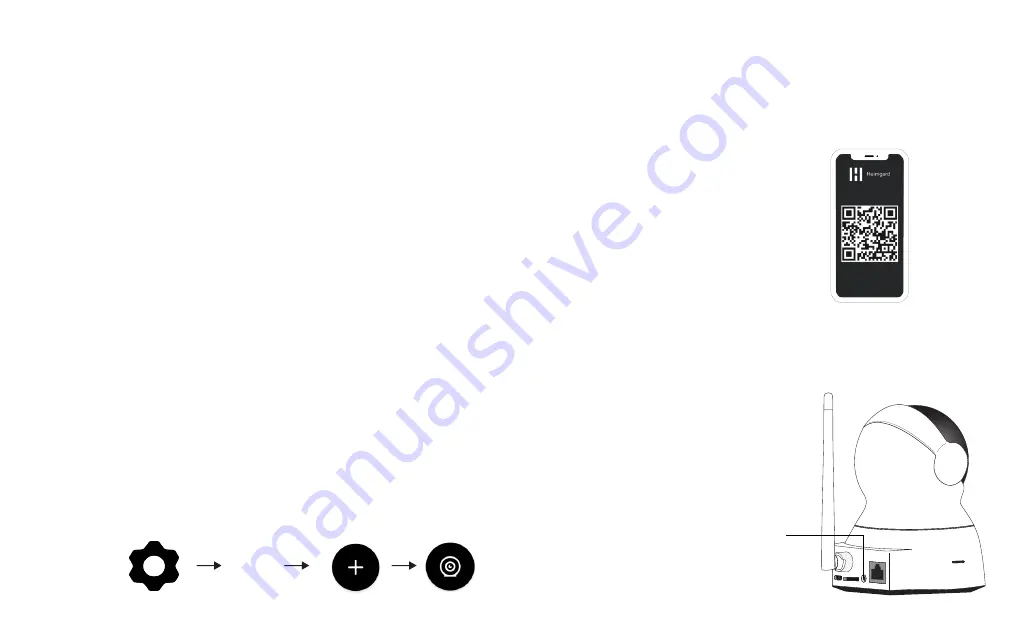
Open the 

Heimgard app

 and follow the steps listed 

here to connect to your device 


Manage 

Devices

3.

Insert or select your 2.4 GHz WIFI network name (this 

is case sensitive). Enter your WIFI password and click 

generate.  A QR code will appear on your screen.

4.

On your camera press and the join button (K) for 5 

seconds. The LED light will flash blue.  

Press and 

hold 5 sec-

onds

Summary of Contents for 117575

Page 1: ...Indoor Camera 360 Quick start guide version 1 0 Requires a heimgard hub...

Page 2: ...a 360 C USB power adapter EU and US D Ethernet cable B Micro USB power cable Device overview H Power input J Ethernet input K Join Reset Button E Wall bracket F Screws x 2 G Wall anchors x 2 I LED Lig...

Page 3: ...H and to an internet connected home router Set up with either the Ethernet cable or WiFi You must choose before getting started Setup via Ethernet cable 2 At the top of your screen you recieve a notif...

Page 4: ...n and reconnect the power 1 Connect the power cable B to the camera H Insert the power cable into the correct USB power adapter C Connect the USB power adapter to a wall socket 2 Open the Heimgard app...

Page 5: ...ess on your phone Configure and use Advanced Settings The camera can be used for two purposes Record and Generic Generic The camera will not record when it detects motion You can manually stream and i...

Page 6: ...r time is now set and you can logout Troubleshoot Generic Issues Check that the cables are inserted correctly That you have internent connectivity If you have issues adding or configuring the camera p...

Page 7: ...As wall materials vary screws for fixing also vary For advice on suitible screw systems contact your local specialized dealer You will need a screw driver a drill Determine where you want the camera...

Page 8: ...connect to the network Red and blue Blinking slowly The device is receiving the wifi signal or connecting to wifi Lights are solid and steady The device is connected to network Website heimgard com su...

Page 9: ...device to dripping or splashing 11 Protect the attached cables from being walked on or pinched par ticularly at plugs convenience receptacles and the point the exit the apparatus 12 Only use attachmen...

Reviews: