


38
Rev. 05/2020
39
Rev. 05/2020
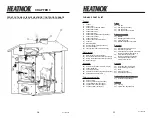
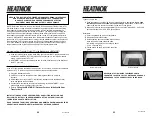
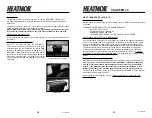
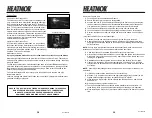
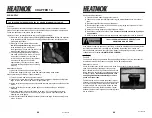
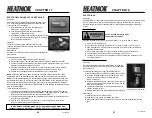
Firebox Door
Principles of the Firebox Door
The firebox door is HTF cooled to prevent warping of the
door. It also acts like a water jacket, absorbing heat from
the fire, and placing that energy into the HTF. Being HTF
cooled, the front of the firebox door will never be hotter than
the HTF. The cold outside atmospheric air is drawn over
the warm surface of the firebox door, by the combustion
blowers, which is then warmed and forced into the firebox
as warmed combustion air. This lessens the time needed
for the interior of the firebox to reach that high smoke
burning temperature. It is important that the firebox door
seal maintains an airtight seal.
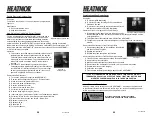
Operation of the Firebox Door
HTF from the main water jacket flows in a loop between
the firebox door and the water jacket by natural thermal
siphoning. Since there is no pump involved, there is very
little pressure. During this process, the HTF cools the door
and the HTF in the door is heated.
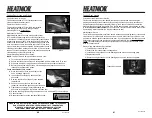
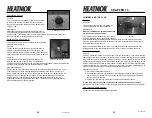
Maintenance / Result
A properly adjusted firebox door will not allow smoke to enter or escape the firebox.
Maintain a tight seal all around the perimeter of the firebox door at all times. There may be
times when the perimeter of the firebox door will build up with “creosote strings,” especially
along the bottom.
To keep the perimeter clean, occasionally scrape down to the steel.
Do not cut,
scrape or
disturb the actual soft, pliable seal. Keep the door correctly adjusted on the hinges so that
the pliable seal is being forced against the firebox ledge. Keep all nuts and bolts on the
handle, latch and hinges properly adjusted.
The seal itself consists of a rope in the groove of the firebox door, covered with high
temperature silicone.
Failure to manage and maintain the firebox door could result in premature replacement of
parts and a buildup of creosote.
ABSOLUTELY NO FIRE IN THE FIREBOX WHEN PERFORMING THIS PROCESS.
DO NOT PERFORM THIS PROCESS WHEN UNIT HTF TEMPERATURE
IS UNSAFE. ALWAYS WEAR PROPER PERSONAL PROTECTIVE
EQUIPMENT WHEN WORKING WITH HTF AND CHEMICALS.
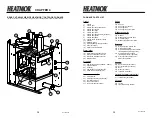
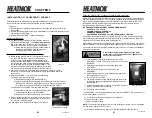
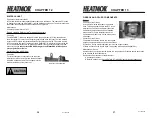
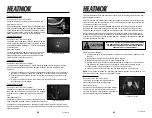
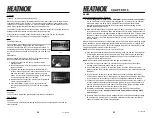
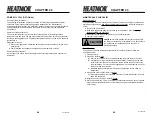
Firebox Door Handle
Firebox Door Handle
Removal of Firebox Door
1) Turn off power to the combustion air blowers.
2) Ensure that the fire in the firebox is extinguished.
3) Stop the flow of HTF from the water jacket through the door hoses by pinching the
two door hoses shut. Make a collar of cardboard between the jaws of two pairs of
vice-grips and clamp the door hoses tight at the center point of their length.
4) Loosen the hose clamps and remove the door hoses from the firebox door.
5) Loosen and remove the nuts and bolts holding the firebox door on to the hinge.
6) Remove the firebox door from the hinges and remove the handle from the firebox
door.
To replace the firebox door, follow these steps:
1) Replace the bolts and nuts onto the new door just as they were removed.
2) Hang the firebox door on the hinges loosely, with the nuts just slightly more than
finger tight, and attach the handle on to the firebox door allowing the handle to just
barely float freely.
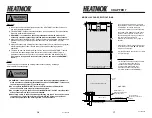
NOTE:
Ensure there is a tight seal around the firebox door frame while it is closed and
latched shut. The firebox door must remain parallel with the door frame.
3) Close the firebox door and allow the handle to rest freely in the latch.
4) Get the firebox door parallel with the door frame ledge and tighten the nuts and bolts
a little more firmly onto the hinges. You may want to block up the firebox door until
the hinge is re-tightened.
5) Re-attach the door hoses, tighten the hose clamps, and unclamp the vice-grips.
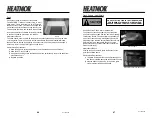
6) Light a fire in the firebox; then ensure that there are no air leaks. You will be able
to detect them by noticing smoke escaping through any air leaks, while the blowers
are running.
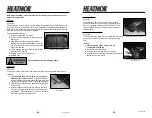
NOTE:
If there is smoke leakage around the firebox door or one corner of the door, it is
adjustable.
7) Lift the door handle off the latch and allow it to rest loosely.
8) With two 1 1/8 inch wrenches, loosen the appropriate hinge (top or bottom) so it is
slightly more than finger tight. (Use only the bottom nut to adjust.)
9) While the bolt is slightly tight, rap the nut between the hinge halves, with a punch
and hammer.
10) With hinge bolt reset, tighten the lower nut.
11) The top and bottom firebox door should remain parallel with the door frame. If it
tends to sag, block it up with appropriate blocking until the hinge is re-tightened.
12)
When replacing the Firebox Door, it is recommended to replace the Door Hoses at this
time.


