03/20
Model H1001.8/H1001.8HPS
Page 5 of 7
INSTALLATION PROCEDURE…
STEP 11:
Install grille and tighten outer side screws. Verify there is chilled water out of bubbler.
MAINTENANCE
STEP 1:
Periodically clean the strainer located in the valve body. Refer to 5874 Series Valve
Manual for more information.
STEP 2:
The condenser fins on chiller should be periodically cleaned with brush, air hose or
vacuum cleaner. Care should be taken not to bend or deform the condenser fins.
STEP 3:
The chiller temperature control is factory set for 50° F water under normal conditions.
For colder water, adjust control clockwise. For warmer water, turn counterclockwise.
Remove front chiller panel for access to temperature control. After adjustment allow
unit to cycle off before checking outlet water temperature.
TROUBLESHOOTING
PROBLEM
REPAIR CHECKLIST
1. Insufficient bubbler flow.
1a. Check that inlet screwdriver stop valve is in
wide-open position.
b. Verify minimum 30 psi flowing supply pressure.
c. Clean strainer. See 5874 Series Valve Manual.
d. Adjust valve to increase flow. Use front adjust
screw or see 5874 Series Valve Manual.
e.
Clean screens (inside nozzle body). Unscrew
nozzle insert and very gently activate water
supply to pop out qty. 3 screens (be careful not
to lose screens). Remove any debris clogging
the screen openings and place back into nozzle
body. Reassemble nozzle insert.
2. Water too warm or cold.
a. Adjust chiller temperature control, clockwise for
colder water.
© 2020 Haws
®
Corporation
– All Rights Reserved
HAWS
®
and other trademarks used
in these materials are the exclusive property of Haws Corporation.
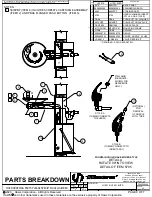
FIGURE 1


