background image

40

2420333140 E06.13 

EN

Telescopic machines, 28 - 43 m

C

- Maintenance

2 -  Detailed program

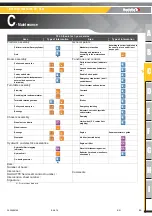
The time periods below are recommended for fuel-powered machines in normal use. 

1 - Increase in periodical inspections

2 - For countries where machines are not subject to controlled periodic maintenance

Symbol

Meaning

Symbol

Meaning

Visual inspections

Systematic replacement 
Operation requiring HAULOTTE 
Services® authorisation

Check-Test See user manual or 
machine maintenance book

(1)

Visual inspection with 
dismantling and exchange or 
replacement if necessary 
Operation requiring HAULOTTE 
Services® authorisation Increase 
in periodical inspections

Check level

Tightening (bolt, etc.)

Lubrication-Lubrication

Tolerance (clearance lubrication)

Oil change

(2)

Static and dynamic tests For 
countries where machines are not 
subject to controlled periodic 
maintenance

During the periodic inspection of the 5000 h (visual inspection with dismantling and exchange or
replacement if necessary), a record must be made of all parts that have been dismantled but not replaced

Summary of Contents for H28TJ+

Page 1: ...Maintenance book T ELESCOPIC MACHINES 28 43 M 2420333140 E06 13 EN Maintenance book TELESCOPIC MACHINES 28 43 M H28TJ HB86TJ H43TPX HB135JRT 2420333140 E06_13 EN...

Page 2: ...2 2420333140 E06 13 EN Telescopic machines 28 43 m...

Page 3: ...nce 12 2 2 Warrantyperiod 12 2 3 Conditionsofwarranty 12 2 4 Warrantyconditions 13 3 Scope of intervention 14 4 Instructions for intervention 15 B RECOMMENDATIONS 1 Lubrication diagram 17 2 Consumable...

Page 4: ...l replacement 93 3 3 3 2 Replacing damaged of hoses 94 3 3 3 3 Evaluation of leaks on hydraulic cylinders 95 3 3 4 Electric 96 3 3 4 1 Replacing damaged cables 96 E002 Wheel reducer 97 E003 Hydraulic...

Page 5: ...5 Diagnosis assistance indicators 159 6 Locations and functions of the main safety features 160 6 1 Locationofthelimitswitchandsensors 162 6 2 Locationsofthesolenoidvalves 164 7 Buzzers 165 8 Indicato...

Page 6: ...6 Maintenance book...

Page 7: ...oughout your machine s service life to ensure optimal use of your HAULOTTE product When contacting our After Sales Service ensure that you provide the machine model and serial number When ordering any...

Page 8: ...ions and to make improvements or modifications to the machine without modifying this manual Certain options can modify the machine s operating characteristics and its associated safety If your machine...

Page 9: ...machine operation If regular maintenance is not carried out this may Void the warranty Cause machine malfunction Reduce machine reliability and shorten its service life Cause operator safety problems...

Page 10: ...terial damage work quality Prohibition relating to work safety and quality Reminder No identified risk but a reminder of the need for common sense good practice or pre action prerequisites Cross refer...

Page 11: ...code For Russia and the Ukraine only The labels must be kept in good condition Additional labels can be obtained from HAULOTTE Services Labels Color Meaning Red Potentially fatal danger Orange Risk o...

Page 12: ...ich does not comply with the instructions or recommendations in this maintenance book claims will not be accepted The machine utilisation period must be recorded by reading the engine hour meter whene...

Page 13: ...any other equipment in direct contact with fuel or lubricants Wearing parts pads bearings tyres connections etc These parts are by definition subject to deterioration during the period of operation W...

Page 14: ...f sold hired or resold equipment Owner or hirer Qualified HAULOTTE Services technician Operator s manual Pre operation inspection Before operation or when the operator changes Operator Operator Operat...

Page 15: ...uations Do not work in an explosive or flammable atmosphere spark flame etc Do not touch the hot parts of the hydraulic power source engine filters etc Do not bridge the battery terminals with metalli...

Page 16: ...16 2420333140 E06 13 EN Telescopic machines 28 43 m A Safety precautions...

Page 17: ...scopic machines 28 43 m B Recommendations Recommendations 1 Lubrication diagram Diagram 5 2 6 6 6 6 6 6 6 6 6 2 1 2 2 2 2 4 3 Seulement pour Only for H43TPX HB135JRT Seulement pour Only for H43TPX HB1...

Page 18: ...eme pressure lithium grease 2820304320 6 Lead free grease Aerosol 0 4 l 0 1 gal US 2820304330 Lead free grease Can 5 l 1 32 gal US 2820304340 7 Molybdenum grease 8 Oil 9 High pressure lubricant Consum...

Page 19: ...n gas oilaccordingto EN590 European fuel oil according to BS2869 class 2 American gas oil according to ASTMD975 07b Japanese gas oil according to NATO F54 HATZ 41C DEUTZ 2011 2012 PERKINS 403 804 1104...

Page 20: ...20 2420333140 E06 13 EN Telescopic machines 28 43 m B Recommendations 2 2 MOTOR OILS In order to ensure that the engine will run properly it is recommended to use the following oils Viscosity table...

Page 21: ...s Biodegradable oils may be used if they comply with the following requirements Ambient operating temperature between 15 C 9 F and 40 C 104 F HEES type biodegradable oil only according to standards IS...

Page 22: ...labels indicate a potentially fatal danger F GB D 7814 518 Composant sp cifique cette machine NE PAS INTERCHANGER Component specific to this machine DO NOT INTERCHANGE Komponenten nur f r diese maschi...

Page 23: ...H I 23 2420333140 E06 13 EN Telescopic machines 28 43 m B Recommendations Specific labels H43TPX HB135JRT 3 1 2 Orange labels Common labels CE The orange labels indicate a risk of serious injury R1 R9...

Page 24: ...24 2420333140 E06 13 EN Telescopic machines 28 43 m B Recommendations 3 1 3 Yellow labels Common labels The yellow labels indicate a risk of material damage and or minor injury J1 J6 J5 J7 J2 J3 J4...

Page 25: ...m B Recommendations 3 1 4 Other labels Common labels Specific labels H28TJ HB86TJ The other labels provide additional technical information 7814 393 7814 394 A2 A3 A11 A12 A8 A7 A15 A9 A1 A5 A6 A16 A3...

Page 26: ...Only Max 232 psi 16 bar A79 R50 R51 Minimum safe approach distance M S A D to energized exposed or insulated power lines Voltage Range Phase to phase Minimum safe approach distance 0 to 300 V Over 300...

Page 27: ...es 28 43 m B Recommendations Specific labels optional 3 1 5 Green labels 3 1 6 Blue labels N B The blue labels indicate information or a precaution to be taken in case of danger Green labels indicate...

Page 28: ...ions 3 2 IDENTIFICATION Locations Standards CE and AS A16 R1 R2 J3 A3 A4 R11 J3 J7 A12 A11 A11 A30 A7 A1 R5 R8 A28 R15 A5 J10 J5 A10 J1 J4 A12 A6 A14 A13 J5 J2 J4 J6 O1 A2 R7 A8 A9 R9 R9 J5 R10 R10 R1...

Page 29: ...d only 3078144510 Red R15 Harness use 1 For AS standard only 3078144520 For AS standard only 3078144520 Red R22 Prohibited use of the PVG 1 307P230040 307P230040 Orange O1 Operation instructions 1 In...

Page 30: ...TTE logo 1 307P217220 307P217220 Other A7 Read the operation manual 2 3078143680 3078143680 Other A8 Hydraulic oil 1 3078143520 3078143520 Other A8 Biodegradable oil 1 3078148890 3078148890 Other A9 U...

Page 31: ...28 43 m B Recommendations Locations Standards ANSI and CSA A16 R1 R2 J3 A25 A22 A3 A4 R11 J3 J7 O3 A12 A11 A11 A30 A7 A1 R5 R8 A29 A5 R50 J5 J1 J4 A12 A6 A14 A13 J5 J2 J4 J6 O1 R7 A8 A9 R9 R10 R9 R10...

Page 32: ...0 3078147090 Yellow J7 Revolving cradle 1 307P215290 307P215290 Other A1 1 Central platform control box 1 307P223390 307P219430 Other A1 2 Left platform control box 1 307P219440 307P219440 Other A1 3...

Page 33: ...F G H I 33 2420333140 E06 13 EN Telescopic machines 28 43 m B Recommendations Other A78 3 Dead Man 1 307P224810 Other A79 Air line 1 307P226470 Color Marking Description Quantity H28TJ HB86TJ H43TPX...

Page 34: ...34 2420333140 E06 13 EN Telescopic machines 28 43 m B Recommendations...

Page 35: ...ce The time periods below are recommended for fuel powered machines in normal use 1 Increase in periodical inspections 2 For countries where machines are not subject to controlled periodic maintenance...

Page 36: ...n objects on all surfaces Steering system Wheels Driving reducer Brake and Tyres No cracks distortions damaged paint or other faults No missing or loose bolts Condition of the tyres cuts excessive wea...

Page 37: ...ail Gate 4 Floor Platform rotation Rotary cylinder Harness anchorage point Boom assembly Structure parts Bearings Caps and covers Cables and chains 1 Cables and chains Cable carrier cat track 1 Turnta...

Page 38: ...switch PV radius limit weighing Back to neutral for all joysticks selectors etc Power system Engine See manufacturer s guide Fuel Air filter dust indicator Engine oil filter Diesel filter decanting de...

Page 39: ...t legislation in the country of use and at least once a year Performance check for all functions and safety devices Greasing and lubrication according to the maintenance plan General condition of the...

Page 40: ...t See user manual or machine maintenance book 1 Visual inspection with dismantling and exchange or replacement if necessary Operation requiring HAULOTTE Services authorisation Increase in periodical i...

Page 41: ...eakproofness external leak excessive distortion Emergency stop buttons on all control boxes Turntable assembly Circuit breaker and contactors Slew ring Overload Revolving joint and commutator Horn Tur...

Page 42: ...control box indicators etc Turntable assembly Enable Switch pedal Slew ring Emergency stop buttons on all control boxes Revolving joint and commutator Circuit breaker and contactors Turntable rotation...

Page 43: ...eakproofness external leak excessive distortion Emergency stop buttons on all control boxes Turntable assembly Circuit breaker and contactors Slew ring Overload Revolving joint and commutator Horn Tur...

Page 44: ...control box indicators etc Turntable assembly Enable Switch pedal Slew ring Emergency stop buttons on all control boxes Revolving joint and commutator Circuit breaker and contactors Turntable rotatio...

Page 45: ...eakproofness external leak excessive distortion Emergency stop buttons on all control boxes Turntable assembly Circuit breaker and contactors Slew ring Overload Revolving joint and commutator Horn Tur...

Page 46: ...control box indicators etc Turntable assembly Enable Switch pedal Slew ring Emergency stop buttons on all control boxes Revolving joint and commutator Circuit breaker and contactors Turntable rotatio...

Page 47: ...eakproofness external leak excessive distortion Emergency stop buttons on all control boxes Turntable assembly Circuit breaker and contactors Slew ring Overload Revolving joint and commutator Horn Tur...

Page 48: ...control box indicators etc Turntable assembly Enable Switch pedal Slew ring Emergency stop buttons on all control boxes Revolving joint and commutator Circuit breaker and contactors Turntable rotatio...

Page 49: ...eakproofness external leak excessive distortion Emergency stop buttons on all control boxes Turntable assembly Circuit breaker and contactors Slew ring Overload Revolving joint and commutator Horn Tur...

Page 50: ...control box indicators etc Turntable assembly Enable Switch pedal Slew ring Emergency stop buttons on all control boxes Revolving joint and commutator Circuit breaker and contactors Turntable rotatio...

Page 51: ...eakproofness external leak excessive distortion Emergency stop buttons on all control boxes Turntable assembly Circuit breaker and contactors Slew ring Overload Revolving joint and commutator Horn Tur...

Page 52: ...control box indicators etc Turntable assembly Enable Switch pedal Slew ring Emergency stop buttons on all control boxes Revolving joint and commutator Circuit breaker and contactors Turntable rotatio...

Page 53: ...eakproofness external leak excessive distortion Emergency stop buttons on all control boxes Turntable assembly Circuit breaker and contactors Slew ring Overload Revolving joint and commutator Horn Tur...

Page 54: ...control box indicators etc Turntable assembly Enable Switch pedal Slew ring Emergency stop buttons on all control boxes Revolving joint and commutator Circuit breaker and contactors Turntable rotatio...

Page 55: ...eakproofness external leak excessive distortion Emergency stop buttons on all control boxes Turntable assembly Circuit breaker and contactors Slew ring Overload Revolving joint and commutator Horn Tur...

Page 56: ...control box indicators etc Turntable assembly Enable Switch pedal Slew ring Emergency stop buttons on all control boxes Revolving joint and commutator Circuit breaker and contactors Turntable rotatio...

Page 57: ...eakproofness external leak excessive distortion Emergency stop buttons on all control boxes Turntable assembly Circuit breaker and contactors Slew ring Overload Revolving joint and commutator Horn Tur...

Page 58: ...control box indicators etc Turntable assembly Enable Switch pedal Slew ring Emergency stop buttons on all control boxes Revolving joint and commutator Circuit breaker and contactors Turntable rotatio...

Page 59: ...eakproofness external leak excessive distortion Emergency stop buttons on all control boxes Turntable assembly Circuit breaker and contactors Slew ring Overload Revolving joint and commutator Horn Tur...

Page 60: ...trol box indicators etc Turntable assembly Ground control box indicators etc Slew ring Enable Switch pedal Revolving joint and commutator Emergency stop buttons on all control boxes Turntable rotation...

Page 61: ...eakproofness external leak excessive distortion Emergency stop buttons on all control boxes Turntable assembly Circuit breaker and contactors Slew ring Overload Revolving joint and commutator Horn Tur...

Page 62: ...control box indicators etc Turntable assembly Enable Switch pedal Slew ring Emergency stop buttons on all control boxes Revolving joint and commutator Circuit breaker and contactors Turntable rotatio...

Page 63: ...eakproofness external leak excessive distortion Emergency stop buttons on all control boxes Turntable assembly Circuit breaker and contactors Slew ring Overload Revolving joint and commutator Horn Tur...

Page 64: ...control box indicators etc Turntable assembly Enable Switch pedal Slew ring Emergency stop buttons on all control boxes Revolving joint and commutator Circuit breaker and contactors Turntable rotatio...

Page 65: ...eakproofness external leak excessive distortion Emergency stop buttons on all control boxes Turntable assembly Circuit breaker and contactors Slew ring Overload Revolving joint and commutator Horn Tur...

Page 66: ...control box indicators etc Turntable assembly Enable Switch pedal Slew ring Emergency stop buttons on all control boxes Revolving joint and commutator Circuit breaker and contactors Turntable rotatio...

Page 67: ...eakproofness external leak excessive distortion Emergency stop buttons on all control boxes Turntable assembly Circuit breaker and contactors Slew ring Overload Revolving joint and commutator Horn Tur...

Page 68: ...control box indicators etc Turntable assembly Enable Switch pedal Slew ring Emergency stop buttons on all control boxes Revolving joint and commutator Circuit breaker and contactors Turntable rotatio...

Page 69: ...eakproofness external leak excessive distortion Emergency stop buttons on all control boxes Turntable assembly Circuit breaker and contactors Slew ring Overload Revolving joint and commutator Horn Tur...

Page 70: ...control box indicators etc Turntable assembly Enable Switch pedal Slew ring Emergency stop buttons on all control boxes Revolving joint and commutator Circuit breaker and contactors Turntable rotatio...

Page 71: ...eakproofness external leak excessive distortion Emergency stop buttons on all control boxes Turntable assembly Circuit breaker and contactors Slew ring Overload Revolving joint and commutator Horn Tur...

Page 72: ...control box indicators etc Turntable assembly Enable Switch pedal Slew ring Emergency stop buttons on all control boxes Revolving joint and commutator Circuit breaker and contactors Turntable rotatio...

Page 73: ...eakproofness external leak excessive distortion Emergency stop buttons on all control boxes Turntable assembly Circuit breaker and contactors Slew ring Overload Revolving joint and commutator Horn Tur...

Page 74: ...control box indicators etc Turntable assembly Enable Switch pedal Slew ring Emergency stop buttons on all control boxes Revolving joint and commutator Circuit breaker and contactors Turntable rotatio...

Page 75: ...eakproofness external leak excessive distortion Emergency stop buttons on all control boxes Turntable assembly Circuit breaker and contactors Slew ring Overload Revolving joint and commutator Horn Tur...

Page 76: ...control box indicators etc Turntable assembly Enable Switch pedal Slew ring Emergency stop buttons on all control boxes Revolving joint and commutator Circuit breaker and contactors Turntable rotatio...

Page 77: ...eakproofness external leak excessive distortion Emergency stop buttons on all control boxes Turntable assembly Circuit breaker and contactors Slew ring Overload Revolving joint and commutator Horn Tur...

Page 78: ...control box indicators etc Turntable assembly Enable Switch pedal Slew ring Emergency stop buttons on all control boxes Revolving joint and commutator Circuit breaker and contactors Turntable rotatio...

Page 79: ...eakproofness external leak excessive distortion Emergency stop buttons on all control boxes Turntable assembly Circuit breaker and contactors Slew ring Overload Revolving joint and commutator Horn Tur...

Page 80: ...Welds Bearings Boom assembly Turntable assembly Welds Welds Hoses and couplings Hoses and couplings Pins rings and pin stop Pins rings and pin stop Pulleys and wear pads Pulleys and wear pads Bearing...

Page 81: ...leakproofness external leak excessive distortion Emergency stop buttons on all control boxes Turntable assembly Circuit breaker and contactors Slew ring Overload Revolving joint and commutator Horn Tu...

Page 82: ...d control box indicators etc Turntable assembly Enable Switch pedal Slew ring Emergency stop buttons on all control boxes Revolving joint and commutator Circuit breaker and contactors Turntable rotati...

Page 83: ...leakproofness external leak excessive distortion Emergency stop buttons on all control boxes Turntable assembly Circuit breaker and contactors Slew ring Overload Revolving joint and commutator Horn Tu...

Page 84: ...d control box indicators etc Turntable assembly Enable Switch pedal Slew ring Emergency stop buttons on all control boxes Revolving joint and commutator Circuit breaker and contactors Turntable rotati...

Page 85: ...leakproofness external leak excessive distortion Emergency stop buttons on all control boxes Turntable assembly Circuit breaker and contactors Slew ring Overload Revolving joint and commutator Horn Tu...

Page 86: ...d control box indicators etc Turntable assembly Enable Switch pedal Slew ring Emergency stop buttons on all control boxes Revolving joint and commutator Circuit breaker and contactors Turntable rotati...

Page 87: ...leakproofness external leak excessive distortion Emergency stop buttons on all control boxes Turntable assembly Circuit breaker and contactors Slew ring Overload Revolving joint and commutator Horn Tu...

Page 88: ...d control box indicators etc Turntable assembly Enable Switch pedal Slew ring Emergency stop buttons on all control boxes Revolving joint and commutator Circuit breaker and contactors Turntable rotati...

Page 89: ...MAINTENANCE CONFIGURATION 3 2 PLACING IN OPERATING CONFIGURATION 1 Remove the turntable rotation locking pin 2 Pull the emergency stop button 3 3 GENERAL POINTS 3 3 1 Recommendations on the condition...

Page 90: ...2 2 Pins and bearings Except maintenance schedule check pins and bearings in the following cases Abnormal noise during the movements of the structure Observance of excessive amounts of foreign materia...

Page 91: ...he bearing the bearing drift and the bearing housing must be correctly aligned during the assembly process The recommended values for the bearing drift are given on the diagram below Recommended Value...

Page 92: ...nterior ring of the bearing 3 3 2 4 Brakes The brake system is an important component of the safety of the machine It is essential to carry out functional tests periodically every 6 month First test H...

Page 93: ...n and each time an anomaly has been detected Take an oil sample each year check the viscosity ensure there are no foreign bodies and change if necessary Systematically change the oil in the hydraulic...

Page 94: ...dentify and memorise the hose path of the hose to be replaced Use an oil collection pan to avoid polluting the environment After hose removal plug the the hose ends and components the ports from which...

Page 95: ...boom should be fully extended and in the horizontal position For machines fitted with Boom lifting cylinder or Jib cylinder Lift the concerned equipment boom or jib of approximately half way Extend t...

Page 96: ...3 4 1 Replacing damaged cables Locate the faulty wire s and its their points of connection to ensure continuity of machine operation after the wire is replaced Note the cable path to facilitate reass...

Page 97: ...tion pan Place barriers around the perimeter of the work area 1 Turn the wheel to obtain the following configuration 2 Plug 1 is on a horizontal line 3 Plug 2 is on a vertical line 4 Loosen and remove...

Page 98: ...98 2420333140 E06 13 EN Control Oil change Wheel reducer E002 15 mn...

Page 99: ...ating configuration Standard tool kit Protective goggles Gloves Place barriers around the perimeter of the work area Clogging must be checked when hot When cold oil viscosity may simulate filter clogg...

Page 100: ...100 2420333140 E06 13 EN Replacement Hydraulic filter cartridge E003 15 min...

Page 101: ...configuration 3 3 2 Placing in operating configuration Standard tool kit Protective goggles Gloves Place barriers around the perimeter of the work area Touch the exterior of the filling hole with the...

Page 102: ...102 2420333140 E06 13 EN Filling up Oil change Fuel tank E004 15 mn...

Page 103: ...f greasing as indicated in the program Standard tool kit Steel shims Protective goggles Gloves Place barriers around the perimeter of the work area The illustrations in this paragraph do not necessari...

Page 104: ...T 21 5 daN m 158 lbf ft HA260PX HA80JRT 21 5 daN m 158 lbf ft HA32PX HA100JRT 21 5 daN m 158 lbf ft HA41PX NT HA130JRT NT 21 5 daN m 158 lbf ft H14TX HB40 8 7 daN m 64 lbf ft H16TPX HB44J 8 7 daN m 64...

Page 105: ...issing or damaged Presence of metal particles in the grease Wear on gear teeth Step 2 Measurement of the clearance Place the machine in the following conditions On flat ground Set up barriers to defin...

Page 106: ...chassis or turret and the slew ring as previously If the difference between two measurements does not exceed 2 mm the test validates correct operation Otherwise contact HAULOTTE Services to repair the...

Page 107: ...tions exist Presence of cracks damage deformations or other faults on the hub Damage on the tire Cut or hole at 3 cm 2 in in the rubber side wall on the whole tire thickness Blister or pronounce lump...

Page 108: ...l nuts on the the wheel to be removed 2 Raise the machine using a jack or a hoist 3 Remove the wheel nuts 4 Remove the wheel 5 Fitt the new wheel 6 Lower the machine to the ground 7 Tighten the wheel...

Page 109: ...el 320 236 HA20PX HA61JRT Drive wheel 320 236 Steer wheel 320 236 HA260PX HA80JRT Drive wheel 320 236 Steer wheel 320 236 HA32PX HA100JRT Drive wheel 650 479 Steer wheel 650 479 HA41PX NT HA130JRT NT...

Page 110: ...110 2420333140 E06 13 EN Replacement Tightening Wheel E006 15 min...

Page 111: ...630 790 464 66 582 67 890 990 656 43 730 19 1070 1180 789 19 870 32 M27x3 930 1150 685 93 848 2 1300 1400 958 83 1032 59 1560 1730 1150 6 1275 98 M30x3 5 1260 1570 929 33 1157 97 1770 1960 1305 49 144...

Page 112: ...112 2420333140 E06 13 EN Tightening Screws bolts and nuts E007 15 min...

Page 113: ...fit and tighten the drain out 2 5 Top up the oil level as indicated above 6 Refit the filling cap 1 5 Additional operation 1 Place the machine in its operating configuration 3 3 2 Placing in operating...

Page 114: ...114 2420333140 E06 13 EN Control Oil change Turntable rotation gearbox E008 15 mn...

Page 115: ...ation 3 Control N B Packers of different thicknesses can be used for adjustment 4 Lubrication 5 Replacement Replace the friction pads 6 Additional operation 1 Place the machine in its operating config...

Page 116: ...116 2420333140 E06 13 EN Control Lubrication Replacement Pulleys and wear pads E013 15 mn...

Page 117: ...ely and operational 3 Lubrication Lubricant must be applied with a brush to the external chains at least every 250 hours or every 6 months The frequency of application depends on surrounding condition...

Page 118: ...elongation wear Elongation of up to 2 over 12 segments of the original chain length is permitted Measure the value of 3 using an appropriate method Compare with the value of 4 indicated in the table...

Page 119: ...t To make any other adjustments not detailed in this maintenance logbook Contact Haulotte Services for further advice 6 Replacing the chains The chains must imperatively be changed every 10 years Cont...

Page 120: ...120 2420333140 E06 13 EN Control Lubrication Chains E016...

Page 121: ...transmission system In order to ensure safe use of machinery Haulotte Group recommends that you perform the following inspections Daily inspection Position the machine on a flat and firm surface Powe...

Page 122: ...ft10 in for telescopic machines Raise the mast assembly up to the inspection flaps Using a flash light perform a visual inspection of the following items Check that cables are properly aligned with on...

Page 123: ...h of the cable Replacement is compulsory when 1 strand is broken near the ends No deformed folds or frayed strands must be observed No signs of corrosion must be observed 4 Check the tension of the ca...

Page 124: ...s in a particularly hostile environment Abnormal noises are produced during movement of structure Machine has been in storage for more than 6 months Machine has been submitted to an abusive load or se...

Page 125: ...each 250 h imperatively Every precaution must be taken before working on or near the machine Comply with the recommendations in the maintenance book for your machine For all tightening actions quoted...

Page 126: ...ement N 3 moves complying with the measurement of 301 15 mm Start the thermal engine Lift the boom to the highest position without telescoping to ensure that the sections are fully retracted Come back...

Page 127: ...djustment procedure H43TPX HB135JRT E053 Element No 3 Tighten the extension chains from the end of element No 2 to element No 4 complying with the measurement of 30 15 mm N B In this position the thre...

Page 128: ...128 2420333140 E06 13 EN Cables and chains Specific adjustment procedure H43TPX HB135JRT E053 Element No 4...

Page 129: ...ables at the end of element No 1 until element No 3 moves Tighten retraction cables B at the ends of elements No 1 and 2 Unscrew the extension chain and cable nuts by exactly 3 Make a mark on the nut...

Page 130: ...ains Specific adjustment procedure H43TPX HB135JRT E053 Refit the retraction cable nut stops at the ends of elements No 1 and 2 Tighten the extension cables and chains by 2 5 turns remount the fasteni...

Page 131: ...late for the extension cable nuts at the rear of the boom and the locknuts for each cable Move each telescope forwards and backwards 3 times by approximately 1 metre ensuring that the movements are sy...

Page 132: ...132 2420333140 E06 13 EN Cables and chains Specific adjustment procedure H43TPX HB135JRT E053...

Page 133: ...he caps located on the top of the battery The level of electrolyte in the battery must be approx 0 01 m 0 ft39 in above the plates 4 Filling up Standard tool kit Protective goggles Gloves Place barrie...

Page 134: ...batteries with distilled water to the minimum electrolyte level if any of the elements are below this minimum level Work in a clean and well ventilated area away from naked flames Open the bay Use th...

Page 135: ...machine in its operating configuration 3 3 2 Placing in operating configuration To keep your batteries in good condition test the density of each element once a month using a batttery hydrometer accor...

Page 136: ...136 2420333140 E06 13 EN Control Filling up Battery charge Battery E018 10 min...

Page 137: ...3 1 Placing the machine in maintenance configuration 3 Lubrication Oil the parts of the telescope subject to friction with a spatula Oil the telescoping cable 4 Additional operation 1 Place the machin...

Page 138: ...138 2420333140 E06 13 EN Lubrication Telescope E022 15 mn...

Page 139: ...F during the operations 3 Power supply voltage control 1 Disconnect all equipment connected to the generator welder hand equipment 2 Start up the machine 3 Start the generator 4 Wait for the generato...

Page 140: ...e 5 Press the TEST button on the 60 A cabinet 6 Check that there is no voltage at the welder outlet 8 Press the TEST button on the plug situated in the cage 9 Check that there is no voltage at the out...

Page 141: ...of the the cable carrier chain Premature wear excessive friction 2 Ensure that cables slide inside the cable carrier chain 3 Ensure that cables don t leave their socket Locate them back in the socket...

Page 142: ...142 2420333140 E06 13 EN Control Cable carrier cat track E048 30 min...

Page 143: ...ct HAULOTTE Services Clogged fuel filter Replace the filter Electric battery low Recharge the battery or batteries Faulty printed circuit fuses ground control box Replace the fuse s Emergency stop pus...

Page 144: ...or slope exceeding the authorised limit Do not exceed the authorised limit Section G 1 Main characteristics Faulty fuse s FU6 Replace the fuse s No power supply in the platform Stow the machine using...

Page 145: ...cator Remove some weight Do not exceed the authorised limit Section G 1 Main characteristics Hydraulic oil temperature too high Allow to cool down Axle not fully extended or retracted Fully extend or...

Page 146: ...146 2420333140 E06 13 EN Telescopic machines 28 43 m D Diagnosis assistance...

Page 147: ...r control circuit main fuse and calculator FU5 3 A Turntable movement control circuit fuse FU6 3 A Platform movement control circuit fuse FU7 20 A Solenoid valve power supply circuit fuse FU8 5 A Perm...

Page 148: ...or switch SA6 Turret jib switch SA8 Turret boom telescoping switch SA13 Turret boom lifting switch SA15 Turret orientation switch SA16 Beacon option switch SA19 Turret emergency pump switch SA30 Jib l...

Page 149: ...b Jib compensation control solenoid valve Lifting YV18a Jib lifting control solenoid valve Lifting YV18b Jib lifting control solenoid valve Lowering YV19a Platform rotation control solenoid valve Righ...

Page 150: ...ircuit fuse FU7 20 A Solenoid valve power supply circuit fuse FU8 5 A Permanent power supply circuit fuse FU9 20 A Accessory power supply circuit fuse FU10 3 A LS valve circuit fuse FU11 25 A Cooler c...

Page 151: ...A15 Turret orientation switch SA16 Beacon option switch SA17 Turntable jib orientation switch SA18 Turntable platform orientation switch SA19 Turret emergency pump switch SA21 Turret compensation swit...

Page 152: ...Turntable rotation control solenoid valve YV7 Boom telescoping control solenoid valve YV8 31 Axle extension outrigger steering control solenoid valves YV9 Differential locking control solenoid valve Y...

Page 153: ...5 3 A Turntable movement control circuit fuse FU6 3 A Platform movement control circuit fuse FU7 20 A Solenoid valve power supply circuit fuse FU8 5 A Permanent power supply circuit fuse FU9 20 A Acce...

Page 154: ...U5 3 A Turntable movement control circuit fuse FU6 3 A Platform movement control circuit fuse FU7 20 A Solenoid valve power supply circuit fuse FU8 5 A Permanent power supply circuit fuse FU9 20 A Acc...

Page 155: ...2 Engine start up relay KM4 Electric pump relay KM5 Pre heating relay KM6 Accelerator relay KMG General power supply relay KP1 Engine power supply relay 0 Battery 101 Battery 102 Emergency stop circui...

Page 156: ...KM4 Electric pump relay KM5 Pre heating relay KM6 Accelerator relay KMG General power supply relay KP1 Engine power supply relay 0 Battery 101 Battery 102 Emergency stop circuit 103 Starter 119 Engin...

Page 157: ...PVG YV4 24 Direction PVG YV5 25 Boom telescoping PVG YV7 27 Engine looms 29 Boom angle sensors SL1 SL2 Boom telescope length sensors SL3 SL4 Orientation angle sensor SL9 31 Forward drive proportional...

Page 158: ...VG YV5 25 Boom telescoping PVG YV7 27 Engine looms 29 Boom telescope length sensors SL3 SL4 Connection with ground control box door SA6 Rear axle angle sensor SL7 30 Chassis sensors SQ30 Extended fron...

Page 159: ...noid valve YV9 Differential locking control solenoid valve YV10 High speed drive control solenoid valve YV12 Brake release control solenoid valve YV15A Compensation lowering control solenoid valve YV1...

Page 160: ...opic machines 28 43 m E Electric circuit 6 Locations and functions of the main safety features Locations H28TJ HB86TJ SQ12 SL80 SL73 SQ13 SQ11 B8 SL9 SQ1 B4 SQ41 SQ42 SQ44 SL70 SL71 SL72 SL60 SL61 SQ2...

Page 161: ...cage angle in positive SL72 Absolute angle sensor Platform 10 Limit cage angle in negative SL73 Relative angle sensor Platform Jib Optimize cage compensation SL80 Relative angle sensor Upper boom Jib...

Page 162: ...8 43 m E Electric circuit 6 1 LOCATION OF THE LIMIT SWITCH AND SENSORS Locations H43TPX HB135JRT SQ12 SQ3 SL1 SL2 SL3 SL4 B4 SQ30 SQ31 SQ34 SL6 SQ41 SL5 B8 SL7 G1 G2 A1 A2 SQ7 SQ8 SQ9 SQ4 B2 B3 GB1 SQ...

Page 163: ...t switch High speed cut off To telescope out SQ4 Sensor Boom telescope detection ILS Telescope length detection SQ7 Jib position limit switch 5 5 Jib rotation detection in work position 5 5 SQ8 Jib po...

Page 164: ...machines 28 43 m E Electric circuit 6 2 LOCATIONS OF THE SOLENOID VALVES Locations H43TPX HB135JRT YV15 YV16 YV18 YV19a YV19b YV2 YV3 YV4 YV5 YV7 YV16 YV34 YV35 YV36 YV37 YV30a YV30b YV2 YV8 YV9 YV10...

Page 165: ...ion Movement buzzer option Marking Description HL1 Battery charge indicator HL3 Engine overheating indicator HL4 Engine oil pressure light HL5 Beacon light option HL6 Work light option HL11 Electric p...

Page 166: ...L5 Beacon light option HL6 Work light option HL11 Electric pre heating indicator HL16 Overload indicator HL17 Radius limitation indicator LTB01 Enable Switch pedal indicator LTB02 Power ON indicator L...

Page 167: ...ic circuit Hydraulic circuit 1 Hydraulic diagram Main components N B See end of manual 2 Solenoid valves Locations H28TJ HB86TJ YV15a YV15b YV18a YV18b YV29 YV41 YV42 YV1 YV4 YV5 YV7 YV21a YV21b YV28...

Page 168: ...ntrol solenoid valve Right YV19b Platform rotation control solenoid valve Left YV21a Left steering control solenoid valve YV21b Right steering control solenoid valve YV27 Brake release control solenoi...

Page 169: ...333140 E06 13 EN Telescopic machines 28 43 m F Hydraulic circuit Locations H43TPX HB135JRT YV15 YV16 YV18 YV19a YV19b YV2 YV2 YV4 YV5 YV7 YV16 YV34 YV35 YV36 YV37 YV30a YV30b YV2 YV8 YV9 YV10 YV21a YV...

Page 170: ...ontrol solenoid valve YV12 Brake release control solenoid valve YV15a b Compensation control solenoid valve YV16a b Jib rotation solenoid valve YV18a b Jib lifting lowering control solenoid valve YV19...

Page 171: ...ntervention register keeps a record of maintenance and repair work carried out inside or outside the maintenance programme N B In the case of a HAULOTTE Services intervention the qualified technician...

Page 172: ...172 2420333140 E06 13 EN Telescopic machines 28 43 m G Intervention register Date Type of intervention Number of hours Intervenor HAULOTTE Services intervention number...

Page 173: ...A B C D E F G H I 173 2420333140 E06 13 EN Telescopic machines 28 43 m G Intervention register Date Type of intervention Number of hours Intervenor HAULOTTE Services intervention number...

Page 174: ...174 2420333140 E06 13 EN Telescopic machines 28 43 m G Intervention register Date Type of intervention Number of hours Intervenor HAULOTTE Services intervention number...

Page 175: ...A B C D E F G H I 175 2420333140 E06 13 EN Telescopic machines 28 43 m G Intervention register Date Type of intervention Number of hours Intervenor HAULOTTE Services intervention number...

Page 176: ...176 2420333140 E06 13 EN Telescopic machines 28 43 m G Intervention register Date Type of intervention Number of hours Intervenor HAULOTTE Services intervention number...

Page 177: ...5V 29 1 S_TOR_ 0 12V U 1 2 3 To Turret Part Power Supply To Turret Part Power Supply 12V Permanent High speed Pressure Sensor Turret angle HEAD A Node 12V EVs To the Turret Part Power Supply To the Tu...

Page 178: ...Bus CAN Vers partie moteur thermique Masse Mise sous tension Klaxon Shunt Vers partie ch ssis _ G C D I X X 0 II X X X NC NO or NO NC E_TOR 0 12V D C G Alimentation S_TOR 0 12V To engine part main re...

Page 179: ...DEUTZ uniquement E_TOR 0 12V Homme mort tourelle E_TOR 0 12V E_TOR 0 12V E_TOR 0 12V E_TOR 0 12V E_TOR 0 12V E_TOR 0 12V E_TOR 0 12V Levage fl che transport Orientation transport Pendulaire transport...

Page 180: ...Fl che n 2 Direction Gauche Direction Droite S_TOR 0 12V S_TOR 0 12V S curit relevage S_TOR 0 12V Direction Mvts panier S_TOR_ 0 12V E_TOR 0 12V 1 4 3 Impulsions orientation Ferm si dent couronne S_T...

Page 181: ...1 10 15 16 14 13 11 12 7 8 3 4 5 6 HEAD Node B NBB01 CNB01 Basket turret bundle connector CNB02 Spider bundle connector Turret Basket Basket emergency stop Start engine Emergency pump High speed trans...

Page 182: ...slation Joystick Black Red White X signal Y signal Out of neutral Out of neutral Y signal Fr left direct Y signal Front out of neutral Rear out of neutral Fr right direct Basket rotation to left Baske...

Page 183: ...und E_ANA_ 4 20mA 30 F I E_ANA_ 0 5 4 5V 10 U Weighting Basket absolute angle Inclino E_TOR_ 0 12V U 5 Basket absolute angle Tilt 10 Jib Basket relative angle Jib telescope in SL60 SL61 SL70 SL71 SL73...

Page 184: ...B B G2 Option YA2 Acc l rateur Pr chauffage Vers partie tourelle folio 1 Vers partie tourelle folio 2 Vers partie tourelle Vers partie tourelle folio 1 Vers partie tourelle folio 1 Voyant batterie Po...

Page 185: ...Pr chauffage Preheating Accelerator Fuel pump Cooler Beacon A2 B3 B2 Engine oil pressure Engine overheating Injection pump Pompe injection Cold start temp Surcaleur T P T C t Moteur Engine side To hou...

Page 186: ...on Tourelle Alim Accessoires Alim Electrovannes Alim permanente Vers Panier Alim Noeud B To Basket B Node Power Accessories Power Electrovalve Power Permanent Power Chassis Selection Turret Selection...

Page 187: ...e A Gauche B Boom telescoping Boom lifting Basket rotation out B in A Down A Up B Right A Left B Left B Left B Right A Right A Up A Down B Down A Up B Turret slewing Jib lifting Compensation Accelerat...

Page 188: ...DE FOLIOS NBRE TOTAL DE FOLIOS NBRE TOTAL DE FOLIOS NBRE TOTAL DE FOLIOS NBRE TOTAL DE FOLIOS H43PX MODIF MODIF MODIF MODIF MODIF MODIF MODIF MODIF MODIF MODIF MODIF MODIF MODIF MODIF MODIF MODIF MODI...

Page 189: ...4 1 G 5 D G 7 G 7 5 D G 8 7 6 8 8 8 8 2 2 2 2 G G G G 1 1 1 1 G G G G 1 1 1 1 Collecteur lectrique Electrical manifold 6 66 6 6 66 6 Masse ch ssis Chassis Ground P Alimentation supply Arr t d urgence...

Page 190: ...speed movements Emergency pump Horn High speed driving Differential lock Load selection Wall Follow up Generator Dead man s pedal Basket rotation Compensation Jib Jib rotation Rear steering Left Right...

Page 191: ...OR_ 0 12V S_TOR_ 0 12V S_TOR_ 0 12V S_TOR_ 0 12V S_TOR_ 0 12V S_TOR_ 0 12V 1 I 6 E_TOR_ 0 12V 1 6I E_TOR_ 0 12V G1 G2 10 4 10 4 10 4 Slewing lifting Telescoping Translation Axe X Axe Y Out of neutral...

Page 192: ...16 Electrical diagram Telescopics 28 to 43 m...

Page 193: ...6 23 CYL 6 E 36 36 E CYL 2 7 6 23 220 7 16 21 36 36 36 9 9 9 9 E E E 5 9 220 7 1 CYL 1 E E 9 9 9 9 1 2 9 2 3 8 G 1 3 8 G CYL 3 0 77 85 0 67 5 CYL 6 CYL 2 CYL 3 CYL 1 CYL 4 CYL 5 CYL 7 1 5 16 12UN 2B...

Page 194: ...36 E 9 9 d 3 9 d 2 0 d 2 0 528 6 5 3 4 16UNF 2B A10VE45 DG 0 20UNF 2B 7 16 1 1 16 12UN 2B 7 16 20UNF 2B FR 3 4 16UNF 2B 1 1 16 12UN 2B 5 FR 7 16 20UNF 2B A10VE45 DG 1 1 16 12UN 2B 3 4 16UNF 2B 20UNF 2...

Page 195: ...0 35 C230 DIRECTION AVD AV 1 4 G P 3 8 G Aux 3 8 G 1 4 G AR B AR R E DE DIR E C TION AR 80 50 C 800 1 4 G A1 1 1 4 G B1 1 4 G A2 1 1 4 G B2 270b 4PVG32 4256 EMETTEUR 110 50 C315 2 2 2 250b 2 2 4 3 3 5...

Page 196: ...4 HYDRAULIC DIAGRAM Telescopics 28 to 43 m...

Reviews: