Operation and maintenance
30
Caution!
Caution!
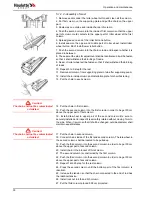
5.1.2.2 -Assembly of mast
1. Remove seams under the roller wheel button and clean all the column.
2. Put first column on the supporting plate and put the chain on the upper
part.
3. Paste wax on outside and inside channel of column.
4. Push the second column into the inside of first column so that the upper
part of column could contacts to the upper part of roller wheel at the first
column.
5. Spread grease on end of the roller bolt and button.
6. Install seam on the u pper and middle part of roller wheel. Install roller
wheel button. Don't install lower roller button.
7. Push the second column into the chain column and inspect whether it is
placed in between.
8. The seam at the side for adjustment shall be identical and it will be fasten
so that it shall withstand the 6.8~9kg of loads.
9. Seam of roller wheel will be fasten so that it shall withstand the 6.8-9kg
of loads.
10. Repeat 3 to 9 step for the rest.
11. Remove all column from supporting plate in turn after supporting seam.
12. Install chain inside column and installation plate for chain fastening.
13. Put the chain in each column.
The chain shall not be contaminated
or twisted.
14. Put the chain in first column.
15. Push the second column into the first column in order to be get 30 cm
above the upper part of first column.
16. Install id le wh eel in upper p art of the seco nd column. Be sure to
securely installed and inspect it is smoothly rotated without moving 1mm to
the side. When it is worn so that it shall be changed, outside diameter shall
maintain equal distance.
The chain shall not be contaminated
or twisted.
17. Put the chain in second column.
18. Connect chains inside of the first and second column. The idle wheel in
the second column shall be located to be pulled up.
19. Push the third column into the second column in order to be get 30 cm
above the upper part of second column.
20. Install chain in the bracket of third column.
21. The second column is constrained by the first column.
22. Push the third column into the second column in order to be get 30 cm
above the upper part of second column.
23. Repeat 16 to 25 step for the rest column.
24. Press the second column until the bottom part of the first column is
identical.
25. Increase the tension so that the chain connected to the end of rod has
the identical tension.
26. Install rock nut in 4th and 5th column.
27. Put the third column placed 5.08 cm projected.
Summary of Contents for Quick Up 11
Page 2: ......
Page 4: ......
Page 8: ...Operation and maintenance ii...
Page 12: ...Operation and maintenance vi...
Page 26: ...Operation and maintenance 14...
Page 28: ...Operation and maintenance 16...
Page 44: ...Operation and maintenance 32...
Page 46: ...Operation and maintenance 34...
Page 47: ...Operation and maintenance 35 7 HYDRAULIC DIAGRAM 7 1 AC VERSION...
Page 48: ...Operation and maintenance 36 7 2 DC VERSION...
Page 49: ...Operation and maintenance 37 8 WIRING DIAGRAMS 8 1 AC VERSION...
Page 50: ...Operation and maintenance 38 8 2 DC VERSION...
Page 51: ...39 9 REGISTER OF INSPECTION AND REPAIR Date Comments...
Page 52: ...40 Date Comments...


