background image


4


Preparing the initial start-up 

The unit and its related components may be put into operation, used and maintained only by 
persons who have read the operating instructions and follow the instructions, notes and safety 
advice. 

4.1


Setting up, connecting 

1.


Before connecting, always check whether the unit is suitable for use with the local mains 
voltage. The unit is designed for operation with rechargeable battery, 230 V and 115 V. The 
mains voltage is indicated by the number on the fuse holder (Section 3, item 8). To change 
the mains voltage, refer to Section 4.2 Mains voltage. The unit will be destroyed if used with 
wrong mains voltage. 

 
2.


Set up unit at the desired location. Do not place the unit on a surface generating or radiating 
heat. Avoid locations exposed to direct sunlight. 

 
3.


Ensure that the unit is switched off (off-switch depressed, refer to Section 3, item 1). 

 
4.


Ground the unit via the ground connector (Section 3, Pos. 7) using the enclosed grounding 
cable. 

 
5.


Plug the measuring head connector into the measuring head port (Section 3, item 6) and 
screw tight. 

 
6.


If required, a recording instrument can be connected to the recorder output (Section 3, item 
5). 

 
7.


Connect the Statometer II to the mains unless working in battery mode. 


8.


Put unit into operation. 


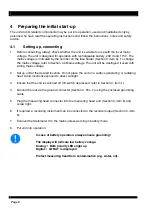
In case of battery operation, always ensure grounding! 
 
The display will indicate low battery voltage. 
Analog = Both polarity LEDs light up 

Digital = LO BAT is displayed 
 
Protect measuring head from contamination (e.g. water, oil). 


Page 6 

Summary of Contents for Statometer II

Page 1: ...Operating instructions Statometer II Test Line ...

Page 2: ......

Page 3: ... the contents of the package for completeness 2 Perform a visual inspection to determine any damage to the unit due to transportation 3 In case of missing parts or other defects complain to the forwarder without delay 4 Inform a representative of the company HAUG GmbH Co KG in order to ensure that the unit is repaired or replaced 1 Notes on operating instructions In these operating instructions th...

Page 4: ...mm In case of convex or concave surfaces the measuring value will be falsified For reasons of safety unauthorized conversions and modifications of the unit are not permitted The installation and operating conditions indicated in these Operating Instructions must be adhered to 2 2 Storage of the Statometer II For storage remove the rechargeable batteries from the battery compartment underneath Chec...

Page 5: ... selection 3 Display digital or analog 4 Carrying handle stand 5 Recorder output 6 Measuring head port 7 Ground connection Figure 1 Figure 2 8 Set mains voltage 9 Fuse holder 10 Socket for non heating apparatus Figure 2 Figure 3 11 Measuring head 12 Measuring head connector 13 Impeller Figure 3 Page 5 ...

Page 6: ...t up unit at the desired location Do not place the unit on a surface generating or radiating heat Avoid locations exposed to direct sunlight 3 Ensure that the unit is switched off off switch depressed refer to Section 3 item 1 4 Ground the unit via the ground connector Section 3 Pos 7 using the enclosed grounding cable 5 Plug the measuring head connector into the measuring head port Section 3 item...

Page 7: ...00 mA slow 5 Pull out the fuse with the fuse cage from the fuse holder and reattach after turning by 180 The new voltage range is now visible on the fuse holder 6 Reinsert the fuse holder into the socket Press the fuse holder until the spring lock snaps into place on both sides When setting the mains voltage range ensure that the correct fuse is used refer to Section 7 2 4 3 Inserting the NiMH bat...

Page 8: ...er in the measuring head now turns and the unit will perform an automatic zero calibration 4 Move the measuring head vertically towards to the measuring surface The measuring distance amounts to 30 mm 5 Read the amount and polarity of the field intensity measured from the display 6 In case of a capacitor field the value displayed is not corrected In case of measurements on flat surfaces the displa...

Page 9: ...d Page 9 Capacitor field Flat surface display x 1 5 calibrated in a capacitor field with a plate size 300 mm x 300 mm Example 3 Example 4 Measuring head Measuring head Convex surface Concave surface indicated measuring value too small indicated measuring value too high ...

Page 10: ...ty The surface charge density is proportional to the normal component of the electric field The connection is made using the absolute permittivity 0 8 86 x 10 12 As Vm The charge density therefore results from the equation Charge density field intensity x absolute permittivity For the above example 12 kV m x 8 86 x 10 12 As Vm 106 32 x 10 9 As m2 6 Remedy of defects In case of malfunction in conne...

Page 11: ...e to the impeller will result in false measuring results 7 2 Changing the fuse 1 Switch off the unit and isolate from the mains 2 Pull the cable out of the socket for non heating apparatus at the rear of the unit 3 Detach the fuse holder in the socket spring lock and pull out 4 Replace the fuse 5 Reattach the fuse holder Use the following fuses only Unit type Mains voltage range Fuse Statometer II...

Page 12: ... Measuring distance 30 mm Analog output Output voltage 2 V to 2 V Imax 0 2 mA Measuring accuracy Digital 10 Analog 15 Over range Digital Display indicates I Analog Pointer exceeds the upper scale value Battery check Digital Display indicates LO BAT Analog Both polarity indicating diodes light up 8 2 Supply voltage Mains Voltages 115 V 230 V 6 10 Frequency range 50 60 Hz Frequency tolerance range 4...

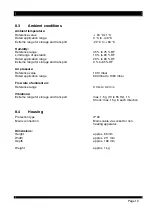
Page 13: ...range for storage and transport 0 to 85 RF Air pressure Reference value 1013 mbar Rated application range 800 mbar to 1060 mbar Flow rate of ambient air Reference range 0 m s to 0 2 m s Vibrations Extreme range for storage and transport max 1 5 g 10 to 55 Hz 1 h Shock max 15 g in each direction 8 4 Housing Protection type IP 20 Mains connection Mains cable via socket for non heating apparatus Dime...

Page 14: ......

Page 15: ......

Page 16: ...made by Statom2 v04gb doc D 0225 GB V04 2012 01 25 ...

Reviews: