16
Art. Nr.: 5090030031
Rev.: 00/2018-11-27
HSI 150-M... (HSI 90-M...) for smooth or corrugated cable ducts
with clip ring for connection to wall insert HSI 150 (HSI 90)
EN
2
3
4
2
Push rubber sleeve over the smooth cable duct
(1.)
and tighten the tensioning clamp with the torque
spanner
(2.)
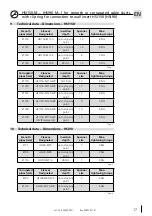
(Table 1/Table 3) (see Fig.: 7 and 8).
3
Moisten the inside of the rubber sleeve with water
to facilitate installation. Then push the rubber sleeve
with the smooth pipe on the pre-mounted system
cover as far as it will go
(1.)
and tighten the tensi-
oning clamp with the torque spanner
(2.)
(Table 1/
Table 3) (see Fig.: 9).
1
Apply insertion depth marking (Table 1/Table 3) to
the smooth cable duct (see Fig.: 6).
Legend for Fig. 7
1
Ring clip
2
Stop
3
Smooth cable duct
8
Assembly: Connection for corrugated
cable ducts (e.g. Fränkische Rohrwerke,
other pipe manufacturers may vary)
Legend for Fig. 10
1
System sealing rings
2
Clip rings (labelling, e.g. Kabuflex system)
3
Corrugated cable duct
1
Insert system sealing rings (not included and only
available through pipe manufacturer) at the end of
the corrugated pipe into the gaps (see Fig.:). 10).
7
Assembly: Connection for smooth
cable ducts
Then insert the split clip ring supplied into the gap of
the corrugated pipe after the system sealing rings;
here, care must be taken to ensure that clip ring is
positioned immediately underneath the tensioning
clamp (one or two clip rings are supplied, depending
on the type of pipe) (see Fig.: 10 and 11).
Push the rubber sleeve over the corrugated pipe with
clip ring
(1.)
and tighten the tensioning clamp with
the torque spanner
(2.)
(Table 2/Table 4) (see Fig.: 12).
Moisten the inside of the rubber sleeve with water
to facilitate installation. Then push the rubber sleeve
with the corrugated pipe on the pre-mounted system
cover as far as it will go
(1.)
and tighten the tensioning
clamp with the torque spanner
(2.)
(Table 2/Table 4)
(see Fig.: 13).


