For removal of dust, moisture and other contaminants
usage of clean brush or soft, lint-free cloth is
recommended. Do not use agressive agents (thinner,
alcohol,...) or hard objects that could damage the tool.
Make sure that, during the work, bearing surfaces,
shafts and pivot points are protected with thin coat
of quality machine or motor oil. Do not oil
excessively.
When the tool is not in use, store it in a closed position
– with handles closed. That will keep other objects
from becoming stuck between crimping dies and
damaging them. Keep the tool in a dry and clean area.
1. Preparing the tool for work
With this tool
only
plugs of
appropriate type
should
be used. Cable size is also very important. Plug shoud
be previously prepared according to the
manufacturer's instructions
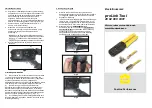
Fig. 1. clarifies terms „upper die“, „lower die“, „middle
die“ necessary for correct tool preparation. Using the
inappropriate cable size may result with false crimp,
and tool damaging for which the manufacturer can not
be held responsible.
Fig. 1
Sub insert is easily dismounted using the 2.5 mm allen
wrench (supplied).
Die set selection and instalation
With die set
only
microplugs of
appropriate type
can be
used. Crimping microplugs of unsuitable type may result
with unsatisfactory characteristics of crimped
connections and eventually with damaging of the tools
and is to be strictly avoided. Prior to crimping, please
check the alignment of the microplug to the die set.
Store inserts (Fig. 1.) adequately when separated from
the tool. Keep them dry and clean.
2. Terminating procedure
Load the plug according to plug manufacturers
instructions.
Fig.2
Insert the plug assembly in the tool part marked with
arrows as shown (Fig.3). Plug must be inserted up to
the delimiter (in middle die).
Fig.3.
Slowly
close tool handles completely to perform full
cycle crimping. (Fig.5.)
In case the tool becomes block for any reason,
please follow unblocking procedure (Fig. 7.- 9. - back
of this brochure).
Fig. 4
Fig. 4
Fig. 5
□
After the full crimping cycle is done, let the tool open
fully by itself in order to remove crimped plug. Pull out
the plug assembly. The tool is ready for next crimping


