background image


Handleiding Boxer Plus, wijzigingen voorbehouden, oktober 2012. Harrie Leenders Haardkachels BV 

12


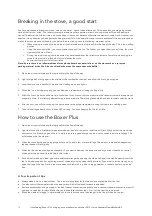
Breaking in the stove, a good start


You have purchased a brand-new stove: ‘zero on the meter’, has not seen a flame yet. This means that you are going to take 
care of the first few ‘miles’. The refractory ceramic elements will evaporate moisture and your stove will start its breaking-in 
period. Therefore, the first few times, do not build your fire too hot because otherwise the elements could crack. However, you 
need not worry about any shrinkage cracks being formed. This initial operation requires some additional time and attention as 

well as the steps we have outlined for you below. Before starting, note the following important points: 


When starting to make a fire, open the air-control slide and the (optional) throttle flap all the way. This is the kindling 
position. 


Using the air-control slide, you can conveniently control the fire. The further you open the air-control slide, the more 
vigorously the fire will burn. 


During the initial start-up, some moisture may be released from the refractory elements. Therefore, when using the 

stove for the first time, place a(n old) towel under the stove. 


Ensure that there is sufficient ventilation. 

Note: Ensure there is no inflammable and/or explosion-hazardous material in or on the stove such as a spray can, 
packing material or the like. Also check inside the stove the space above the baffle.  


1.   Open the air-control slide and the (optional) throttle flap all the way. 
 

2.   Light a large ball of dry paper in the middle of the combustion chamber and allow this fire to go out again. 
 

3.   Load the stove with a handful of dry and thin kindling wood and light it. 
 

4.   When the fire is burning properly, you can dampen it somewhat by closing the flap a little. 
 

5.   Allow the fire to go out and the stove to cool down for an hour so that the moisture in the refractory ceramic elements can 

evaporate. Note: the refractory elements may release moisture. Therefore, place beforehand an old towel under the stove. 

 
6.   After an hour, you will start bringing the whole stove to the proper temperature using first some thin kindling wood. 
 

7.   Then, thicker logs about 5x5 cm thick and 30 cm long. Continue keeping the fire for a while. 
 

How to use the Boxer Plus


1.   Open the air-control slide and the (optional) throttle flap all the way. 
 
2.   Light the stove with a firelighter (or paper/cardboard) and a fair amount of small wood. Stack lightly so that the wood can 

 easily catch fire. Maintain a good fire for a while to ensure a good draught, and a nice fire under the more solid logs. This 
will also keep the flue cleaner. 

 
3.   When the stove has been burning properly for a while, add a few, more solid logs. The amount to be added depends on 

the heat needed. Stack lightly.  


4.   When the flue has reached a good draught or if you want to dampen the stove somewhat, you can close the air-control 

slide and/or the (optional) throttle flap a little further. 

 
5.   Each time after adding a load, give some additional draught by opening the slide and flap all the way. Repeat this until the 

fuel is burning properly. For a glowing mass of charcoal, you may close the flap further. If you want to let the stove go out, 
open the flap all the way. Note: if the stove does not draw well, e.g. due to foggy weather, a cooker hood etc., open the 

flap. 


A few important tips 

 
•   Always make a fire on a bed of ashes. This is an insulating layer for the fire and an excellent bed for the fuel. 

•   You also control the temperature by the amount and kind of fuel used for each load added. 
•   Remove excess ashes using a scoop or the Ash Cleaner. Never remove ashes using a vacuum cleaner because fire may still 

continue to smoulder for days. Make sure you leave a layer of ashes (abt. 3 cm) for the next fire to be made. 

•   When the weather is foggy, it is preferable not to use the stove since the draught in the flue will then be too low. 

Summary of Contents for Boxer Plus

Page 1: ...Boxer Plus Manual NL EN FR DE...

Page 2: ...oktober 2012 Harrie Leenders Haardkachels BV 2 NL Inhoud Installatie instructie 3 Handleiding 5 EN Content Installation instructions 9 Manual 11 FR Sommaire Instructions d installation 15 Manuel 17 D...

Page 3: ...nde veiligheidsmaatregelen Voor de algemene veiligheid verwijzen wij naar de VCA richtlijnen Let op er mag zich na installatie geen brandbaar en of explosiegevaarlijk materiaal in of op de haard bevin...

Page 4: ...of achterafvoer Plaats platte band meegeleverd in de rand bij zowel de afvoer als de afdekplaat De boutjes bevestigen is een beetje gefriemel monteer eerst de afvoer en dan pas de afdekplaat Dat gaat...

Page 5: ...rd mits deze is aangesloten Bij het aanmaken is het hoofdzaak dat het rookkanaal en de haard op temperatuur komen De goede warmte van hout U heeft een houthaard gekocht Hout als brandstof is in veel o...

Page 6: ...uur lang afkoelen zodat het vocht in de vuursteen kan verdampen Let op er kan vocht uit de vuurstenen komen Leg vooraf een oude handdoek onder de haard 6 Na een uur gaat u de hele haard goed op temper...

Page 7: ...gen worden Let op de linker en de rechter pijp zijn verschillend Het glas Het glas beslaat als er vochtige brandstof wordt gestookt of te weinig zuurstof wordt toegevoerd Bovendien kan het glas beslaa...

Page 8: ...te voorkomen Ventileer de woning Gebruik nooit water om het vuur te doven Zorg dat de schoorsteen na een brand eerst wordt geveegd en ge nspecteerd op beschadiging en lekkage Service Het is niet toege...

Page 9: ...sharp Take appropriate measures For general safety we refer to the VCA guidelines Note After installation ensure there is no inflammable and or explosion hazardous material in or on the stove such as...

Page 10: ...luded in delivery into place at the edge at both the outlet and the cover plate Fixing the bolts may need some finger dexterity first install the outlet and only then the cover plate That way it will...

Page 11: ...ur stove if provided with such a control feature The main thing when making a fire is that both the flue and the stove reach the proper temperature The fine heat from wood You have purchased a wood st...

Page 12: ...r an hour so that the moisture in the refractory ceramic elements can evaporate Note the refractory elements may release moisture Therefore place beforehand an old towel under the stove 6 After an hou...

Page 13: ...ft and right pipes differ from one another The glass The glass steams up when burning wet fuel or too little oxygen is supplied Also the glass may steam up when the fire does not start fiercely enough...

Page 14: ...rom getting into your house Ventilate the house Never use water to extinguish the fire After a fire ensure that the chimney is first swept and inspected for any damage and leaks Service It is not perm...

Page 15: ...s Pour la s curit g n rale nous vous renvoyons aux directives VCA Attention Une fois le po le install assurez vous qu il n y a pas de mat riaux inflammables et ou qui pr sentent un danger d explosion...

Page 16: ...la livraison dans le bord du trou du raccord d vacuation et dans celui pour la plaque du recouvrement Fixer les petits boulons peut demander un peu d habilet des doigts Montez d abord le raccord d va...

Page 17: ...t raccord Le plus important pendant l allumage est que le conduit de fum e et le po le puissent monter en temp rature La bonne chaleur du bois Vous avez achet un po le bois Le bois est un combustible...

Page 18: ...on les l ments r fractaires peuvent d gager de l humidit D posez un vieil essuie mains sur le sol sous le po le 6 Apr s une heure vous allez construire un bon feu avec du petit bois fin 7 Puis ajouter...

Page 19: ...gauche et le tuyau de droite diff rent l un de l autre La vitre Il se formera des d p ts sur la vitre si l on utilise du combustible humide ou si l alimentation d oxyg ne n est pas suffisante Ces d p...

Page 20: ...r viter la fum e dans votre maison Ventilez la maison N utilisez jamais de l eau pour teindre le feu Apr s un feu de chemin e faites proc der au ramonage et l inspection de la chemin e d g ts fuites S...

Page 21: ...a nahmen Zur allgemeinen Sicherheit beziehen wir uns auf die VCA Richtlinien Achtung Sorgen Sie nach der Installation daf r dass sich kein entz ndbares und oder explosionsgef hrliches Material wie Spr...

Page 22: ...gen Sie flaches Band mitgeliefert im Rand am Abzug sowie an der Deckplatte an Zum Feststellen der Bolzen ist etwas Fingerfertigkeit erforderlich installieren Sie zuerst den Abzug und erst danach die D...

Page 23: ...Ihrem Ofen verbundene Frischluftzufuhrregelung falls er damit ausgestattet ist Beim Anheizen besteht der wichtigste Punkt darin dass sowohl der Rauchkanaal als auch der Ofen die erforderliche Tempera...

Page 24: ...igkeit abgeben Aus diesem Grunde sollten Sie vorher ein altes Tuch unter den Ofen legen 6 Nach einer Stunde bringen Sie den gesamten Ofen auf die richtige Temperatur wobei sie zun chst ein wenig d nne...

Page 25: ...eite sind unterschiedlich Das Glas Das Glas beschl gt wenn mit feuchtem Brennstoff geheizt oder zu wenig Sauerstoff zugef hrt wird Dar ber hinaus kann das Glas beschlagen wenn das Feuer nicht vehement...

Page 26: ...Rauch in Ihrem Haus zu vermeiden Die Wohnung bel ften Auf keinen Fall Wasser zum L schen des Feuers benutzen Daf r sorgen dass der Schornstein nach einem Brand zuerst gefegt und auf Besch digung und...

Reviews: