Encoder Configuration Options
N2412A/N2422A User Manual
42
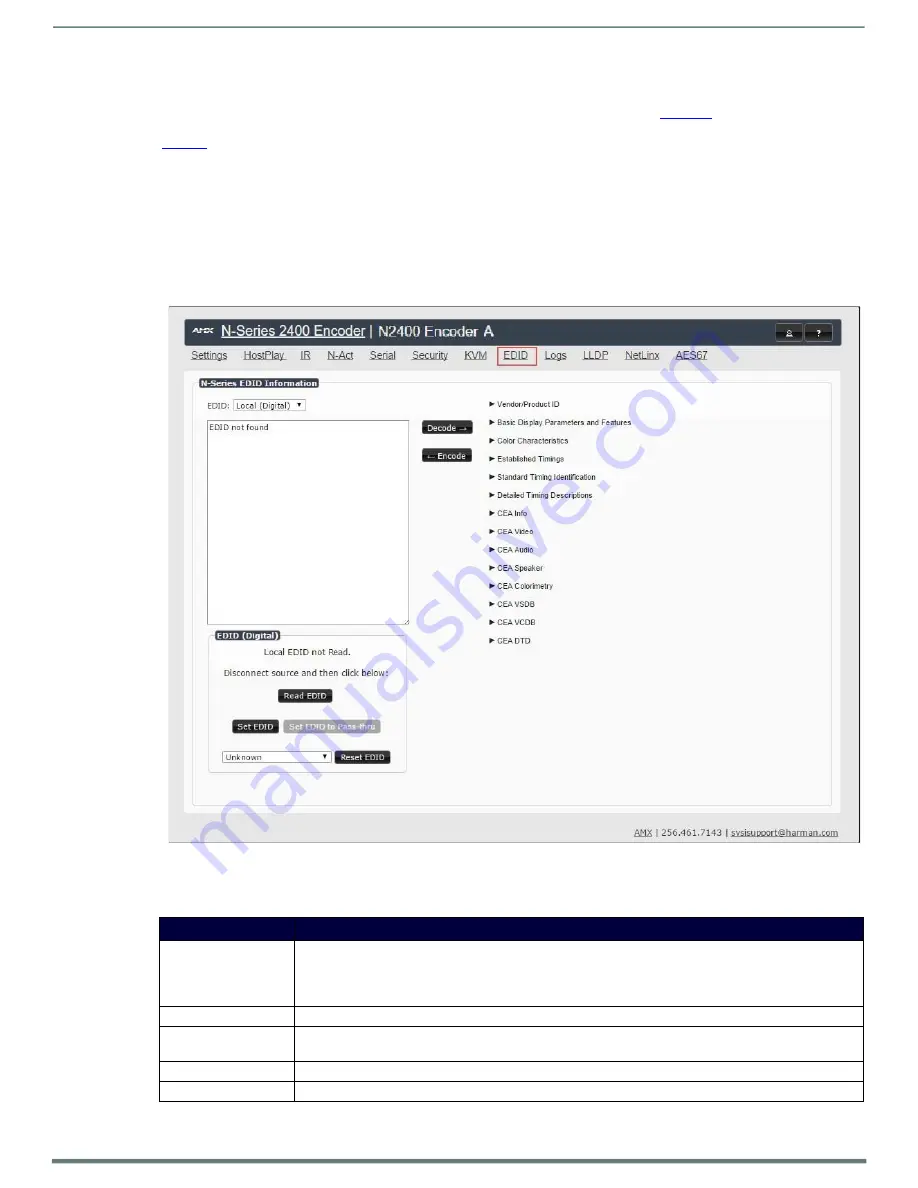
EDID Page
Click the
EDID
link at the top of any of the main web pages to access the page shown in
. Every display has stored
information that it communicates to the output device. This page allows you to view that information. Options are described in
. Edit the Encoder’s EDID if you need to change the display options available to the source. There are four different ways to
control the EDID of the Encoders.
Option 1:
Use the default settings drop-down menu and select from the options available. Then click
Set EDID
. This will work for
most sources and is most often set to
Stereo (2 channel)
.
Option 2:
When using an EDID captured from a display connected to a Decoder, paste the data in to the white EDID block,
overwriting existing EDID. Then click
Set EDID
.
Option 3:
Make changes to the operating parameters displayed on the right side of the screen. Use the
Encode
button to translate
the changes into a new EDID and click
Set EDID
.
Option 4:
Connect a compatible display to the Encoder's
HDMI Out
port and click
Set EDID to Pass-thru
.
NOTE:
The source will need to be disconnected while modifying EDID settings.
FIG. 37
EDID Page
TABLE 16
EDID Page Options
Option
Description
EDID drop-down box
Select what EDID information to display.
Pass-thru:
Displays EDID information for the display connected to the Encoder’s pass thru port.
Local (Digital/Analog)
: Displays EDID information for the Encoder. This information is being provided to the
source connected to the Encoder.
Decode button
Click to translate the EDID currently displayed on the left to the operating parameters list on the right.
Encode button
After making any changes to the operating parameters list on the right, click this button to update the EDID
information on the left. To store the new settings, click
Set EDID
.
Read EDID
Click to initially show the EDID or if the source EDID has changed (refreshes the EDID table).
Set EDID
If creating a custom EDID, click to apply the changes.


