Archive Service
50
Vision
2
Instruction Manual
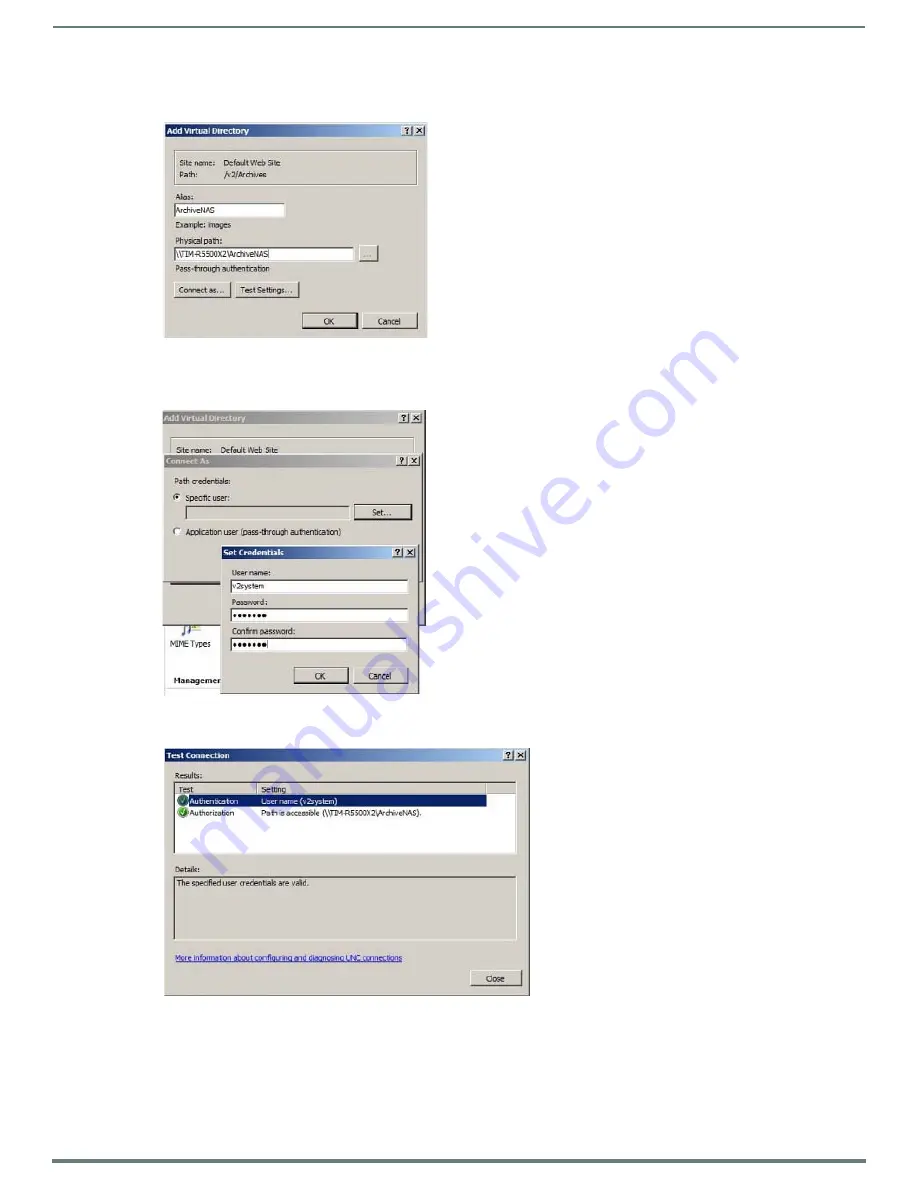
21. In the Alias text box, enter “ArchiveNAS”.
22. Set the PhysicalPath text box to the UNC Path of the folder on the NAS, for example: \\NASservername\ArchiveNAS.
23. Click
Connect as
, and check the
Specific User
check box.
24. Select
Set
and enter “v2system” for the user name and “Vision2” for the password for the NAS share (see FIG. 70). Click
OK
.
25. Click
Test Settings
and confirm the user is valid and the path is accessible. Click
Close
.
26. In the IIS Manager, select
Connections > Application Pools
.
27. Right-click
V2AppPool
and select
Advanced Settings
.
28. Under Process Model, select
Identity
and click the
Browse
(...) button.
29. Select
Custom Account
.
30. Click
Set
, and enter “v2system” for the user name and “Vision2” as the password for the NAS User account.
FIG. 69
Add Virtual Directory Dialog
FIG. 70
Set Credentials Dialog
FIG. 71
Test Connection dialog


