11
7
.
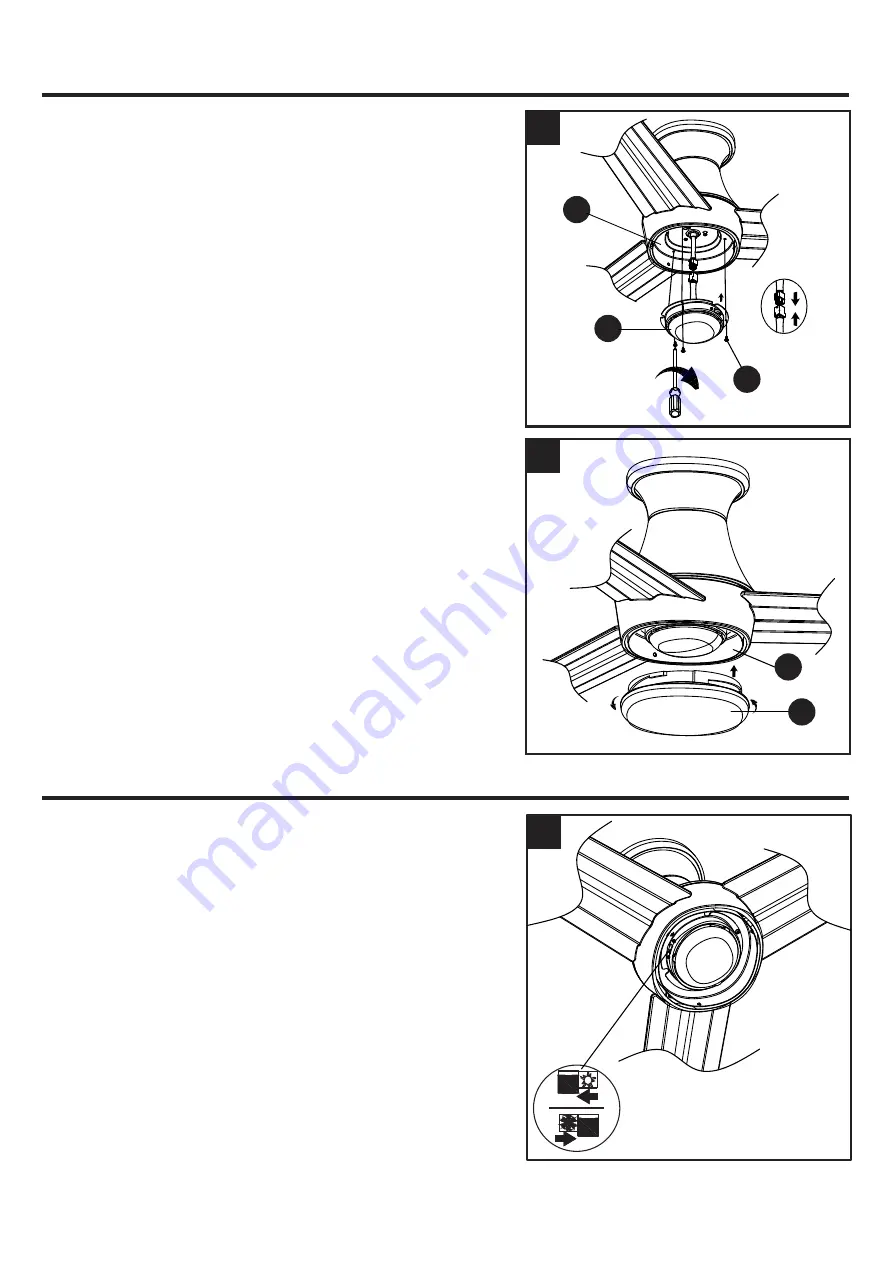
Remove three (3) screws (K) preassembled on the
switch housing (C). Attach the connector from the light
kit (E) to the connector from the motor assembly(B).
Align the three holes between the light kit (E) and the
switch housing (C). Re-install the switch housing screws
(K) to attach the light kit (E) to the switch housing (C).
Tighten all mounting screws (K) securely.
NOTE:
The two connectors have keyholes that must
be mated correctly before they can be engaged.
8
.
Secure the bowl (F) to switch housing (C) by twisting
in a clockwise direction. Do not over-tighten.
FINAL INSTALLATION INSTRUCTIONS
7
C
E
K
8
C
F
OPERATION INSTRUCTIONS
1. When the season changes, you may want to change
the direction in which the fan spins.
In warmer weather, counterclockwise rotation creates a
downward airflow, which cools the air. Push the switch
LEFT
and see a SUN icon.
In cooler weather, clockwise rotation creates an upward
airflow,which moves hot air from the ceiling. Push the
switch
RIGHT
and see a SNOWFLAKE icon.
WARNING:
Turn off and wait for fan to stop before
flipping the reverse switch.
NOTE:
Use a small screwdriver or ballpoint pen to
move the reverse switch if you have difficulty doing so
by hand.
1
Summary of Contents for 2599777
Page 18: ......


