


English
_65
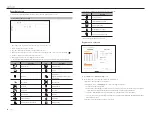
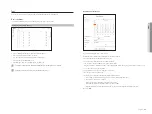
connecting and Setting the network
Networking may differ from the connection method, check your environment before setting the connection mode.
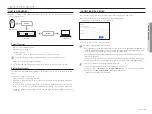
when no router is used
•
Static mode
- Internet connection : Static IP, leased line, and LAN environments allows connection between the Recorder
and remote user.
- Network Settings : Set the <
network
> in <
interface
> menu of the connected Recorder to <
Static
>.
`
Consult your network manager for IP, Gateway and Subnet Mask.
•
dHcP mode
- Internet connection : Connect the Recorder directly to a cable modem, DHCP ADSL modem or FTTH
network.
- Network Settings : Set the <
network
> in <
interface
> menu of the connected Recorder to <
dHcP
>.
when a router is used
`
To avoid IP address conflict with the Recorder's static IP, check followings :
•
Setting the recorder with a static iP
- Internet connection : Connect the recorder to an IP router where cable modem is connected, or connect the
recorder in the local area network (LAN) environment.
•
Setting the recorder network
1.
Set the <
network
> in <
interface
>menu of the connected Recorder to <
Static
>.
2.
Check whether the set IP address is in the static IP range provided by the Broadband Router.
IP Address, Gateway, and Subnet Mask : Consult your network manager.
`
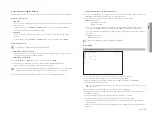
If a DHCP server is configured with starting address (192.168.0.100) and end address (192.168.0.200), you should set the IP
address out of the configured DHCP range (192.168.0.2 ~ 192.168.0.99 and 192.168.0.201 ~ 192.168.0.254).
3.
Check the Gateway address and subnet mask are equal to those set in the Broadband Router.
•
Setting the dHcP iP Address of the broadband router
1.
To access the Broadband Router's configurations, open a web browser on the local PC that is connected to the
Broadband Router and enter the router's address (ex : http://192.168.1.1).
2.
At this stage, make the local PC's windows network configurations to the below example :
example)
IP : 192.168.1.2
Subnet Mask : 255.255.255.0
Gateway : 192.168.1.1
- Once connected to the Broadband Router, it prompts with password. While entering nothing to the User
Name field, enter “
admin
” into the password field and press <
oK
> to access the router configurations.
- Access the router's DHCP configuration menu and set its DHCP server activation, and provide the start and
end address.
`
Start address : 192.168.0.100
`
End address : 192.168.0.200
`
Above steps may differ from the router devices depending on the manufacturer.
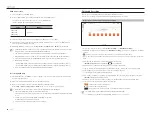
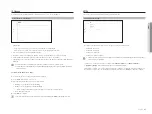
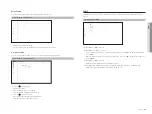
Port Setting
Setup > network > interface > Port
• Protocol type : Select the protocol type among TCP, UDP - Unicast and UDP - Multicast.
• RTSP : It is used to transmit the video over the network. The initial value is <
558
>.
• UDP port : Activated when an UDP item is selected in protocol type. The initial value is <
8000-8159
>,
and the setting value changes in 160 units.
- UDP : It has less stability and faster speed when compared to TCP, and recommended for local area network
(LAN) environments.
• Multicast IP address : Enter the IP address directly when selecting an UDP-Multicast.
• Multicast TTL : Enter the TTL value when selecting an UDP-Multicast. The initial value is set to <
5
>, and enter a
value between 0 and 255.
• HTTP port : Enter the port value for the HTTP web viewer. The initial value is set to <
80
>.
• HTTPS port : Enter the port value for the HTTPS web viewer. The initial value is set to <
443
>.
`
HTTPS is an enhanced version of the HTTP web communication protocol. If security is important when accessing the web viewer,
enable the HTTPS port.
• Cam proxy port : Sets the camera proxy port. The initial value is set to <
10001
>, and the setting value changes
in 64 units.
●
SetuP
Summary of Contents for Wisenet XRN-3210B4
Page 1: ...NETWORK VIDEO RECORDER User Manual Wisenet NVR ...
Page 118: ......