background image

English _

3


!

OVER

VIEW

IMPORTANT SAFETY INSTRUCTIONS

1. 

Read these instructions.

2. 

Keep these instructions.

3. 

Heed all warnings.

4. 

Follow all instructions.

5. 

Do not use this apparatus near water.

6. 

Clean the contaminated area on the product surface with a soft, dry cloth or a damp cloth. 
(Do not use a detergent or cosmetic products that contain alcohol, solvents or surfactants or oil constituents 
as they may deform or cause damage to the product.)

7. 

Do not block any ventilation openings, Install in accordance with the manufacturer’s instructions.

8. 

Do not install near any heat sources such as radiators, heat registers, stoves, or other apparatus (including 
amplifiers) that produce heat.

9. 

Do not defeat the safety purpose of the polarized or grounding-type plug. A polarized plug has two blades 
with one wider than the other. A grounding type plug has two blades and a third grounding prong. The wide 
blade or the third prong are provided for your safety. If the provided plug does not fit into your outlet, consult 
an electrician for replacement of the obsolete outlet.

10. 

Protect the power cord from being walked on or pinched particularly at plugs, convenience receptacles, and 
the point where they exit from the apparatus.

11. 

Only use attachments/ accessories specified by the manufacturer.

12. 

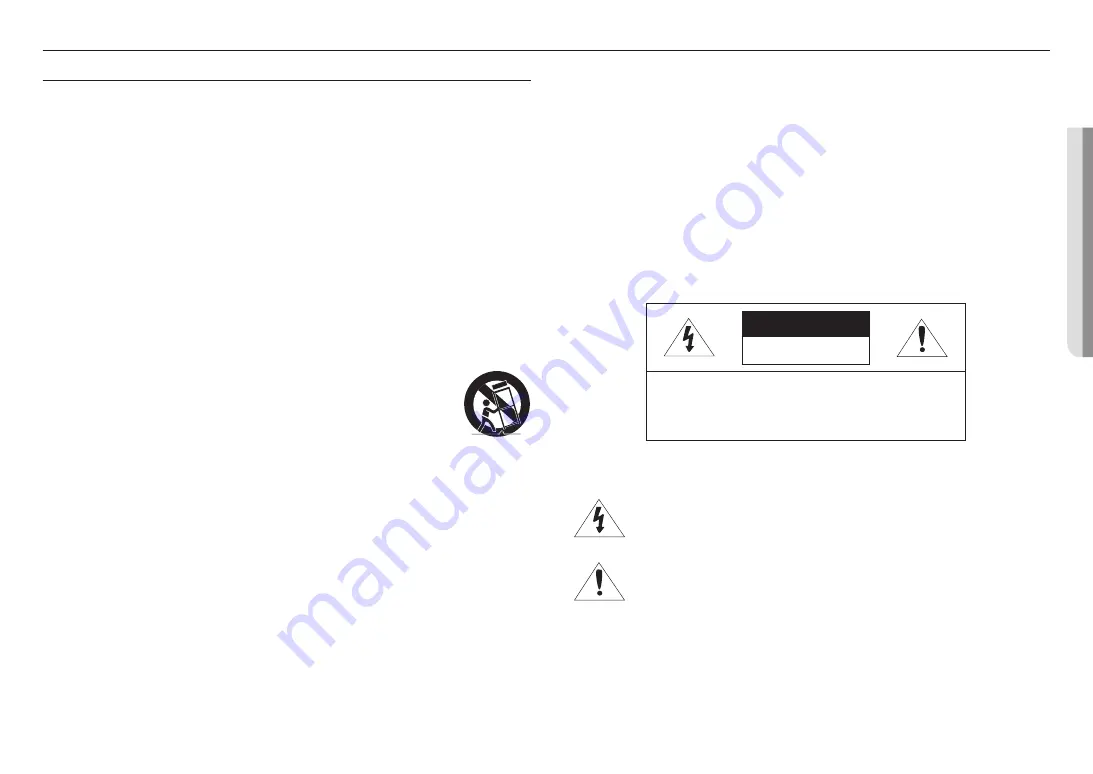
Use only with the cart, stand, tripod, bracket, or table specified by the manufacturer, 
or sold with the apparatus. When a cart is used, use caution when moving the cart/
apparatus combination to avoid injury from tip-over.

13. 

Unplug this apparatus during lighting storms or when unused for long periods of time.

14. 

Refer all servicing to qualified service personnel. Servicing is required when the apparatus 
has been damaged in any way, such as power-supply cord or plug is damaged, liquid has 
been spilled or objects have fallen into the apparatus, the apparatus has been exposed to rain or moisture, 
does not operate normally, or has been dropped. 

15. 

This product is intended to be supplied by a Listed Power Supply Unit marked “Class 2” or “LPS” and rated 
from 12 Vdc, 1.2A or PoE(53V), 0.33A.

16. 

This product is intended to be supplied by isolation power.

17. 

If you use excessive force when installing the product, the camera may be damaged and malfunction. 
If you forcibly install the product using non-compliant tools, the product may be damaged.

18. 

Do not install the product in a place where chemical substances or oil mist exists or may be generated. As 
edible oils such as soybean oil may damage or warp the product, do not install the product in the kitchen or 
near the kitchen table. 
This may cause damage to the product.

19. 

When installing the product, be careful not to allow the surface of the product to be stained with chemical 
substance. 
Some chemical solvents such as cleaner or adhesives may cause serious damage to the product’s surface.

20. 

If you install/disassemble the product in a manner that has not been recommended, the production functions/
performance may not be guaranteed. 
Install the product by referring to “Installation & connection” in the user manual.

21. 

Installing or using the product in water can cause serious damage to the product.

22. 

This device has been verified using STP cable. The use of appropriate GND grounding and STP cable 
is recommended to effectively protect your product and property from transient voltage, thunderstroke, 
communication interruption.

WARNING

TO REDUCE THE RISK OF FIRE OR ELECTRIC SHOCK, DO NOT EXPOSE THIS PRODUCT 

TO RAIN OR MOISTURE. DO NOT INSERT ANY METALLIC OBJECT THROUGH THE 

VENTILATION GRILLS OR OTHER OPENINGS ON THE EQUIPMENT.
Apparatus shall not be exposed to dripping or splashing and that no objects filled with liquids, 

such as vases, shall be placed on the apparatus.
To prevent injury, this apparatus must be securely attached to the Wall/ceiling in accordance 

with the installation instructions.

CAUTION

CAUTION

RISK OF ELECTRIC SHOCK. 

DO NOT OPEN

CAUTION

 : TO REDUCE THE RISK OF ELECTRIC SHOCK. 

DO NOT REMOVE COVER (OR BACK). 

NO USER SERVICEABLE PARTS INSIDE. 

REFER SERVICING TO QUALIFIED SERVICE PERSONNEL.

EXPLANATION OF GRAPHICAL SYMBOLS

The lightning flash with arrowhead symbol, within an equilateral triangle, is 

intended to alert the user to the presence of “dangerous voltage” within the 

product’s enclosure that may be of sufficient magnitude to constitute a risk of 

electric shock to persons.

The exclamation point within an equilateral triangle is intended to alert the user to 

the presence of important operating and maintenance (servicing) instructions in 

the literature accompanying the product. 

overview

Summary of Contents for Wisenet TNM-3620TDY

Page 1: ...THERMAL NETWORK CAMERA User Manual TNM 3620TDY ...

Page 2: ...rectness of the contents in this document but no formal guarantee shall be provided Use of this document and the subsequent results shall be entirely on the user s own responsibility Hanwha Techwin reserves the right to change the contents of this document without prior notice Designandspecificationsaresubjecttochangewithoutpriornotice TheinitialadministratorIDis admin andthepasswordshouldbesetwhe...

Page 3: ... the product the camera may be damaged and malfunction If you forcibly install the product using non compliant tools the product may be damaged 18 Do not install the product in a place where chemical substances or oil mist exists or may be generated As edible oils such as soybean oil may damage or warp the product do not install the product in the kitchen or near the kitchen table This may cause d...

Page 4: ...he ITE is to be connected only to PoE networks without routing to the outside plant The wired LAN hub providing power over the Ethernet PoE in accordance with IEEE 802 3 at shall be a UL Listed device with the output evaluated as a Limited Power Source as defined in UL60950 1 or PS2 as defined in UL62368 1 Unit is intended for installation in a Network Environment 0 as defined in IEC TR 62102 As s...

Page 5: ...13 13 Connecting the Camera Directly to Local Area Network 13 Connecting the Camera Directly to a DHCP Based DSL Cable Modem 14 Using Device Manager 14 Searching Camera Automatically 14 Configuring IP Address 15 Registering Camera Manually 15 Configuring IP Automatically 16 Port Range Forward Port Mapping Setup 17 Connecting to the Camera from a Shared Local PC 17 Connecting to the Camera from a R...

Page 6: ... Transcend Product Type High endurance The compatibility varies depending on the card manufacturers and types RECOMMENDED NAS SPECIFICATIONS Recommended capacity 200GB or higher is recommended For this camera you are recommended to use a NAS with the following manufacturer s specs Recommended products QNAP NAS Synology NAS WHAT S INCLUDED Please check if your camera and accessories are all include...

Page 7: ...oE port A port that connects to the PoE injector and network cable for power and network connection d Power port DC 12V Used to plug the power cable e MICRO USB port Port to connect the WiFi dongle Wifi dongle and OTG adapter are sold separately f Reset Button The button restores all camera settings to the factory default Press and hold for about 5 seconds to reboot the system J If you reset the c...

Page 8: ...reverse direction It might damage your Micro SD card and your product When it rains or the humidity is high insertion or ejection of a Micro SD card is not recommended When installing removing the Micro SD card make sure you put the product body on a flat ground before working on it in order to prevent accidents due to loss or drop of any parts Removing a Micro SD card Gently press down on the exp...

Page 9: ... 10 100 Mbps Cable Category 5e or higher Max Distance 100 m DC Resistance 0 125 Ω m PoE Support IEEE 802 3at CONNECTING WITH OTHER DEVICE Grounding cable Monitor for installation Power PoE Router J J The Test Monitor Out port of the product is provided for easier installation and is not recommended for monitoring purposes If the screen freezes for about 1 2 seconds at a certain time interval or wh...

Page 10: ...creen stabilized For this reason a screen calibration is performed when the power is initially turned on If you want to connect an external device you must turn off the external device before proceeding Connect the set and the adapter power line first and then connect the power cable to the outlet on the wall Power Cable Specification In case of DC 12V Input Wire Type AWG 20 18 16 Cable Length Max...

Page 11: ...G 711 PCM Bit Rate 64kbps Sampling Frequency 8kHz Full duplex Audio Audio in Selectable microphone Line in Supported voltage 2 5VDC 4mA Input impedance 2K Ohm Audio out Line out 3 5mm mono jack Maximum output 1Vms Line out impedance 600Ω Connecting to the I O port box Connect the Alarm I O cable to the corresponding port of the port box Sensor Alarm Warning lamp ALARM IN Used to connect the alarm ...

Page 12: ...a Warning lamp Siren power Warning lamp Siren ALARM OUT 12VDC 20mA MAX RESISTOR 10K ohm DIODE RELAY DC 5V or 3 3V TRANSISTOR GND GND TRANSISTOR External connection Inside of the camera GND RESISTOR To connect the external sensor Connect one signal line of a 2 wire sensor to the ALARM IN port and connect the other wire to the GND port Alarm In Wiring Diagram Alarm Out Wiring Diagram ...

Page 13: ...00 To change the IP address use the Device Manager For further details on Device Manager use refer to Using Device Manager Page 14 CONNECTING THE CAMERA DIRECTLY TO A DHCP BASED DSL CABLE MODEM 1 Connect the user PC directly with the network camera 2 Run the Device Manager and change the IP address of the camera so that you can use the web browser on your desktop to connect to the camera 3 Use the...

Page 14: ... administrator HTTP Port Used to access the camera using the Internet browser The default value is 80 RTSP Port Used to control real time streaming The default value is 554 If using a Broadband Router IP Address Enter an address falling in the IP range provided by the Broadband Router ex 192 168 1 2 254 192 168 0 2 254 192 168 XXX 2 254 Subnet Mask The Subnet Mask of the Broadband Router will be t...

Page 15: ...ISTERING CAMERA MANUALLY If the camera cannot be found using search function the camera can be registered remotely by manually inserting IP information if the camera is connected to external network 1 Click Add Devices Manually Add Device at the main page of the device manager 2 Insert the range of IP address that you search 3 Select the Model Name of the camera that you register and insert HTTP p...

Page 16: ...ing setting is an example of setting a CISCO IP router The settings may differ depending on the connected Broadband Router model For more information refer to the user manual of the applicable router Setting up Port Range Forward for several network cameras You can set a rule of Port Forwarding on the Broadband Router device through its configuration web page A user can change each port using the ...

Page 17: ...NTERNET On a remote computer that is in the Broadband Router s network cluster users can access cameras within a Broadband Router s network by using the camera s DDNS URL 1 Before you can access a camera in the Broadband Router network you should have set the port range forward for the Broadband Router 2 From the remote PC launch the Internet browser and type the DDNS URL address of the camera or ...

Page 18: ...ng system to support the UPnP protocol 2 Click the camera name for search In the Windows operating system click the camera name searched from the network menu The login window is displayed Connecting via Bonjour 1 Run the client or operating system to support the Bonjour protocol 2 Click the camera name for search In the Mac operating system click the camera name searched from the Bonjour tab of S...

Page 19: ... by using a memo pad or memorizing it LOGIN Whenever you access the camera the login window appears Enter the User ID and password to access the camera 1 Enter admin in the User name input box The administrator ID admin is fixed and can not be changed 2 Enter the password in the Password input field 3 Click Sign in If you log in successfully you can see the Live Viewer screen J J When you access t...

Page 20: ...s event had occurred Verify the settings in the following sequence A Check Data Time settings B The Motion detection should be set to Enable C Check if the E mail option of Event setup menu is checked to use No signal is found at the Alarm Output port even when an intelligent video analysis event is generated Check alarm output port settings Cannot record into the Micro SD card Check if the Micro ...

Page 21: ...erms and conditions of the purchase contract This product and its electronic accessories should not be mixed with other commercial wastes for disposal Hanwha Techwin cares for the environment at all product manufacturing stages and is taking measures to provide customers with more environmentally friendly products The Eco mark represents Hanwha Techwin s devotion to creating environmentally friend...

Page 22: ......

Reviews: