background image

 35

ОПИС ПРИЛАДУ

Деко для запікання*

Решітка для грилю 

(решітка для 

сушіння)   

Дротяні

напрямні

*для певних моделей

Піддон для смаження*

Summary of Contents for FCGS6 Series

Page 1: ...EN INSTRUCTION MANUAL UA IO CBI 2809 8515907 04 2023 v1 FCGS6...

Page 2: ...following these instructions carefully you will be able to avoid any problems in using the appliance It is important to keep the instruction manual and store it in a safe place so that it can be consu...

Page 3: ...3 Safety instructions 4 Description of the appliance 8 Installation 10 Operation 12 Baking in the oven practical hints 18 Test dishes 20 Cleaning and maintenance 22 Technical data 27 TABLE OF CONTENTS...

Page 4: ...derstand the ha zards involved Children shall not play with the appliance Cleaning and user maintenance shall not be made by chil dren without supervision During use the appliance becomes hot Care sho...

Page 5: ...aults must be fixed by an appropriately qualified and authorised person In the event of any incident caused by a technical fault disconnect the power and report the fault to the service centre to be r...

Page 6: ...ore economically in a pan on the cooker hob Make use of residual heat from the oven If the cooking time is greater than 40 minutes switch off the oven 10 minutes before the end time Important When usi...

Page 7: ...ch of children UNPACKING DISPOSAL OF THE APPLIANCE Old appliances should not sim ply be disposed of with normal household waste but should be delivered to a collection and recycling centre for electri...

Page 8: ...8 DESCRIPTION OF THE APPLIANCE Oven function selector knob Electronic programmer Temperature adjust ment knob Temperatureregulator signal light L Cooker operation signal light R...

Page 9: ...optional 9 SPECIFICATIONS OF THE APPLIANCE Cooker fittings Baking tray Grill grate drying rack Roasting tray Sideracks...

Page 10: ...ing without allowing the four screws in the places shown in the diagram to fall out The oven is manufactured to work with a one phase alternating current 230V 1N 50 Hz and is equipped with a 3 x 1 5...

Page 11: ...11 INSTALLATION 600 595 40 40 560 40 560 560 560 600 525 544 570 1004 16 26 23 180 37 595 max 50 595 570 3 390...

Page 12: ...n the oven only use a cloth well rang out with warm water to which a little washing up liquid has been added The electronic prgrammer Ts is equipped with electronic sensors which are switched on by to...

Page 13: ...functions The Kitchen Timer can be set from 1 minute up to 23 hours and 59 minutes To set the Kitchen Timer l Touch MENU then the display will show blinking l Use the sensors to set the Kitchen Timer...

Page 14: ...l be flashing l Use the sensors to select your pre ferred tone Use to select the setting 1 to 3 Use to select the setting 3 to 1 Adjust display brightness You can adjust display brightness 1 to 9 wher...

Page 15: ...sts Frankfurter sausages thickness of roasted dish should not exceed 2 3 cm and should be turned over during roasting Defrosting Only fan is on and all heaters are off Fan and combined grill on When t...

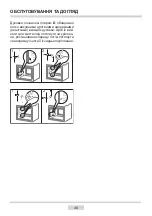
Page 16: ...sh or the oven chamber Bottom heater on When the knob is set to this position the oven is heated using only the bottom heater Baking of cakes from the bottom until done moist cakes with fruit stuffing...

Page 17: ...heater In order to switch on the grill you need to Set the oven knob to the position marked grill Heat the oven for approx 5 minutes with the oven door shut Insert a tray with a dish onto the appropr...

Page 18: ...e after switching off the oven it is advisable to leave the cake inside for about 5 min temperatures for baking with the ultra fan function are usually around 20 30 degrees lower than in normal baking...

Page 19: ...14 18 Beef 225 250 2 120 150 Pork 160 230 2 90 120 Chicken 180 190 2 70 90 Chicken 160 180 2 45 60 Vegetables 190 210 2 40 50 Vegetables 170 190 3 40 50 Oven with automatic air circulation including a...

Page 20: ...2 Baking tray 3 150 170 1 25 35 2 Baking tray 3 150 170 1 25 35 2 Baking tray Roasting tray 2 4 2 baking tray or roasting tray 4 baking tray 160 175 1 25 35 2 Fatless sponge cake Wire rack black baki...

Page 21: ...1 Preheat for 5 minutes do not use Rapid preheat function 2 Preheat for 8 minutes do not use Rapid preheat function Type of dish Accessory Level Type of heating Temperature 0 C Time min Whole chicken...

Page 22: ...ning function pour 250ml of water 1 glass into a bowl placed in the oven on the first level from the bottom close the oven door set the temperature knob to 50 C and the function knob to the bottom hea...

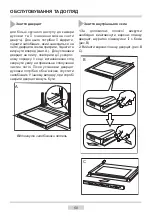
Page 23: ...ports Installing wire shelf supports 1 2 1 2 l Ovens in cookers marked with the letter D are equipped with easily removable wire shelf supports To remove them for washing pull the front catch then til...

Page 24: ...cooker do the inverse When fitting ensure that the notch of the hinge is correctly placed on the protrusion of the hinge holder After the door is fitted to the oven the safety catch should be carefull...

Page 25: ...e or by an appropriately authorised fitter CLEANING AND MAINTENANCE 3 Pull the inner glass panel from its seat in the lower section of the door Re move the inner panel fig D 4 Clean the panel with war...

Page 26: ...entre check the following points that are presented in the table PROBLEM REASON ACTION 1 The appliance does not work Break in power supply Check the household fuse box if there is a blown fuse replace...

Page 27: ...W D 59 5 x 59 5 x 57 5 cm The product meets the requirements of European standards EN 60335 1 EN60335 2 6 The data on the energy labels of electric ovens is given according to standard EN 60350 1 IEC...

Page 28: ...28...

Page 29: ...29 30 34 36 38 44 48 53...

Page 30: ...30...

Page 31: ...31 15...

Page 32: ...32 1 40 10...

Page 33: ...33 100...

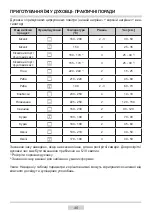
Page 34: ...34 O L R...

Page 35: ...35...

Page 36: ...36 Y 100 C 230 1N 50 3 x 1 5 2 1 5 16 A...

Page 37: ...600 595 40 40 560 40 560 560 560 600 525 544 570 1004 16 26 23 180 37 595 max 50 595 570 3 390 37...

Page 38: ...38 250 30 Ts Ts 0 00...

Page 39: ...39 Ts A 0 00 l MENU l 7 l MENU l 7 7 MENU 1 23 59 l MENU l l MENU 7 l l MENU dur...

Page 40: ...40 l 1 10 7 l l MENU l l MENU l l l MENU ton l 1 3 3 1 1 9 1 9 7 l l bri ton bri l 1 9 9 1 7 22 00 6 00...

Page 41: ...41 0 0 Supergrill 2 3 i 50 50 10 0 1 5 0 20 0 2 5 0 0...

Page 42: ...42 R L R L L L R...

Page 43: ...43 5 250 190...

Page 44: ...44 5 20 30 1...

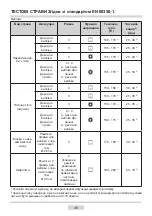
Page 45: ...150 3 25 35 160 170 1 3 25 40 2 155 170 1 3 25 40 2 220 240 1 2 15 25 210 220 2 45 60 190 2 3 60 70 230 250 4 14 18 225 250 2 120 150 160 230 2 90 120 180 190 2 70 90 160 180 2 45 60 190 210 2 40 50...

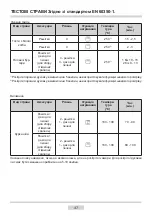
Page 46: ...0 170 1 25 40 2 3 155 170 1 25 40 2 3 155 170 1 25 40 2 2 4 2 4 155 170 1 25 50 2 3 150 160 1 30 40 2 3 150 170 1 25 35 2 3 150 170 1 25 35 2 2 4 2 4 160 175 1 25 35 2 26 3 170 180 1 30 45 2 2 20 2 18...

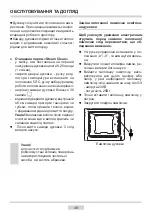
Page 47: ...47 EN 60350 1 0 C 2 1 180 190 70 90 2 1 180 190 80 100 5 10 0 C 4 250 1 1 5 2 5 4 250 2 2 3 4 3 250 1 1 10 15 2 8 13 1 5 2 8...

Page 48: ...48 Steam Clean 0 25 1 50 C 30 0 G9 230 25...

Page 49: ...49 D 1 2 1 2...

Page 50: ...50 1 2 A B C...

Page 51: ...51 D 1 2 3 1 2 3 1 2 3 3 D D1 4...

Page 52: ...52 1 2 0 00 3...

Page 53: ...53 230V 50 Hz 2 9 kW 59 5 x 59 5 x 57 5 cm EN 60335 1 EN 60335 2 6 EN 60350 1 IEC 60350 1 ECO...

Page 54: ...54...

Page 55: ...55...

Page 56: ......

Reviews: