6
Preparing for set up
Scanning your key tags
Locate the bag/s of bar-coded key tags for scanning. When you scan them into the system, the Datalog-Keypad
will ask for the keys in numerical order according to Apartment number. You do not need to keep track of the
key tags during this step. HandyTrac recommends attaching keys after all tags are scanned into the system.
NOTE: You may want to leave your old Key Tags on for a couple of days until you fully understand the
HandyTrac system.
STEP ONE: Connecting the Network Cable and Establishing Communications
A)
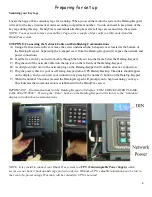
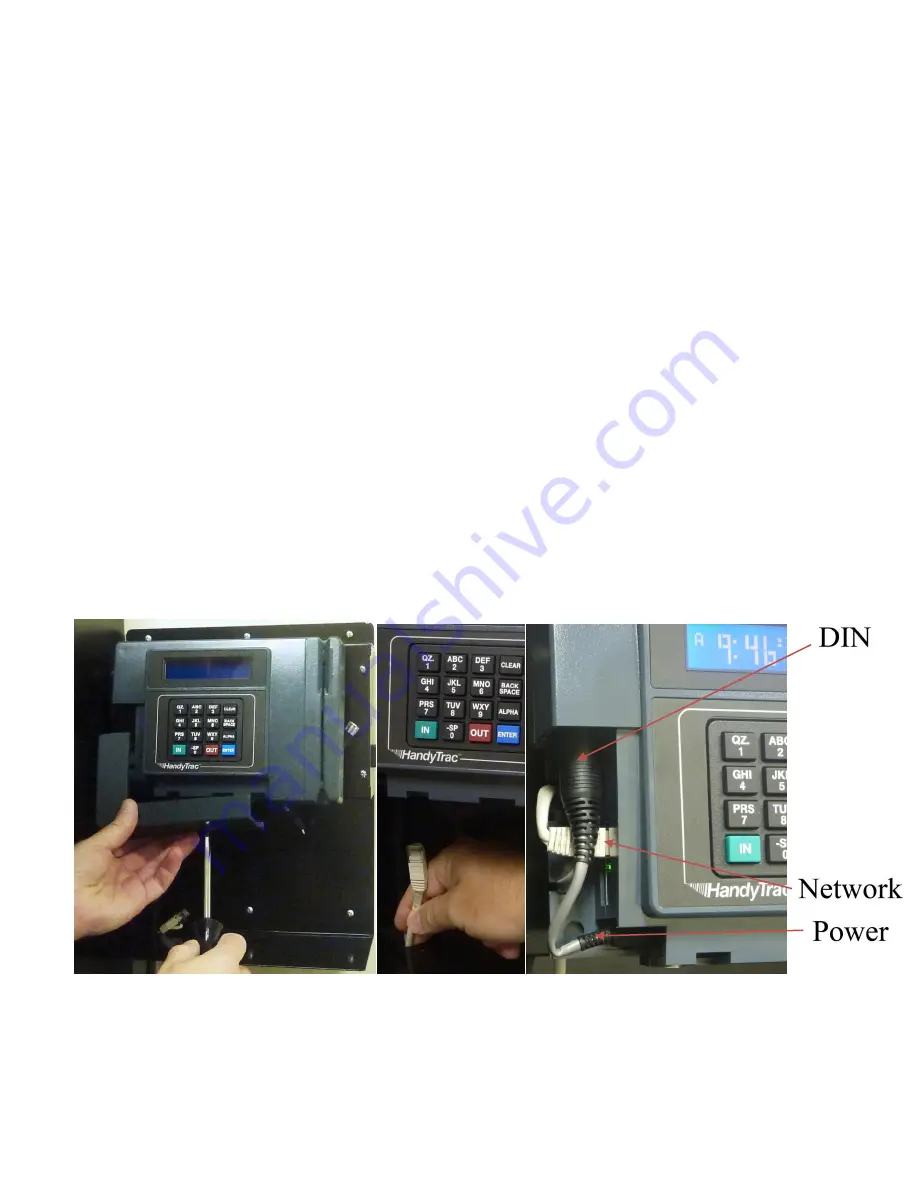
Using a flat-head screwdriver, remove the screw underneath the L-shaped cover located at the bottom of
the Datalog-Keypad. Separating the L-shaped cover from the Datalog-Keypad will expose the network and
power connections.
B)
Feed the free end of your network cable through the hole cut into the frame below the Datalog-Keypad.
C)
Plug the end of the network cable into the top jack on the left side of the Datalog-Keypad.
D)
A solid green light next to the network plug on the Datalog-Keypad will confirm an active connection.
E)
Plug the power cable for your new Datalog-Keypad into a UPS Battery Backup. Time/date should appear
on the display, and you can test your connection by pressing the number 5 button on the Datalog-Keypad.
F)
When the number 5 button is pressed the Datalog-Keypad will prompt you to begin scanning your keys.
This indicates that communication is established with the HandyTrac server.
IMPORTANT: If communications fail the Datalog-Keypad will display “COM CHECK FAILED PLEASE
CALL 888-458-9994”. Pressing the “Enter” button on the Datalog-Keypad will return it to the “time/date”
display to troubleshoot communications
.
NOTE: It is crucial to connect your HandyTrac system to a
UPS (Uninterruptable Power Supply)
which
serves as your battery backup and surge protection device. Without a UPS, valuable information can be lost in
the event of a power outage. Warranty will be voided if a UPS is not used.


