SmartPOS User Guide:
PAX A920 |
v01, 01 July 2021
|
5
1.3 Getting started
You can choose to operate your PAX A920 either with Wi-Fi or with
cellular connectivity. See below how to set up each connection type.
Wi-Fi connectivity
1. Turn on the card reader by pressing and holding the power button on
the right side for 2-4 seconds.
2. Use the touch screen to bring the settings bar down from the top
of the screen. You must pull it all the way down until the settings
appear in full with icon names.
3. Select the Wi-Fi name (below the Wi-Fi icon).
4. Select the toggle switch to enable Wi-Fi.
5. Once the list of available Wi-Fi networks appear, select your desired
network.
6. When your card reader has successfully connected to the network, it
will confirm this action by displaying “connected” below the network
name.
Cellular connectivity
You will be provided with a mini-SIM that is exclusively configured for
you and is likely to be pre-installed in your card reader.
To confirm if your SIM is already installed, please follow these steps:
1. Make sure your card reader is turned off using the power button.
2. Push the battery cover slide latch (at the back of the card reader) to
the right to open, remove the battery case (lifting from the bottom)
and take out the battery (also lifting from the bottom).
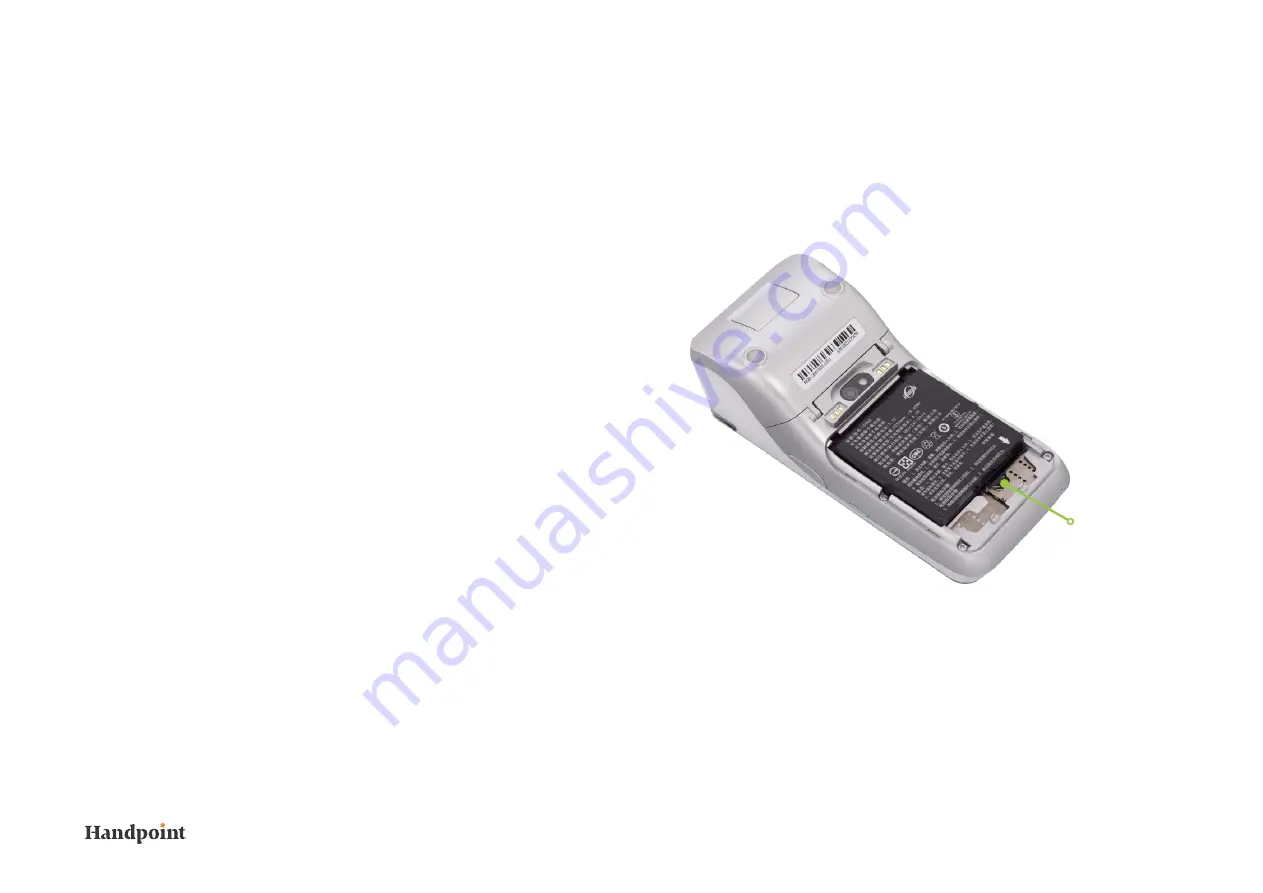
3. Once removed, you should see your SIM card in the SIM1 card
slot (on the left-hand side) otherwise insert it here (see the below
image).
4. Re-insert the battery and casing, after which you need to push the
cover slide latch back to the left.
To activate your cellular connectivity, you will need to follow the below
steps:
1. Turn on the card reader by pressing and holding the power button on
the right side for 2-4 seconds.
2. Select the Settings application and the following steps:
SIM slot


