GB
84
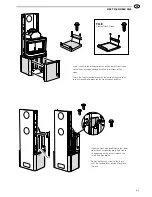
TILE
Lower side stone
Assembly
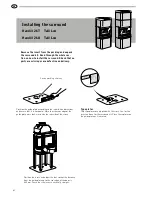
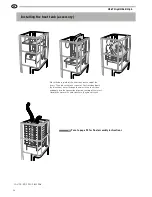
Soapstone and tile stoves are installed in more
or less the same way. These illustrations show
installation of a soapstone model, along with
smaller illustrations of corresponding tiles and
profiles.
H26T Low/H26K Low
Installing tiles
Installing soapstone
403872
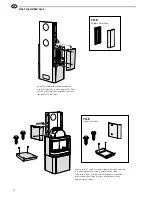
Top stone
403871
Upper side stone
403868
Upper front stone
403870
Middle side stone
403869
Lower side stone
403867
Lower front stone
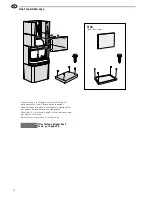
403882
Top stone
403881
Upper side stone
403878
Upper front stone
403880
Middle side stone
403879
Lower side stone
403877
Lower front stone
General information
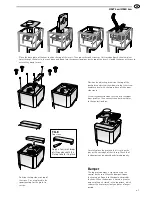
The stove must be placed on a level and horizontal surface to
ensure that the rows are even and straight, so that the tiles do
not become misaligned or the gaps between them too large.
While you are installing the stove, make sure that all the
stones/tiles are level and that each row is of uniform height
along its length.
Remember that the stones/tiles must be handled with care.
They are easily scratched and sharp edges are vulnerable to
knocks. You should also be careful not to crack the stones/
tiles when screwing in screws.
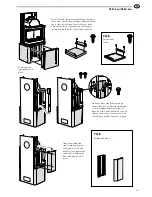
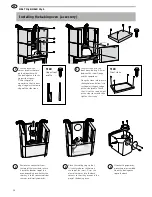
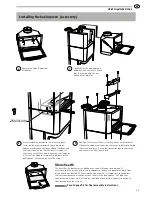
For the tile model, first screw
two profiles firmly into the lower
side plates. Insert them in the
same way as for the soapstone
model.
Make quite certain that the
rear side profiles are vertically
straight. Push in the lower side
stones from the front so that
their suspension plates hook
into the horizontal keyholes of
the side profiles. Make sure that
there is a 5 mm gap between the
stone and the lower edge of the
door.


