


Pro-Stitcher Lite for the HQ Simply Sixteen
Installation Instructions | 15
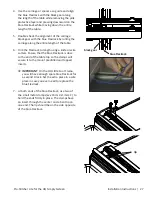
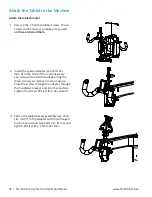
4. Place the Pro‑Stitcher Lite tray assembly (see
Parts List, item E) onto the HQ Simply Sixteen
carriage and place the one new longer screw
and washer into the outside hole (location
circled in the image). Note the position of the
longer circled screw and washer. It goes through
an additional layer of metal bracket requiring it
to be longer.
5. Fasten the tray with the five remaining new
screws and washers into the outside screw
holes where you originally removed the old
screws.
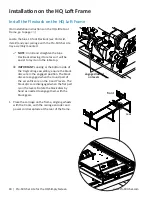
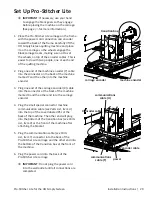
Install the Y‑Rack
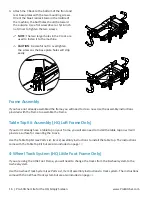
1. Carefully lay the quilting machine on its left side
as shown (looking from the front).
Â
IMPORTANT: Take care not to put any undue
weight or pressure on the machine encoder,
circled. You may want to carefully place the
two bottom wheels just off the front edge of
the table, with a second person holding the
machine.
2. Locate the Y‑rack (see Parts List, item G) and two
mounting screws (see Parts List, item H) for the
HQ Simply Sixteen machine.