background image

DRT 

User Manual 


15 


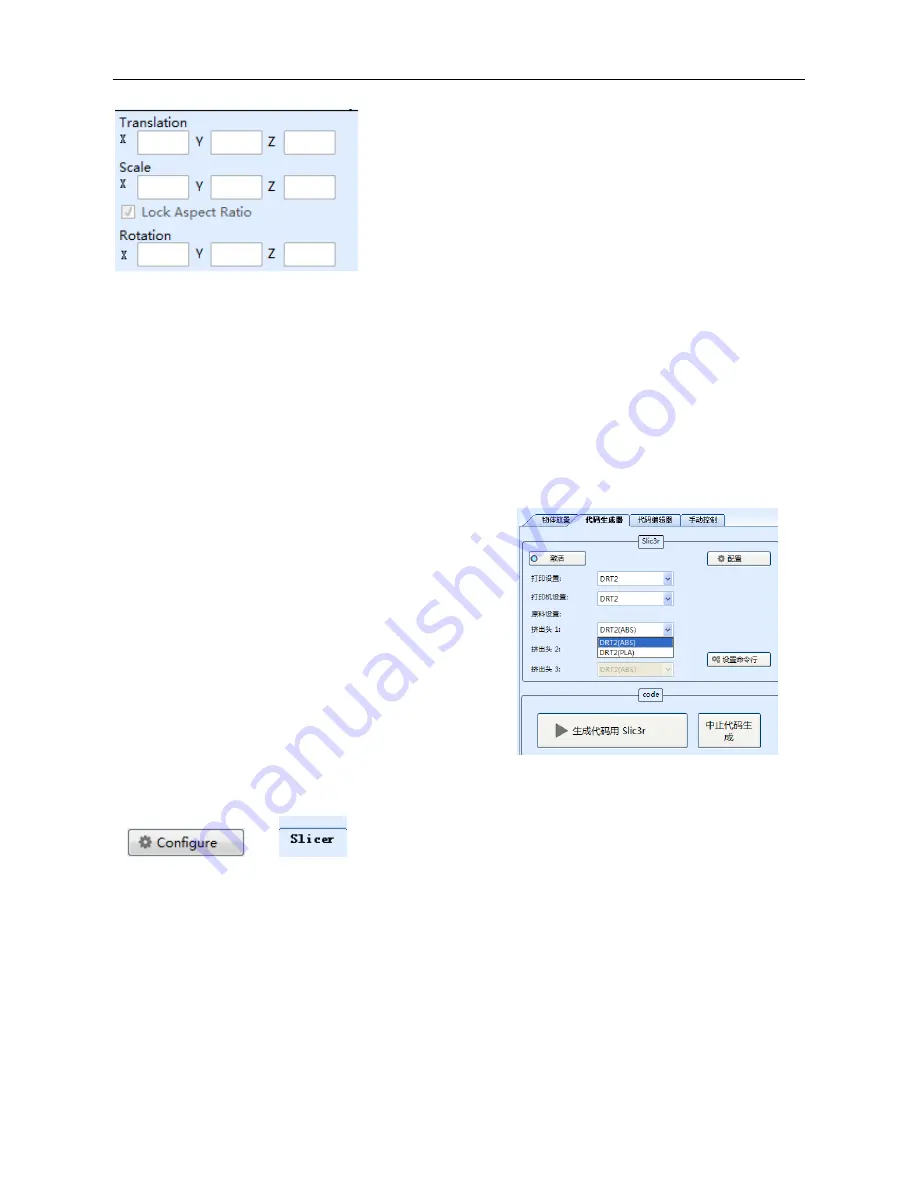
“Translation”- change the position 

“Scale”- Change the size 

“Rotation”- the angle of the model. 

There are “Center Objects”, “Copy Objects” buttons, in the down part, you could 

try these functions. 

Generating Gcode 

If  you  print  ABS,  choose  DRT2(ABS),  If 

PLA, choose DRT2(PLA) 


If  you  want  to  change  the  settings,  please  refer  to  below  pictures  after  click, 

  in 


Summary of Contents for DRT II

Page 1: ...nfigurate the software and test 6 1 Connect the software 6 2 Test 9 4 Print Models 11 1 Machine Adjustment 11 2 Generate STL file to GCODE 13 3 Printing 19 4 Off line Printing 19 5 LCD control Systems...

Page 2: ...DRT User Manual 2 DRT User Manual 1 Connecting Power and Computers 1 Connecting Power Connecting one point of the cable to 3D printer the other point to the outlet...

Page 3: ...DRT User Manual 3 Press ON OFF button turn on the machine 2 Connecting Computers Connecting the machine and the computer with the USB wire...

Page 4: ...net the speed could be faster PS Win 7 or aboved version has that software STEP2 Find the automatically installment program double click to install the driver according to the wizard PS If the automat...

Page 5: ...ue of the driver click install at last The same method as common driver manual installment Right click My Computer choose Management click Device Management and refer to below pictures Find Port you i...

Page 6: ...Manual 6 3 Pre configurate the software and test In the SD card there are not only our company s own software we also supply the CURA 1 Connect the software Double click Our printing system will come...

Page 7: ...st still remember your port Use yours Suggested that set other parameter as the picture below especially the Baud Rate must be 115200 Setting the PRINTER Attention please the temperature is important...

Page 8: ...TER CONFIGURATION Our DRT build size is 200 200 200MM so change the number to 200 in the market form the other could be the same as below picture Then click PS In the Repetier General Settings the wor...

Page 9: ...ssfully the software will show Test the Moving control and the end stop Click Homing button After that move the X Y Z axis to check the movement X homing Y Z is the same After click the axis will home...

Page 10: ...rusion and heat bed If not heated the number of temperature will be the same as ambient Click and the temperature will rise up When the extruder temperature rise to 230 If PLA the temperature could be...

Page 11: ...e of the hit or other aspects So before printing please check whether the heat bed is flat or not again and whether the height between the heat bed and nozzle is OK Click homing Z axis check whether t...

Page 12: ...ual 12 Use M2 5 hex key to loosen the screw counterclockwise as the below picture when you are doing that check the distance reach to the suggested distance is OK If the distance is too small as the b...

Page 13: ...e as the below picture when you are doing that check the distance reach to the suggested distance is OK The adjustment for other 3 corners is the same as above 2 Generate STL file to GCODE Our 3d prin...

Page 14: ...nd Slicing Configuration open it double click Double click and run then press Enter button then the slicing configuration well be set as our company s default You can also change the settings accordin...

Page 15: ...ation the angle of the model There are Center Objects Copy Objects buttons in the down part you could try these functions Generating Gcode If you print ABS choose DRT2 ABS If PLA choose DRT2 PLA If yo...

Page 16: ...Layer height is suggested 0 3mm first layer height 0 2mm Perimeters speed suggested 20 small perimeters suggested 20 external perimeters suggested 40 First layer speed suggested 30 if too fast the par...

Page 17: ...ser Manual 17 Filament diameter 1 75 extrusion multiplier 1 extruder temperature 230 bed 110 because we are printing ABS Nozzle diameter 0 4 After every change we must click to save remember the save...

Page 18: ...DRT User Manual 18 Choose the saved configuration as the above picture I save the name as DRT Now your setting is done Click then Click Gcode is being generated as the right picture Gcode is generated...

Page 19: ...y important it is better that leave the machine after its successful printing 4 Off line printing Off line printing is better especially for big models costing more time After the GCODE is generated c...

Page 20: ...er Manual 20 5 LCD control Systems 1 First Page Inform Screen 1 Real LCD display 2 Explanation for LCD display Under First Page you could adjust CHOOSE button to change the print speed Confirm Choose...

Page 21: ...the system will turn into First Page automatically 3 Main Page without SD card in the machine 4 Main Page with SD card in the machine Choose Info screen system will change into First Page 3 Part Page...

Page 22: ...atically according to PLA s parameter Choose Preheat ABS nozzle and bed s temperature will rise up to 240o 110o automatically according to PLA s parameter Choose Cooldown the nozzle and heatbed stop h...

Page 23: ...f there are no SD card the First Page will be picture 8 when you put the SD card in and choose Init SD Card machine will refresh automatically turn into picture 9 8 Main Page without SD card in the ma...

Page 24: ...code test2 gcode 10 SD card s contents Refresh refreshing the files in the SD card After choose one file and the temperature is OK machine will start When printing with SD below is is the content of M...

Page 25: ...DRT User Manual 25 Choose Stop Print machine will stop After choose Tune contents will be shown as below picture the number might be different according to your own demands 12 Tune details explanation...

Page 26: ...DRT User Manual 26 Websites Any question please visit our websites Website http www han bot com Forum http www han bot com bbs forum php mod forumdisplay fid 36 Alibaba http han bot en alibaba com...

Reviews: