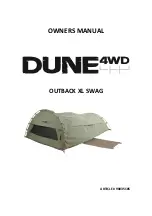
2
Table of Contents
Safety Information
Table of Contents ........................................................2
Safety Information .......................................................2
Pre-Assembly
............................................................3
Planning Assembly...................................................................3
Part List....................................................................................3
Assembly .......................................................................4
Care Instructions
....................................................................
2
WARNING:
WARNING:
This pergola is NOT a permanent structure and is designed for sunshade and privacy only.
The pergola should only be used in ideal weather conditions. You MUST completely disassemble the pergola prior to any extreme
weather such as heavy thunder storms, hurricanes and/or ice/hail storms. Failure to do so may result in structural or property damage.
CAUTION:
CAUTION:
The pergola roof is weather resistant but will leak in rain. I
t is recommended to remove the roof panels
CAUTION:
Keep all children and pets away from assembly area.
Begin assembly not less than 6 feet from any obstruction such as fence, garage, house, overhanging branches, clothes line or electrical wires.
Some parts may contain sharp edges, wear protective gloves if necessary.
Care Instructions
Before using, wipe with a clean, dry cloth. Do not use bleach or solvents. Treat the frame with liquid wax for maximum protection against
UV light and salty, damp air. Clean the roof panels periodically with a mild soap and water. Do not use harsh chemical cleaners as
this will damage the panel finish.
Please properly tighten all hardware and perform periodic inspections during usage for cracked welds
or loose nuts or bolts.
Always install the pergola on level ground utilizing the ground stakes provided
for stability. It is not recommended
a hard surface such as a wood deck or concrete floor.
if expecting ice or hail storms.
Keep all flames and heat sources away from the sling roof panels.
These parts are not fire proof and will burn or melt if left in continuous contact with any extreme heat source.
to permanently anchor this pergola to
WARNING:
When assembling and using this product, basic safety precautions must alawys be followed
to reduce the risk of personal injury and damage to product or surroundings.
Do not cook or barbeque under the roof.
You may contact our customer service department with any questions by phone at 1-855-HD-HAMPTON or visit www.hamptonbay.com.