4
5
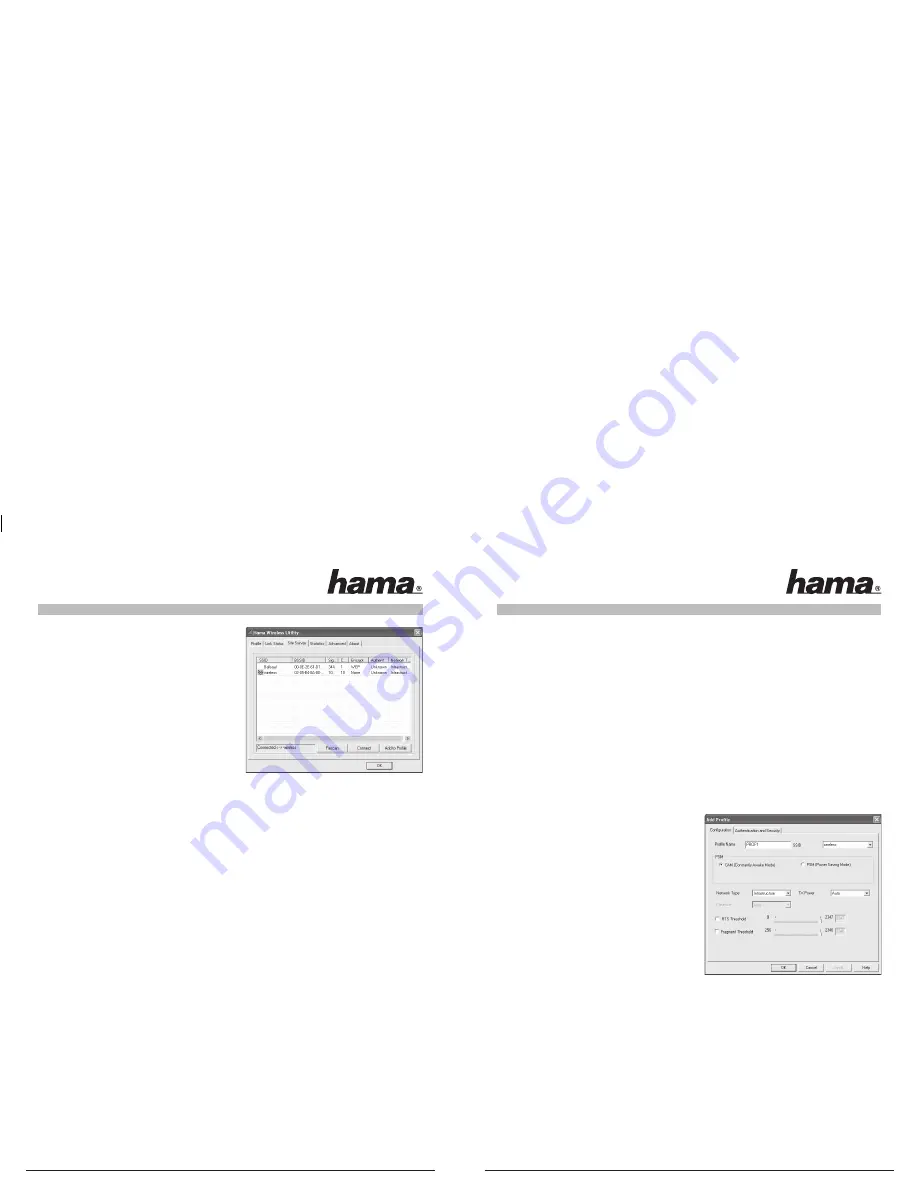
Click the circled symbol to open the utility from the task bar.
The Hama Wireless LAN Utility starts with the following
screen, whereby the values in the columns may be
different.
This screen shows all available wireless networks. The
SSID
, which is used to identify WLAN devices in the
respective wireless LAN, the router MAC address
(BSSID),
the
signal strength
, the
channel
used, the
encryption
algorithm
and the
authentication
and the
type of network
are displayed.
The lower section of this window shows the connection
status
(Connected / Disconnected)
. Click
Update
to search
for wireless networks again.
3.1 Quick confi guration
First, select the required network by clicking the corresponding line in the list. The network selected is
highlighted in blue in the list. Now click the
Connect
button.
You are connected to the network if the selected network is run without encryption and the signal is strong
enough. This is indicated by the green symbol and Connected is shown in the status window.
If the network you selected is encrypted, another window opens in which you can enter the encryption data.
The data must be identical to the router or access point settings. The
authentication type
and
encryption
are
generally already selected in accordance with the target network. Enter the code which must correspond
exactly with the code used by the router or access point.
Click
Ok
to confi rm after you make your entries.
If you do not have this code yourself, please contact the person responsible for confi guring the router or
access point.
For detailed information on setting encryption, please see Page 6, under the heading:
Setting the wireless LAN encryption.
If you have made these entries successfully, a green symbol is also displayed to indicate the successfully
connection in the network overview.
For further information on the connection made, open the
Status
tab. It contains information on the
Connection quality, Signal strength
or
Interference level.
3.2 Detailed confi guration
When confi guring, it is useful to create a profi le. A profi le serves to save various settings for a connection
under a certain name. For example, if you want to connect to various wireless networks, you can save the
settings for the networks in profi les, which allows you to change the confi guration quickly.
3.2.1 Creating a new profi le
You need the following information to create a profi le:
•
SSID
(network ID): This is the name of the required network.
•
Encryption
used in the target network
•
Network type
(type of network): Infrastructure or ad-hoc
There are two basic ways to create a profi le:
Version 1 :
Change to the
Profi le
tab and click
Add.
or
Version 2 :
Open the
Site Survey
tab. All networks are listed in this tab. Select the
required network in the list and click
Add to profi le.
For hidden networks only:
If the SSID fi eld is empty, the router or access point is set to hide the network. The SSID cannot
therefore be copied automatically.
In both cases, the following window is displayed on
the screen:
The device supports the infrastructure and ad-hoc
network types.
Infrastructure:
Select this type if you want to connect
this wireless LAN device to a wireless LAN router or
access point.
Ad-hoc
: Select this type if you want to connect
directly to another wireless LAN client device, e.g. another
USB stick or a WLAN PCI card without a wireless LAN
router or access point. Two WLAN client devices are
required for this.
3.2.1.1 Infrastructure mode
First enter a name for your profi le
(Profi le name)
, e.g. “PROF1”.
If you have selected
version 1
to create the new profi le, you must enter the network ID
(SSID)
of the target
network in the SSID fi eld. This is in the wireless LAN settings in your router or access point or you can ask the
person in charge. If you have selected
version 2,
the
SSID
has already been copied automatically from the
network overview.
To reduce the energy consumption, you can run the device in power saving mode. In this mode, certain
functions are deactivated or run at a lower setting if they are not fully used. Select
Constantly Awake Mode
, if
you want to work at full power all the time.
Select
Infrastructure
under network type. This mode facilitates connection to a wireless LAN router or access
point. The settings for
TX Power, RTS Threshold
and
Fragment Threshold
can be left at the default settings.


