background image

Sheet 11

A new machine control unit is supplied without machine software ex spare parts 
warehouse. This is indicated by the service code 4.5.2.5 after installing the central 
control unit and switching on the key switch in the machine’s operating hours meter. 
This service code is generated direct from the display control board. Only the boot 
loader has already been pre-installed. 

Therefore, the machine software must be “flashed” onto the central control unit after 
mechanical installation and electrical connection of the central control unit.

Service PC on which the current HAKO diagnostics software is installed. 
(Windows 7 or higher)

1 free USB 2.0 port 

CAN-FOX interface PN 03502430  

Alternatively, CANUSB interface PN 03501750

Interface cable PN 03502750

2.1 Settings

Summary of Contents for Scrubmaster B 120 R

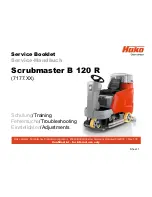
Page 1: ...X Service Booklet Service Handbuch Hako GmbH Technisches Produktmanagement 23840 Bad Oldesloe Germany Updated 05 2018 Rev 1 03 Confidential for internal use only Schulung Training Fehlersuche Troubles...

Page 2: ...ntrol unit 14 2 1 3 Connection diagram 16 2 2 Brief description 17 2 2 1 Switching off vacuuming dirt water tank full 18 2 2 2 Indication Solution Tank empty 21 2 2 3 Machine home position 22 2 2 4 Se...

Page 3: ...9 4 4 Hako system maintenance S 40 5 Cleaning programmes FPV 41 6 Machine settings 44 6 1 Basic settings 44 6 1 1 Cleaning units 45 6 1 2 Battery and charger settings 47 6 1 3 Battery setting LDS 48 6...

Page 4: ...head 64 7 4 1 Potentiometer in the lifting element for the brush head 65 8 Water pump 66 8 1 Water quantities 67 8 2 Water pump standstill detection 68 9 Drive 69 9 1 DMC drive control AC motor 70 9...

Page 5: ...ents 10 Service messages 79 10 1 Service alarm clock 3 3 1 1 84 11 Battery charger 85 11 1 Operating manual 85 11 2 Programming the charger 89 11 3 Charge data table 90 12 Options 91 13 Real time cloc...

Page 6: ...n de energised disconnect the battery plug except for current and voltage measurements After repairing electrical drives measure the starting and operating currents to detect possibly still present er...

Page 7: ...ware version e g 1 004 and possibly further four digits that show the last displayed service message followed by the hour indicator If a fault occurs the wrench in the display lights up and the machin...

Page 8: ...ition machines are machines that have a clearly defined scope of equipment In this context only a limited scope of additional equipment features is available Additional options are not installed in th...

Page 9: ...ecifically according to customer wishes from a pool of available equipment features Additional options chemical dosing working light warning signal etc are installed in the factory For more details se...

Page 10: ...PN 03006790 is required for these settings Setting via the diagnostics system is planned but currently not yet available Settable parameters include Cleaning unit LDS Low Discharge Signal sender Batt...

Page 11: ...rated direct from the display control board Only the boot loader has already been pre installed Therefore the machine software must be flashed onto the central control unit after mechanical installati...

Page 12: ...Hako diagnostics software via the Hako WebX download portal Service PC e g Panasonic CF19 CF20 Interface PN 03502430 recommended interface or alternatively PN 03501750 Diagnostics cable PN 03502750 D...

Page 13: ...rmation on accessing the download server can be requested from Maike Christiansen e mail mchristiansen hako com To install the software on a service computer or for Updating it Follow the instructions...

Page 14: ...he service PC using the diagnostics cable PN 03502750 and the interface Connect the OBD plug blue contact protection of the diagnostics cable to the machine s OBD contact located behind the cover in t...

Page 15: ...le Flashing the software Turn on the machine Start the Hako diagnostics software Select the HAKO button then click the Scrubmaster B120R button The application independently searches for a new blank c...

Page 16: ...onnection diagram CAN Fox Interface PN 03502430 USB plug to the Service PC D Sub9 Connector CAN D Sub9 Con nector RS232 D Sub9 Socket CAN1 RED D Sub9 Socket CAN2 BLACK OBDII Cable PN 03502750 OBD plug...

Page 17: ...s display these are shown as detailed flash codes using a flash LED see Chapter 9 It is possible to toggle back and forth between the tip switches for scrubbing vacuuming and the green Hakomatic butt...

Page 18: ...ip switch or automatically in case of the signal dirt water tank full to protect the suction turbine Switching off by the operator The squeegee is raised The suction motor switches off with a delay 15...

Page 19: ...ctors of the sensor and the electric contact of the differential pressure sensor B05 is closed The differential pressure sensor is electrically connected to the main control unit A01 X9 10 and A01 X9...

Page 20: ...Sheet 20 2 2 1 Switching off vacuuming dirt water tank full P T S...

Page 21: ...system indicates it with a blinking water tap and a acoustical signal This is determined by a float switch that is positioned in the solution tang in the area above the right rear wheel The float swit...

Page 22: ...g element squeegee or the upper end position is detected by the control unit via the integrated potentiometer The motors are switched off and the LED indicators in the control panel for the cleaning c...

Page 23: ...ruptions If the seat contact switch is not actuated for 6 hours while the key switch is switched on the machine is locked in all functions driving and cleaning The same applies if both contacts of the...

Page 24: ...t contact switch that has been detected as being open by the machine no operator on the seat is indicated on the display of the control panel via the flashing hour indicator and the operator symbol If...

Page 25: ...anges to parameters not described in this manual can result in the machine malfunctioning Therefore all changes to the configuration must be carried out with utmost care Accessing the configuration me...

Page 26: ...n the key switch The following display is shown in the operating hours meter after approx 3 seconds You are now in the start menu of the configuration Chapter 0 of the configuration menu is accessed b...

Page 27: ...uration menu is presented by three numbers Fig 2 4 which describe the individual levels The left number describes the chapter the middle number describes the configuration and the right number specifi...

Page 28: ...itch 2 Once the highest value has been reached it is returned to the lowest value Pressing and holding tip switch 3 for at least 3 seconds saves the selected setting of the content if the diagnostics...

Page 29: ...the diagnostics plug the parameters cannot be changed Press tip switch 2 six times to show the last occurred error on the display e g Press and hold tip switch 3 for approx 3 seconds until 0 0 0 0 is...

Page 30: ...Sheet 30 3 Technical data...

Page 31: ...Sheet 31 3 Technical data...

Page 32: ...Sheet 32 3 Technical data...

Page 33: ...Sheet 33 3 Technical data...

Page 34: ...Sheet 34 3 Technical data...

Page 35: ...nce specifies in single modules the special technical work to be done and the periods of time for the maintenance activities Parts to be replaced for the individual maintenance tasks are determined Fu...

Page 36: ...Sheet 36 4 1 Hako system maintenance customer Maintenance must be carried out by the customer at the following maintenance intervals...

Page 37: ...Sheet 37 4 2 Hako system maintenance I Maintenance must be carried out by an authorised Hako service workshop at the following maintenance intervals...

Page 38: ...Sheet 38 4 2 Hako system maintenance I...

Page 39: ...Sheet 39 4 3 Hako system maintenance II Maintenance must be carried out by an authorised Hako service workshop at the following maintenance intervals...

Page 40: ...Sheet 40 4 4 Hako system maintenance S safety check Maintenance must be carried out by an authorised Hako service workshop at the following maintenance intervals and at least once a year...

Page 41: ...A01 X10 12 and A04 A1 via potential distributor XS04 When driving direction reverse has been selected the signal is set from A02 X6 3 to potential distributor XS05 and thus to inputs A01 X10 13 and A0...

Page 42: ...hen drive control is in neutral No No No Yes Yes Yes Yes No No Lift brush when drive control is in reverse No No No No No Yes No No No Water off when drive control is in neutral Yes Yes Yes Yes Yes Ye...

Page 43: ...ription B120R 3 0 Eingestellte FPV 0 3 0 1 Refer to FPV table x 3 0 2 Refer to FPV table d 3 0 3 Refer to FPV table x 3 0 4 Refer to FPV table x 3 0 5 Refer to FPV table x 3 0 6 Refer to FPV table x 3...

Page 44: ...ent equipment options and working widths These can be set and adapted in the configuration menu To check and change the setting access the programming level as described in Chapter 2 2 4 The possible...

Page 45: ...orking width of 70 cm or 85 cm This setting is necessary for correct functioning of the overload limits and water quantities To check and change the setting of the cleaning units access the programmin...

Page 46: ...guration Content Description B120R 0 2 Brush decks 1 0 2 2 Plate brush deck 750mm d 0 2 4 Plate brush deck 900mm x 0 2 6 Cylindrical brush deck 700mm x 0 2 7 Cylindrical brush deck 850mm x 0 2 d Adjus...

Page 47: ...carried out in the menu items 0 3 X 0 4 X and 0 5 X If the setting for a machine without charger 0 4 0 with charger and without communication 0 4 1 or for a charger with communication and free charact...

Page 48: ...ance free gel batteries GiS and PzS are sealed low maintenance batteries containing liquid electrolyte Regular checking of the electrolyte as well as topping up cleaned water are required here AGM bat...

Page 49: ...ration Content Description B120R 0 3 TSG Adjustment Battery Type only for 0 4 0 0 4 1 and 0 4 2 1 0 3 0 Crown w o Offset x 0 3 1 Crown x 0 3 2 GIS Foreign x 0 3 3 GiS x 0 3 4 PzS or PzB Foreign x 0 3...

Page 50: ...st be determined using the charger documents and then set correctly under 0 5 X The column under 0 4 2 in Table 6 4 then applies to this setting When selecting the chargers Exide 0 4 4 Hoppecke 0 4 5...

Page 51: ...ery charger x 0 4 1 battery charger w o communication x 0 4 2 Battery charger with communication manual charging characteristics selection see battery charger manual x 0 4 4 Battery charger with commu...

Page 52: ...scription B120R 0 5 Charging characteristic Battery size 1 for 0 4 2 for 0 4 4 for 0 4 6 for 0 4 7 0 5 0 LK0 x 0 5 1 LK1 180Ah GiV x 0 5 2 LK2 240Ah GiV 240 Ah PzS x 0 5 3 LK3 320Ah PzS x 0 5 4 LK4 21...

Page 53: ...6 Machine settings 6 1 6 Charging characteristics of the integrated charger Sheet 53...

Page 54: ...whether the last error that occurred in the machine is shown when turning on the machine or not To check and change the setting of the PPV access the programming level as described in Chapter 2 2 4 T...

Page 55: ...ption B120R 2 0 Last error indicator after switching on the machine 1 2 0 0 Deactivate x 2 0 1 Activate d 2 1 Water level when switching on scrubbing 0 2 1 0 Last setting d 2 1 1 Preset level 4 x 2 2...

Page 56: ...vel when switching on TOOL menu option only appears when TOOL option is activated 0 2 3 0 Last setting d 2 3 1 Preset level 4 x 2 6 Water Setting 0 2 6 0 From last level to first level in circuit d 2...

Page 57: ...pter Configuration Content Description B120R 2 8 Acoustic Alarm Tone Interval menu option only appears when the Acoustic Alarm option is activated 0 2 8 0 Standard d 2 8 1 Alternative x 2 B Highest wa...

Page 58: ...igure 7 1 Carry out the pre setting of the threaded bar for adjusting the squeegee inclination using the dimensions shown in Fig 7 1 while making sure that the side with the fine thread M10x1 faces th...

Page 59: ...ar Fig 7 2 a B to adjust the squeegee ensuring the ends of the sealing strips barely have contact with the ground Turn the threaded bar anti clockwise The distance of the sealing strip to the ground i...

Page 60: ...Sheet 60 7 Mechanical components 7 1 Squeegee Fig 7 2a Fig 7 2b...

Page 61: ...rollers Fig 7 4 A has been set to 3 mm in the factory If striping still occurs despite optimum inclination adjustment set the distance of the supporting rollers to the lower edge of the sealing strip...

Page 62: ...Sheet 62 7 Mechanical components Height adjustment 7 1 Squeegee Figure 7 4...

Page 63: ...es are driven by a separate motor Two working widths 70 cm and 85 cm are available as roller brush units for the Scrubmaster B120R Use the guide rail to adjust the dirt hopper ensuring the brush strip...

Page 64: ...brush deck Fixing point for the relieve spring of the Cylindrical brush deck Position of the lifting element when the brush deck is lifted Position of the lifting element with increased brush pressure...

Page 65: ...he position of the brush head can be measured at the central control unit at A01 X19 2 3 Here the position signal is at A01 X19 2 and the negative side of the positioning sensor at A01 X19 3 The follo...

Page 66: ...ltage to convey different water quantities for the six stages The voltage values measured here depend on numerous factors it is therefore not possible to specify exact values Decisive is that the volt...

Page 67: ...be set from approx 1 0 l to approx 5 2 l The setting range for the cylindrical brush units is from approx 1 5 l to approx 3 1 l If the pump is supplied with voltage but the water quantity does not cor...

Page 68: ...tion through the electronics the pump would now always pump against this pressure and could thus be damaged The electronics detects that the pump cannot convey freely and automatically switches the pu...

Page 69: ...eat contact switch has opened and is closed again The drive potentiometer must also be in neutral when closing the seat contact switch or to be more precise it must be recognised as being in neutral b...

Page 70: ...rameters is generally not permitted Currently only the diagnostics with flash codes for the LED indicator is used 9 1 1 Connection description M1 M2 M3 motor connections B B battery power supply A con...

Page 71: ...A5 not used A6 not used A7 foot brake input from switch S10 if B is connected the machine is slowed down until standstill A8 supply speed control B03 negative A9 setpoint from speed control B03 A10 co...

Page 72: ...ng U 60V Defective Battery Excessive downhill ride 5 Drive Motor overheated Machine is used outside it s specification Cool down the drive motor 6 Drive Control Unit overheated Machine is used outside...

Page 73: ...witch A02 X6 and A04 A1 A2 11 Seat switch not closed or timed out No release signal from Machine Control Unit Check the wiring from A01 X10 2 to A04 A4 should be connected to battery minus 12 Wrong Po...

Page 74: ...s a neutral recycle action to reset fault 15 Low voltage internal 12V supply too low Check charging level of the battery 16 Not used 17 Low voltage Battery voltage too low Check charging level of the...

Page 75: ...contactor K02 and Magnetic Brake M01 22 Battery Voltage is too high Voltage 67V Excessive downhill ride 23 Mosfet short circuit in neutral Low side Mosfet short ciionrcuit in neutral position Check M...

Page 76: ...ited to battery minus Mosfet shortcircuited to battery minus before Line Contactor is closed Check insulating of the motor If ok replace the Drive Control Unit 28 S01 Wire off Motor Phase Connection C...

Page 77: ...ally In order to push the machine carry out the following steps 1 Loosen the bolts of the cover to the drive using the supplied socket wrench and remove the cover 2 Remove the pin Fig 9 2 A from the h...

Page 78: ...km h At a maximum speed of 6 5 km h this means that the maximum braking distance must not exceed 1 235 m Check this after carrying out work at the brake system and as part of regular maintenance This...

Page 79: ...tion of brush motors and wiring of the thermo switches 1 2 6 1 Brush motors over current or schort circuit Short circuit in the brushmotors or in their wiring 1 2 6 3 Lifting element brush deck Overlo...

Page 80: ...to battery plus 1 7 4 1 Chemical dosing agent problems Chemcal dosing agent over current interruption in the wiring 3 1 1 2 Fleetrekorder communication interruption Check wiring between machine contr...

Page 81: ...drive control unit Magnetic brake short circuit or interrupted wiring Check the magnetic brake and it s wiring 3 4 0 1 Malfunction drive control unit interrupted wiring encoder Check the wiring of th...

Page 82: ...ve control unit interrupted wiring thermo switch drive motor See blinking code at the drive control unit check the wiring of the drive motor thermo switch Is the machine used outside it s specificatio...

Page 83: ...nit interrupted message is generated by the display During operation of the machine 4 5 3 5 Display communicatin problems Communication between display and control unit interrupted message is generate...

Page 84: ...Sheet 84 10 1 Service alarm clock 3 3 1 1 The service alarm clock is set via the Hako diagnostics system...

Page 85: ...Sheet 85 11 Battery charger 11 1 Operating manual...

Page 86: ...Sheet 86 11 Battery charger 11 1 Operating manual...

Page 87: ...Sheet 87 11 Battery charger 11 1 Operating manual...

Page 88: ...Sheet 88 11 Battery charger 11 1 Operating manual...

Page 89: ...Sheet 89 11 Battery charger 11 2 Programming the charger The integrated Battery charger is adjusted to the different batteries only via the machine control unit see chapter 6 1 4 and 6 1 5...

Page 90: ...11 Battery charger 11 3 Charge data table Sheet 90...

Page 91: ...ase via the machine s control system are specified in Table 12 1 These options include Acoustic warning signal Chemical dosing Scrubbing vacuuming tool Working light Fleet Recorder To set and check th...

Page 92: ...Kit 1 1 0 0 not available x 1 0 1 available d 1 1 Warning Signal Optical and acoustical Front Rear and Beacon on Pole 1 1 1 0 not available d 1 1 1 available x 1 2 Chemical Dosing Agent 1 1 2 0 not a...

Page 93: ...ent Description B120R 1 6 Working Headlight 1 1 6 0 not available d 1 6 1 available x 1 7 Fleetrecorder 1 1 7 0 not available d 1 7 1 available x 1 B TOOL Spinkle Nozzle for cleaning of the recovery t...

Page 94: ...with voltage via a backup battery on the control electronics Proceed as follows to set the clock e g after replacing a battery Connect diagnostics plug PN 03006790 to plug A01 X3 Fig 2 2 Without the...

Page 95: ...h is switched on The display for the year is shown in the operating hours meter after approx 3 seconds In the example 11 for 2011 Now release the tip switches again Press tip switch 6 to access the se...

Page 96: ...d held longer than one second the value automatically changes at constant speed If a value is changed the bottom right dot behind the last number disappears After pressing tip switch 5 for 3 seconds t...

Page 97: ...Sheet 97 14 Notes...

Page 98: ...Sheet 98 14 Notes...

Page 99: ...Sheet 99 14 Notes...

Reviews: