10
HakkiPilke 50 Easy
Version 1.2 2012
3.
Control functions and preparation
3.1.
Arranging the machine for operation and transport
Before arranging the machine for transport, ensure that the operating conditions detailed in Section 1.4 are
met and review the safety instructions in Section 1.5.
Note! Inspect and clean the machine according to Sections 4.3 and 5.8 before arranging it for transport.
3.1.1.
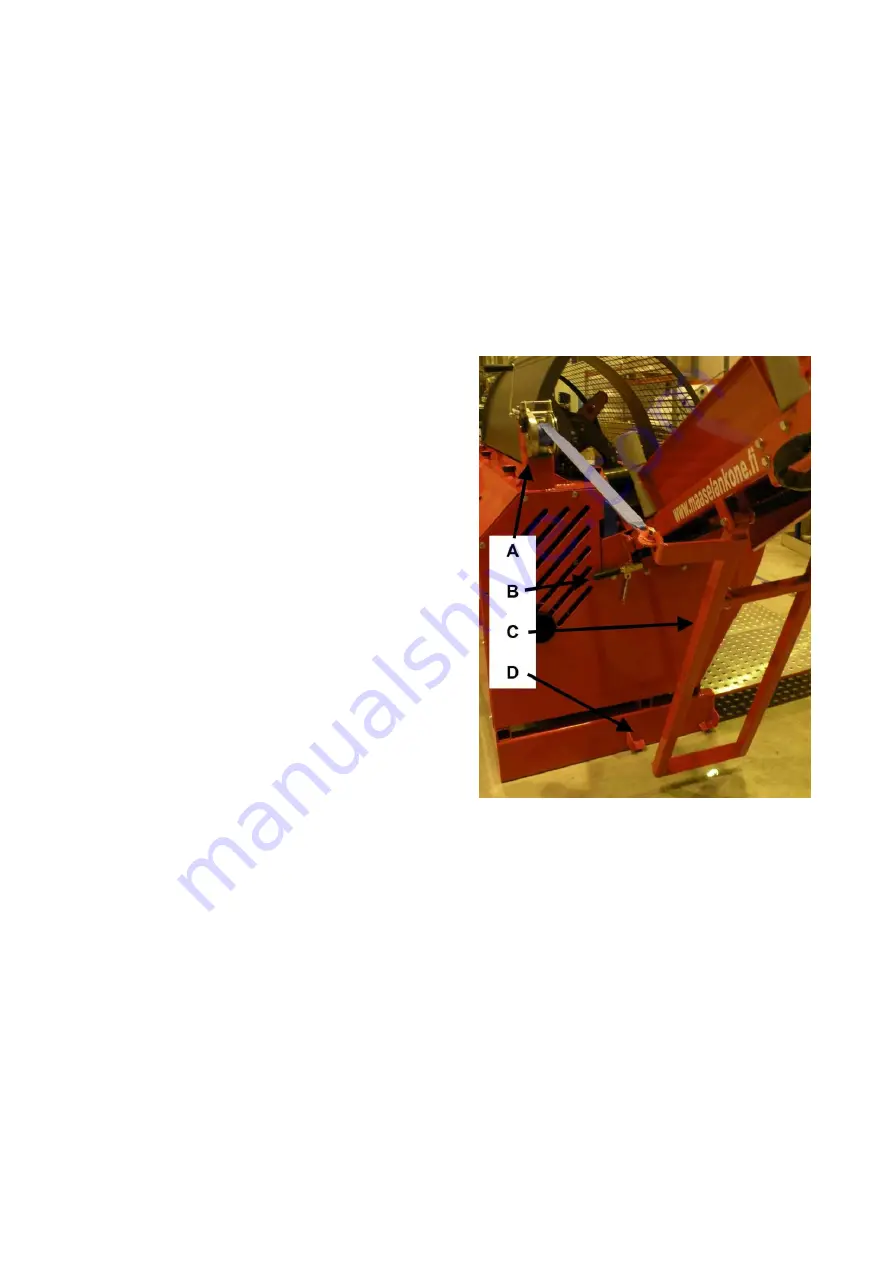
Placing the input conveyor in the operating or transport position
Place the input conveyor in the operating position
as follows:
1.
Ensure that sufficient room is available to
lower the input conveyor (approx. 2 m).
2.
Release approx. 15 cm of lifting strap from
the winch A.
3.
Release the conveyor lock B and push the
conveyor down until the lifting strap
tightens.
4.
Use the winch to lower the input conveyor
down onto its support C. The support must
fit into the intended slot D in the frame.
When placing the input conveyor in the transport
position, use the winch to lift the conveyor up, and
ensure that the locking latch locks it in place.
Figure 5. Lowering the input conveyor
3.1.2.
Placing the output conveyor in the operating or transport position
Place the output conveyor in the operating position as follows:
Note! Two people are required to turn the conveyor.
1.
Ensure that sufficient room is avaible to lower the output conveyor.
2.
Use the control H in Figure 9 of Section 3.2 (anti-clockwise) to make sure that the conveyor is
stopped, and start the machine.
3.
Keep the lock A open, and move the control E in Figure 9 of Section 3.2 to the right to
hydraulically lower the output conveyor to its lowest position.
4.
Turn the upper section of the conveyor to the operating position with the handles C at the
upper end. Two people are required to turn the conveyor.
5.
Turn the output conveyor's support bar B to the side.
6.
Lift the conveyor hydraulically, and use the lock D on the bottom of the conveyor to lock the
upper section of the output conveyor in the operating position.


