


24
SPECIFICATIONS
L26A10A/L32A10A/L37A10A/L40A10A/L42A10A
68.1
×
24.6
×
52.5 (including base) (L26A10A)
81.3
×
24.6
×
61.9
(
including base) (L32A10A)
94.6
×
31
×
70.3
(including base) (L37A10A)
101.3
×
31
×
75.4
(
including base) (L40A10A)
106
×
31.5
×
80.4
(
including base) (L42A10A)
Model
Screen
Type
Viewable angle
Color system
Sound system
Video input
TV/VIDEO
PAL, SECAM, NTSC (AV)
DTV Y/Pb/Pr
Power
Power consumption
Dimensions (W
×
D
×
H)(cm)
Environment conditions
Accessory
Composite: 480i/p, 576i, 720p,1080i,1080p
AV, S-VIDEO, YPb/Pr, YCb/Cr, VGA, HDMI
BG, DK, I
Working temperature:
Working humidity:
Storage temperature:
Storage humidity:
+
5
℃~+35℃
20%-80%
-
15
℃~+45℃
5%-90%
User’s manual (
×
1)
Remote control (
×
1)
Power cord (
×
1)
Battery (
×
2)
The design and specifications are subject to change without notice.
A-si TFT active matrix
176
°
(H)/176
°
(V)
See rating plate
The part specifications of this TV set provided here are for reference only.
Differences may occur as product technology is updated.
See rating plate
23
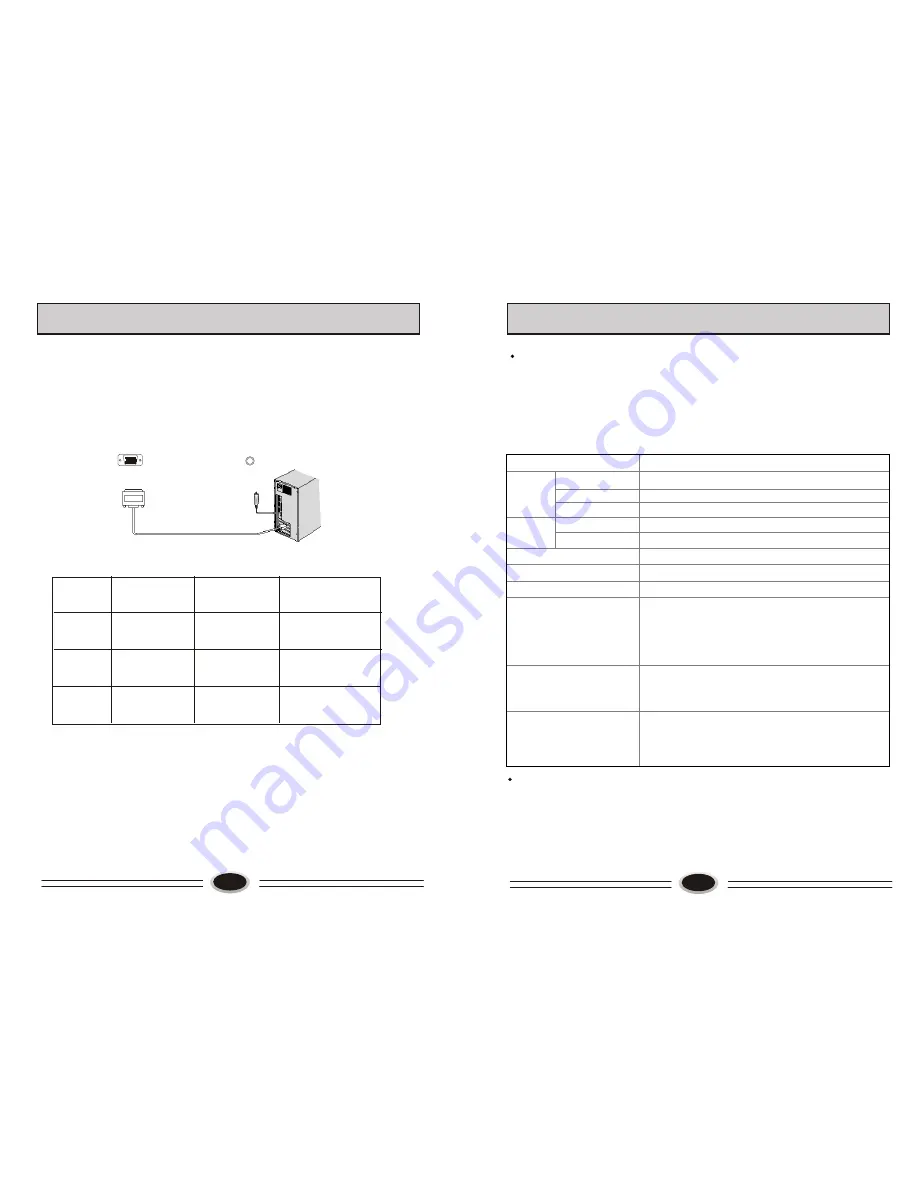
USING YOUR TV AS A COMPUTER DISPLAY
VG A-AU DIO I N
V G A
VGA input
1. Connect the VGA output port in the computer to the VGA port in the TV set.
2. Connect the audio cable in computer to VGA AUDIO IN port in TV set.
3. Press TV/AV button to select VGA mode.
4. Turning on the computer, the screen image of the computer will display on the
TV set.
At this time, the TV set can be used as a computer display.
Note:
1. If the temperature of the TV set is rather low, it is normal that there may be some
artifacts when the set is first turned on.
2. Nonconforming pixels may occur on the panel, but they have no influence on the
normal function of the display.
3. In the standard operation, it is normal if there is one bright dot or dark dot on the
screen.
VGA
SVGA
XGA
640
x
480
800
x
600
1024
x
768
31.5kHz
37.9kHz
48.4kHz
60Hz
60Hz
60Hz
Mode
Resolution
Horizontal
Frequency
Vertical
Frequency
RESOLUTION:
Note: The above parameters are VESA standard.
Summary of Contents for L26A10A
Page 3: ......


