background image


15 

External Equipment Connections 


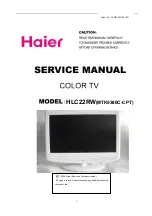
Summary of Contents for HLC22RW

Page 1: ...1 HLC22RW MTK5380C CPT Order No LCD080819001EN 2008 Haier Electronic Company Limited All rights reserved Unauthorized copying and distribution is a violation of law ...

Page 2: ...PECIFICATIONS 3 2 WAINING 4 3 LOCATION OF CONTROLS AND COMPONENTS 6 3 1 Board Location 6 3 2 Main Board AV Board 7 3 3 Power Board 9 3 4 LCD Panel 10 4 External Equipment Connections 11 5 OPERATION INSTRUCTIONS 15 5 1 Front Panel Controls 15 5 2 Back Panel Controls 16 5 3 Universal Remote Controller 17 6 DISASSEMBLY INSTRUCTIONS 18 6 1 Whole Machine 18 6 2 Support Stand Assembly 19 6 3 Back Cabine...

Page 3: ...s 2 Audio output power Built in W 2 1 5W Audio output power outer W No Total power input W 60W Voltage range V AC120V Power frequency Hz 60Hz Time of sleep timer MINS 240Min Net weight KG 6 2 Gross weight KG 7 1 Net dimension MM 524 180 434 Packaged dimension MM 582 216 500 Notes 1 NTSC Standards Developed by National TV Standards Committee 2 M standard each channel bandwidth is 6 MHz and the freq...

Page 4: ...ful interference in a residential installation This equipment generates use and can radiate radio frequency energy and if not installed and used in accordance with the instructions may cause harmful interference to radio communications However there is no guarantee that interference with not occur in a particular installation If this equipment does cause harmful interference to radio or television...

Page 5: ...achments not recommended by the manufacturer as they may cause hazards 5 Water and moisture do not place this product near water for example near a bathtub wash bowl kitchen sink laundry tub in a wet basement or near a swimming pool 6 Accessories do not place this unit on an unstable cart stand tripod bracket or table Use only with a cart stand tripod bracket or table recommend by the manufacture ...

Page 6: ...2 Never push objects of any kind into this product through openings as they may touch dangerous voltage point or short out parts that could result in a fire or electric shock Avoid spilling liquid of any kind on the product 13 Servicing do not attempt to service the product by yourself as opening or removing covers may expose you to dangerous voltage or other hazards Refer all servicing to authori...

Page 7: ...7 3 LOCATION OF CONTROLS AND COMPONENTS 3 1 Board Location No Parts number Description A Board Main Board B Board Power Supply Board C Board DVD 3 2 Main Board AV Board ...

Page 8: ...ector definition Main board connector Power connectors CN3 CN5 Notes CN3 Pin 3 Backlight on off The system can turn on or turn off the backlight of TFT LCD Panel through the power supply unit path CN3 Pin 7 System power on standby CN3 CN5 Pin number Signal name Pin number Signal name 1 12V 1 12V 2 12V 2 GND 3 BL 3 GND 4 DIM 4 5V 5 GND 5 STB 6 GND 7 SW ...

Page 9: ...trength of TFT LCD Panel s backlight through this connector Keypad and remote connector CN2 Speaker connector CN1 DVD VIDEO Connector CN6 Pin number Signal name Description 1 GPIO GPIO 2 PB_IN PB1 IN 3 Y_IN Y1_IN 4 GND GND 5 PR_IN PR1 IN 6 GND GND 7 IR DVD IR DVD AUDIO Connector P1 Pin number Signal name Description 1 LI YPBPR1L_IN 2 RI YPBPR1R_IN 3 GND GND ...

Page 10: ...K5380C U13 AND FLASH U17 U0TX 3V3SB U0RX J3 4x1 W HOUSING DIP4 W H P2 0 1 2 3 4 3 3 Power Board 3 3 1 Function Description Supply power for Main board Panel 3 3 2Connectordefinition INPUT CONNECTOR CN6 CN10 Signal name 1 N 2 GND 3 GND 4 DIM 5 EN 6 12V 7 12V ...

Page 11: ...A2N LVDS EVEN 2 Signal 12 A2P LVDS EVEN 2 Signal 13 14 GND Ground 15 CK1N LVDS EVEN Clock Signal 16 CK1P LVDS EVEN Clock Signal 17 A3N LVDS EVEN 3 Signal 18 A3P LVDS EVEN 3 Signal 19 A4N LVDS ODD 0 Signal 20 A4P LVDS ODD 0 Signal 21 A5N LVDS ODD 1 Signal 22 A5P LVDS ODD 1 Signal 23 A6N LVDS ODD 2 Signal 24 A6P LVDS ODD 2 Signal 25 26 GND Ground 27 CK2N LVDS ODD Clock Signal 28 CK2P LVDS ODD Clock ...

Page 12: ...ader S14B PH SM4 TB D LF JST or equivalent Pin No Symbol Description 1 2 3 VBL 5 0V Power input 4 5 6 13 14 25 26 GND Ground 7 12 15 16 17 18 LVDS EVEN LVDS EVEN Signal 19 24 27 28 29 30 LVDS ODD LVDS ODD Signal ...

Page 13: ...na Connection 1 Connect one end of a coaxial cable not included to the ANT IN jack on the back of your TV DVD combo then connect the other end of the cable into the antenna or cable TV wall outlet 2 To improve picture quality from an antenna in a poor signal area install a signal amplifier ...

Page 14: ...ction There are several ways to connect your television depending on the components you want to connect and the quality of the signal you want to achieve The following are examples of some different ways to connect your TV with different input sources Choose the connection which is best for you VCR connection ...

Page 15: ...15 External Equipment Connections ...

Page 16: ...16 ...

Page 17: ...17 5 OPERATION INSTRUCTIONS Basal information 5 1 Front panel controls ...

Page 18: ...18 5 2 Back panel controls ...

Page 19: ...19 5 3 Universal Remote Controller ...

Page 20: ...rd Assembly Control Board Assembly Assembly Material Subassembly Romote Contral Per setting Assembly 1 2 3 1 3 2 3 3 3 4 3 5 3 6 3 7 Components List NO Name Description Parts number 1 HLC22RW whole machine 2 Packaging 3 TV Set 3 1 Support Stand Assembly 3 2 Back Cabinet Assembly 3 3 Keypad Assembly 3 4 Front Cabinet Assembly 3 5 Remote Control Board Assembly 3 6 Main board Assembly 3 7 DVD ...

Page 21: ...cation No Spare Parts Name in English Specification Qty Support Stand Assembly 1 Base Subassembly 1 Base Borad White 1 Rotational Axis 1 Rubber 5 Bolt Support Stand Assembly 4 Support Stand Assembly Bolt GB818 85 M4X16 4 6 3 Back Cabinet Assembly Components List ...

Page 22: ...ket 2 Terminal Board 1 LCD panel bracket 2 Small cover board 1 Bolster 1 Screw 2 DVD shield metal 1 DVD Button Label white 1 Sponge Strip 0 17 Bolt 2 Bolt GB818 85 M3 4 4 Bolt SJ2824 87 ST4X12F 6 Bolt SJ2824 87 ST4 16F 1 Bolt SJ2824 87 ST3X8F 8 Terminal Label white 1 Bolt SJ2824 87 ST3 8F 8 Bolt SJ2824 87 ST3 8F 8 Bolt SJ2824 87 ST3 8F 3 Back Cabinet Assembly Bolt SJ2824 87 ST3X10F 6 6 4 Front Cab...

Page 23: ...t 1 Transparent Window silk screen DYNEX 1 Plastic board 1 Bolt SJ2824 87 ST3X10F 2 Front Cabinet Assembly Bolt SJ2824 87 ST3 10F 2 6 5 Miscellaneous Material Assembly 6 5 1 Location Photo 6 5 2 Components List Assembly Spare parts number Location No Spare Parts Name in English Specification Qty Miscellaneous Material Assembly 1 LVDS Connection Wire LVDS Wire 1 ...

Page 24: ...PCA060FB 011 P R 1 LCD Panel CLAA220WA01 V2 1 Speaker Y47 418 5W 4Ω 2 Left Gasket EPS 1 Right Gasket EPS 1 Middle Gasket EPE 1 Magnetic Loop BCRK 513571 3 Magnetic Loop ECIK EL6E B 1 ROHS DVD 0090810121A DS C043 R Include DIVX 1 ROHS DVD Signal Wire PH 10P 500 PH 7P 5 1 ROHS DVD Power wire PH 5 300mm PH 4 1 Metal clip 3 Screw SJ2824 87 ST3 8F 3 Miscellaneous Material Assembly Damper Foam 3 ...

Page 25: ...2sec input 8893 Finished these operations system will be into the factory mode menu IF want to exit this factory menu please press the botton Exit in the remoter 7 1 Version S N Panel Resolution Version The first line is the model Name and the second line is current software version ...

Page 26: ... be used in the VGA and Component model When we found the color in the two models was abnormal Then we can use the function to adjust it automatically 7 2 2 Color Temperature The function could adjust the Color Temperature used when debugging 7 3 Audio ...

Page 27: ...e RF atv line AV S Video YPbPr VGA Compression Factor Compression state Downmix output model MTS System used when debugging The parameters only used when debugging no need to be modified 7 4 Channel Range Scan The function could make it to search the channels by differentiation the analog and digital channels ...

Page 28: ... Single RF Scan Search channels in the frequency scope set in advance Factory Scan According to ANTENNA ANALOG ANTENNA DIGITAL CABLE ANALOG CABLE DIGITAL to search channels used only in project debugging ...

Page 29: ...29 Tuner Diagnostic Project debugging setting used to inspect the audio function 7 5Gamma Gamma Bright GAMMA0 8 Middle default settings in the program Dark GAMMA1 2 ...

Page 30: ...djust the backlight 7 7 Function Burning Mode Turn it ON to enter the aging model This is for factory run in testing The screen would display red green blue and black screen repeatedly Each color screen could be exam at that time ...

Page 31: ...31 Clean Storage The function could make the model turn back to the factory default setting Remark The date of the chart only is a example please don t adjust the factory mode base on it ...

Page 32: ...32 8 WIRING CONNECTION DIAGRAM ...

Page 33: ...n some channel Verify if correct channel is selected Adjust the antenna Make adjustments by Fine Tune and MANUAL Scan No color for some channel program black and white Verify if the same problem exists in other channels check out of picture and sound system Refer to relative instructions in the Manual for color adjust Spots with some or all pictures Verify if the antennal is correctly connected Ve...

Page 34: ... failure check State No power First check cables which connect with PSU then check as follows 1 Check PSB input voltage AC input voltage 120V connector CN7 2 Check PSB output voltage orderly voltage 12V 12V connector CN3 P6 P7 ...

Page 35: ...35 9 3 Main board failure check ...

Page 36: ...36 State No picture ...

Page 37: ...P Sunken TCP lead cracking ACF bonding short Awful environment and something electric enter into LCD Mis align between TCP and Panel Panel failure TCP failure Failure Mode Part Name Description Phenomena Failure cause Dot Defect Bright dot dark dot in pannel Incoming Inspection Standard Polarizer Bubble Bladder in Polarizer Bladder between Polarizer and top glass Polarizer Scratch Polarizer Scratc...

Page 38: ...mbalance Abnormal Color Only color abormal Capacitance improper bring crosstalk inside LCD pannel Circuit Abnormal Color Only color abnormal 1 Chip lose action 2 IC short or jointion bad 3 Pannel and vsc connect bad Failure Mode Part Name Description Phenomena Failure cause Mechanlcal Nolse When turn panel appear cacophony Caused by Mechanica noise of backlight unit Ripple Connectric circle Caused...

Page 39: ...mp housing and wire Because consume power too much F M F M in B L white balck Rotundity or wirelike F M in B L unit Failure Mode Part Name Description Phenomena Failure cause Light leakage Brightness at bottom of LCM brighter than normal B L unit badness Uniformity B L brightness asymmetric Sheet in B L unit is uneven Mechanlcal or B L Mount hole Lack screw or screw damage Lack screw Screw damage ...

Page 40: ... great way to keep the dust off your screen for a while Wet a soft cloth in a mixture of lukewarm water and a little fabric softener or dish washing detergent Wring the cloth until it s almost dry and then use it to wipe the screen 2 Make sure the excess water is off the screen and then let it air dry before you turn on your TV Cleaning the Cabinet Extended Absence If you expect to leave your TV d...

Page 41: ......

Page 42: ......

Page 43: ......

Page 44: ......

Page 45: ......

Page 46: ......

Page 47: ......

Page 48: ......

Page 49: ......

Page 50: ......

Page 51: ......

Page 52: ......

Page 53: ......

Page 54: ......

Page 55: ...41 Sincere Forever Haier Group ...

Reviews: