background image

Chapter 1  

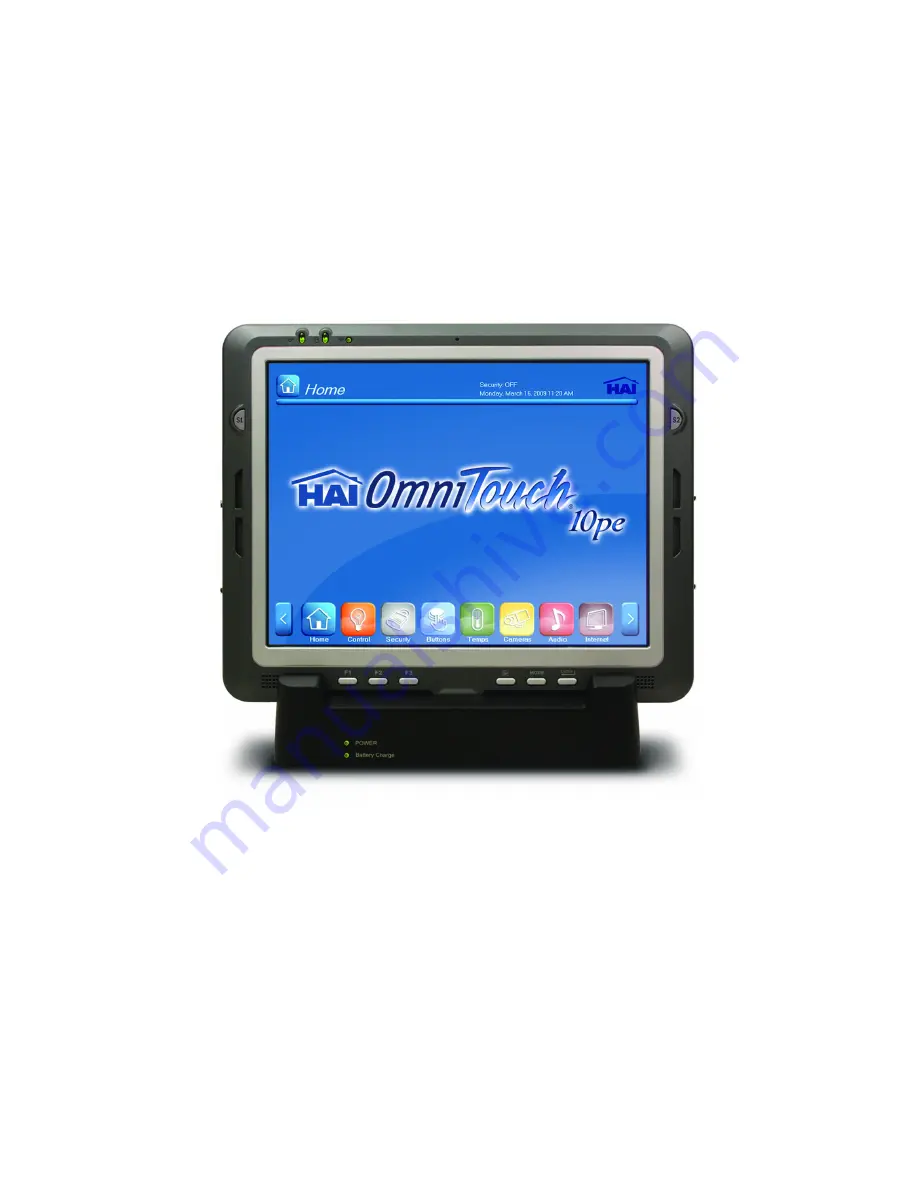
Introducing the OmniTouch 10pe  


Thank you for purchasing the OmniTouch 10pe Portable Touchscreen.  The durable OmniTouch 10pe is 

a customizable touchscreen that allows you to control all capabilities of an HAI Omni IIe, OmniPro II, 

Lumina, or Lumina Pro home control system.  


The high performance processor incorporates an additional graphic controller to provide speed and 

efficiency when in use, while using minimal power to extend battery life.  


The OmniTouch 10pe is equipped with I/O ports to provide ample connectivity.  The OmniTouch 10pe 

supports 802.11a/b/g Wireless LAN.  


The OmniTouch 10pe uses the Windows XP operating system.  Three programmable function buttons 

make it easy to interact with your home control system.  A software keyboard included enables you to 

enter and edit text.  


The OmniTouch 10pe is sealed to meet IP54 standards and is built to withstand a 3-foot drop. 


Summary of Contents for OmniTouch 10 pe

Page 1: ...10 Portable Color Touchscreen User s Manual...

Page 2: ...d trademarks or trademarks of Microsoft Corporation Other product names mentioned in this manual may be trademarks or registered trademarks of their respective companies and are hereby acknowledged Do...

Page 3: ...ice must accept any interference received including interference that may cause undesired operation This transmitter must not be co located or operating in conjunction with any other antenna or transm...

Page 4: ...n Do not cover the AC adapter with papers or other items that will reduce cooling also do not use the AC adapter while it is inside a carrying case Use only the AC adapter power cord and batteries tha...

Page 5: ...from children Do not disassemble and do not dispose of in a fire Battery Charge Notice It is important to consider the environment temperature whenever you are charging the Lithium Ion battery pack Th...

Page 6: ...iv...

Page 7: ...g the Power Switch 8 Replacing the Battery 9 Charging the Battery Using the AC Adapter 11 Charging the Battery with the Optional Docking Station 11 Turning On 12 Turning On the OmniTouch 10pe for the...

Page 8: ...vi System Specifications 27 Maintenance 29 Maintaining the Battery Pack 29 Maintaining the LCD Display 29 Cleaning the OmniTouch 10pe 29...

Page 9: ...phic controller to provide speed and efficiency when in use while using minimal power to extend battery life The OmniTouch 10pe is equipped with I O ports to provide ample connectivity The OmniTouch 1...

Page 10: ...ening the box ensure the following items are present OmniTouch 10pe AC Power Adapter Power Cord Rubber Bumpers Stylus OmniTouch 10pe Overview The following sections describe the main components of the...

Page 11: ...tivity 3 WLAN LED Off No RF signal No LAN connection Solid green WLAN connected Blinking green TX RX transmission 4 Microphone Enables you to speak into the OmniTouch 10pe for future use 5 S1 Brightne...

Page 12: ...4 Right View Number Component 1 Microphone Jack 2 Headphone Jack 3 VGA Port 4 Serial Port Left View Number Component 1 Power Button 2 USB Ports 2 3 SD Card Slot 4 Power Input Jack DC...

Page 13: ...tion 1 Left Compartment Contains the hard disk drive 2 Middle Compartment Contains SIM card slot 3 Right Compartment Contains connectors for MSR RFID or GPS module 4 External Battery Contacts Power Sw...

Page 14: ...al 94A01 1 Docking Cradle is used the OmniTouch 10pe Touchscreen should be placed in the cradle while it s not in use Note When inserting the OmniTouch 10pe into the docking cradle push down firmly Th...

Page 15: ...the LAN connector and a port on the local network 2 Serial port Connect a serial cable to connect another PC or serial device 3 USB ports host These ports connect to USB devices Connect USB type A con...

Page 16: ...ned and locked on the indents Removing the Rubber Bumpers From the rear of the OmniTouch 10pe remove the rubber bumpers Using the Power Switch The power switch located next to the external battery con...

Page 17: ...ing to local recycling guidelines in your area CAUTION The battery used in this device may present a risk of fire or chemical burn if mistreated Do no disassemble heat above 60 C or incinerate Replace...

Page 18: ...10 Replacing the Battery 1 Connect the battery connector to the connector inside the compartment 2 Place the battery inside the compartment...

Page 19: ...f 8 hours when a second battery is installed Charging the Battery Using the AC Adapter 1 Plug the AC adapter cable into the Power jack on the OmniTouch 10pe 2 Plug the power cable connector into the A...

Page 20: ...g Cradle until it snaps into place 6 The connection is secure when the bottom edge of the OmniTouch 10pe is aligned with the docking station and the LED indicator on the OmniTouch 10pe blinks green Tu...

Page 21: ...system time zone date and time before connecting to the HAI controller 1 When the OmniTouch 10pe starts up for the first time the OmniTouch 10pe configuration screen will be displayed 2 Press the Exit...

Page 22: ...Using the stylus tap the PenMount Control Panel icon in the system tray 2 Tap Control Panel to open the PenMount Control Panel 3 On the PenMount Control Panel window tap the Device tab and then tap Co...

Page 23: ...librate the stylus Configuring the Wireless Network The embedded wireless network module in the OmniTouch 10pe allows you to connect to the HAI controller and to the Internet over a wireless network A...

Page 24: ...ey 4 Enter the required network key and reenter the key for confirmation and then tap Connect 5 The wireless connection is negotiated Once connected you will see the following The Wireless Network Con...

Page 25: ...next to the year to select the correct year 4 Select a field in the time box and tap the arrows next to the time to change the value of the field 5 Tap the Time Zone tab to select the correct time zon...

Page 26: ...ured you can then enter the HAI controller connection information to connect to the controller To enter the controller connection information double tap the OmniTouchPro_10pe icon as shown When the ap...

Page 27: ...k port number identifies the logical channel to the HAI controller In most installations the default port number can remain the same Port numbers range from 0 to 65535 Press the OK button when complet...

Page 28: ...saving the settings or press the tab entitled Screen Setup to configure various operating parameters The Volume indicator displays the intensity level of the audio output The Vol Dn and Vol Up buttons...

Page 29: ...ion has been entered and the connection to the controller has been established the OmniTouchPro page is displayed Returning to the Configuration Page To return to the configuration page press on any b...

Page 30: ...2 Chapter 3 Using the Hardware Using the Stand The OmniTouch 10pe has a built in stand for easy configuration on a desk or table top Open the stand and adjust the tilt to provide the best viewing angl...

Page 31: ...ever use anything other than your finger or the OmniTouch 10pe stylus on the screen Using another object as a stylus could cause permanent damage to the display Inserting an SD Memory Card Your OmniTo...

Page 32: ...24 Removing a Storage Card...

Page 33: ...and mouse as well as other wireless devices using the USB ports on the left side of the OmniTouch 10pe The following illustration shows how to connect a USB Type A device to the OmniTouch 10pe The co...

Page 34: ...rnal jack to connect a pair of headphones Connecting a Microphone The OmniTouch 10pe features a built in microphone but you can connect an external microphone if needed Connect the microphone to the m...

Page 35: ...ouch panel Audio AC 97 Internal microphone and one speaker stereo supported via headphone jack Application Buttons Power button 1 software keyboard button 1 Mode button 1 Enter button 3 Function progr...

Page 36: ...or Main Battery Rechargeable Li ion smart battery 1900mA 3S1P Power Adapter Input 100VAC 240VAC 50 60Hz Output 19V 3 16A 60W Physical Dimensions Size 10 4 W x 9 38 H x 1 18 73 D Weight 2 6 lb Environm...

Page 37: ...batteries according to local regulations Maintaining the LCD Display Do not scratch the surface of the screen with any hard objects Do not spray liquid directly on the screen or allow excess liquid t...

Page 38: ......

Page 39: ......

Page 40: ......

Reviews: