F
Fllu
ussh
h L
Liin
ne
ess ((C
Co
on
ntt..))
B. Open the nearest cold water faucet to flush the plumbing
of any excess soldering flux, air, or any other foreign
material.
C
Ch
he
ec
ck
k ffo
orr L
Le
ea
ak
kss
A. Close all faucets.
B. Check all lines and connections for leaks.
If leaks are found
1. Turn off the main water supply.
2. Open a cold water faucet to depressurize the lines.
3. Close the faucet to eliminate any siphoning action.
4. Repair all leaks.
5. Turn on the water supply.
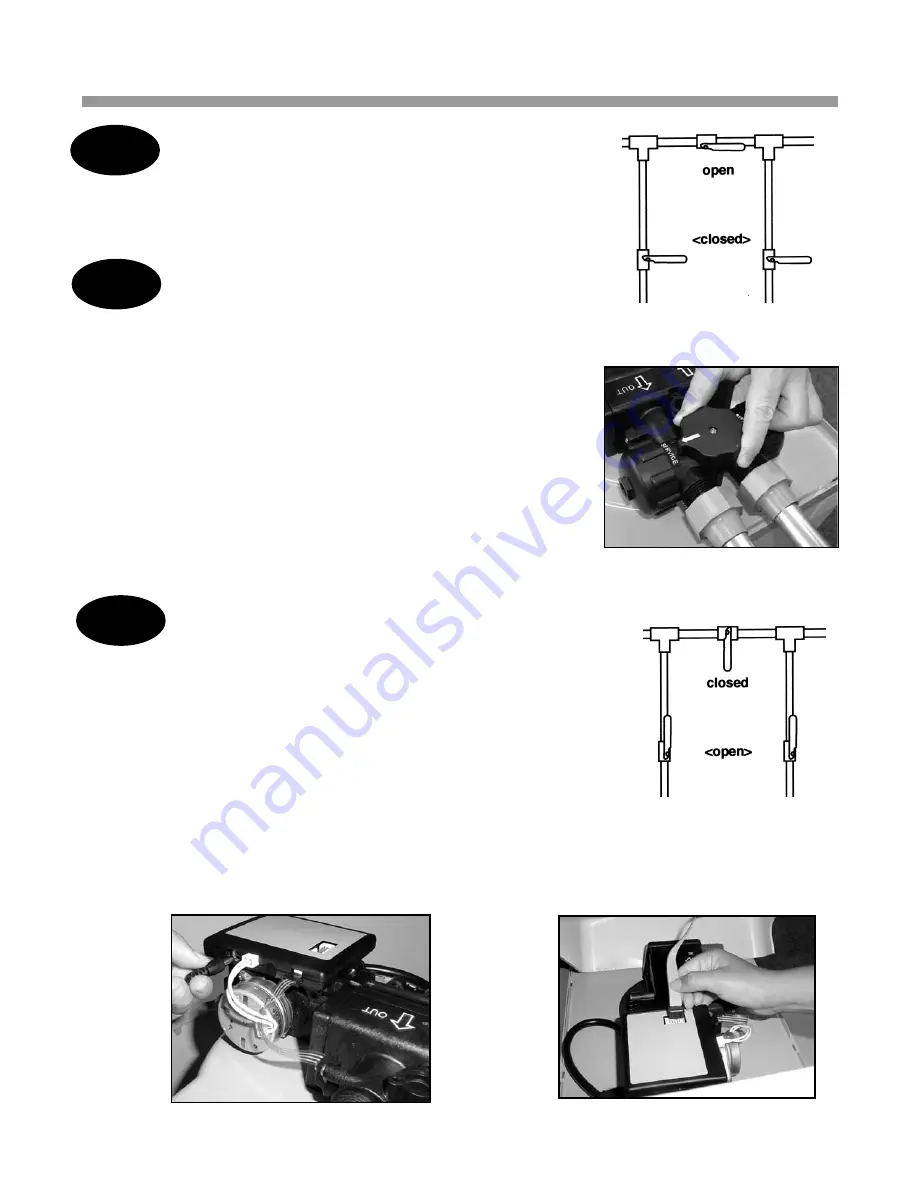
6. Place the bypass in the “service” position slowly to fill
the appliance. (See Figure 11 or 12.)
7. Open a cold water faucet to purge air out of the
appliance.
8. Close the faucet and recheck for leaks.
C
Co
on
nn
ne
ec
ctt tth
he
e C
Co
on
nttrro
olllle
err
A. Connect the transformer power cord to the back
of the controller. (See Figure 13.) Do not plug
the transformer into the wall yet.
B. Make sure the transformer cord is fed through the
same area as the drain and water lines.
C. Insert the ribbon cable plug into the receptacle
on the controller (See Figure 14.)
D. Replace the valve cover.
Note:
For future access, remove the valve cover carefully and disconnect the ribbon cable.
9
IIn
nsstta
alllla
attiio
on
n S
Stte
ep
pss a
an
nd
d S
Stta
arrtt--U
Up
p P
Prro
oc
ce
ed
du
urre
ess
Figure 10: Bypass Position
STEP 7
Figure 11: Service Position
(Appliance shown with optional bypass.)
Figure 12: Service Position
STEP 8
Figure 13: Connect Transformer Power Cord
STEP 6
Figure 14: Connect the Ribbon Cable
Summary of Contents for Maximizer 400
Page 39: ...37 N No ot te es s...


