


9-13
SECTION 9 –
MAINTENANCE AND STORAGE
Cleaning
It is not recommended to clean the Engine
Air Intake Filter element. However, a clean
damp cloth should be used to wipe away dust
and debris from the air cleaner housing.
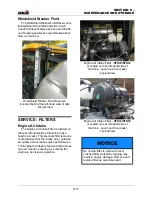
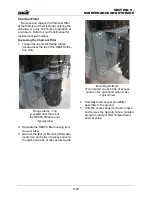
Radiator Screen
To maintain adequate airflow through the
engine cooling system, the Radiator Screen
(located ahead of rear hood) must be
inspected daily and cleaned as necessary.
Cleaning the Radiator Screen
(Preferred Method)
•
Ensure the Hydrostatic Drive Control
Handle is in the NEUTRAL position and
parking brake is engaged.
•
Start the engine.
•
Press and hold the Throttle Switch
(located near the Hydrostatic Drive Con-
trol Handle) in the UP position to throttle
engine to full RPM.
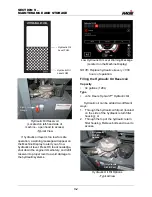
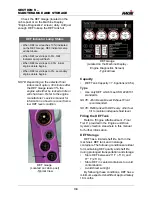
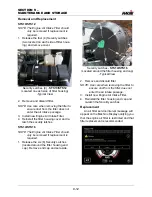
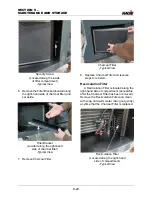
•
Press the Fan Reverse Button (located
on the Machine Display Main Menu
Page) to navigate to the “Engine Fan
Control” screen.
•
On the “Engine Fan Control” screen,
press the Reverse Button to activate the
reversible fan.
•
While the fan is in reverse mode, use a
whisk broom brush (or equivalent) to dis-
lodge large debris and dirt from the Radi-
ator Screen.
•
When finished cleaning the Radiator
Screen
, press and hold the Throttle
Switch in the DOWN position to
decrease engine RPM.
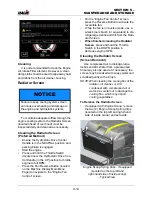
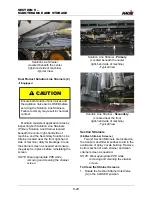
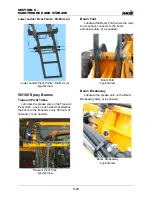
Cleaning the Radiator Screen
(Screen Removal)
Use compressed air to dislodge large
debris and dirt. Water from a pressurized
hose may also be used or if necessary, the
screen may be soaked with soapy water and
scrubbed gently with a brush.
NOTE: When cleaning the cooling fins of the
radiator, oil cleaner, or A/C
condenser with compressed air or
water, be careful not to damage the
cooling fins, which may impair
cooling capabilities.
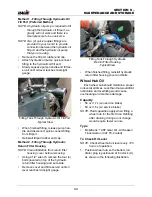
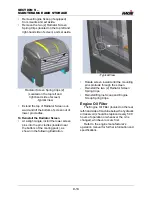
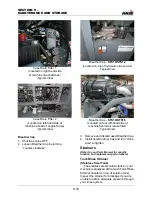
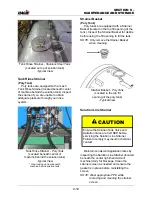
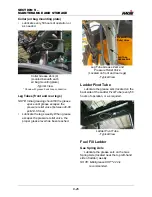
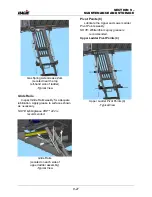
To Remove the Radiator Screen
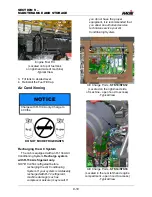
•
If equipped with Engine Scoop
, remove
the two (2) Engine Scoop Spring Clips
(located on the top left and right-hand
side of inside scoop) and set aside.
NOTICE
Failure to keep cooling systems clean
can cause overheating and damage to
the engine and hydrostatic systems.
Engine Scoop Spring Clips -
if equipped
(Located on the top left and
right-hand side of inside scoop)
-Typical View
Summary of Contents for STS/DPS Series
Page 2: ...5 DASH AUTO...
Page 5: ...Troubleshooting 10 38...
Page 52: ...SECTION 2 SAFETY AND PRECAUTIONS 2 15 650210 Located on each NORAC sensor...
Page 380: ...NOTES 5 DASH AUTO...
Page 381: ...NOTES 5 DASH AUTO...
Page 382: ...NOTES 5 DASH AUTO...


