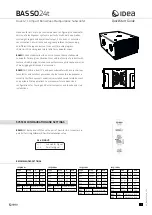
background image

– 11 –

O

PERATION

AUTO TURN-ON / SLEEP MODE

The TRM10.1/TRM12.1 subwoofers automatically turn  on when they sense an input signal.  When the signal being fed to the
TRM10.1/TRM12.1 is turned off, the subwoofer's amplifier will turn off and go into "sleep mode."  This feature eliminates the
inconvenience of operating a mechanical switch.

INPUT SENSITIVITY (GAIN)

The Input Sensitivity is used to match the TRM10.1/TRM12.1 with signal levels from a variety of mixing consoles. The Input
Sensitivity uses a variable potentiometer to match input levels over a 30dB range and is variable from 0dBu to -30dBu. The
numbers listed on the back panel indicate the input in dBu required to produce an output of 100dB SPL @ 1 meter.  When the
control is set to its full CLOCKWISE position the monitor is matched to 0dB input level (the input circuit is less sensitive to the
amplitude of the input signal).  When the control is set to its full COUNTER CLOCKWISE position the monitor is matched to
-30dB input level (the input circuit is more sensitive to the amplitude of the input signal).

LOW-PASS CROSSOVER

The Low-Pass Crossover is used to set the electrical cutoff
point of the subwoofer enclosure.  The Crossover uses a vari-
able potentiometer to set the cutoff point anywhere between
40Hz and 140Hz.  When the control is set to its full CLOCK-
WISE position the cutoff frequency is set to 140Hz Low-Pass.
When the control is set to its full COUNTER CLOCKWISE
position the cutoff frequency is set to 40Hz Low-Pass.

It is important to match the Low-Pass crossover point of the
subwoofer with the High-Pass crossover point of the high fre-
quency reference monitors.  Mismatching the crossover points
can cause peaks or dips in the acoustical response.
Overlapping the crossover points (i.e., subwoofer at 60Hz
Low-Pass & high frequency monitors at 50Hz High-Pass) will
cause a peak between 50Hz and 60Hz.  Underlapping the
crossover points (i.e., subwoofer at 40Hz Low-Pass & high fre-
quency monitors at 70Hz High-Pass) will cause a dip between
40Hz and 70Hz.   

*This graph was generated by setting the variable crossover to 

40Hz, 50Hz, 60Hz, 70Hz, 80Hz, 90Hz, 100Hz, 120Hz & 140Hz.

Electrical Crossover Response*

Summary of Contents for TRM10.1

Page 1: ......

Page 2: ...er s Name ________________________________________________________ Importer s Address ________________________________________________________ Type of Equipment 2 channel Audio Power Amplifier Speaker...

Page 3: ...he same three wire grounded connection It is important that the blades of the equip ment s plug be able to fully insert into the mating receptacle Never remove the round grounding pin on the plug in a...

Page 4: ...ioente requerida pra la operaci n segura de todo el equipo conectado Aun m s las extensiones deben proveer de la misma conecci n aterrada de tres hiles Es importante que el enchufe se pueda introducir...

Page 5: ...art des util isations de ce mat riel L utilisation de rallonge t d adaptateur est d consell e moins d tre en mesure de fournir la charge lectrique requise un fonctionement sans risque de tout mat riel...

Page 6: ...meisten Anwendungen v l lig ausreicht Wenn Sie Verl ngerungskabel benutzen achten Sie darauf das dies die erforderlichen Str me bertragen k nnen Benutzen Sie immer dreiadrige Verl ngerungskable 11 ZE...

Page 7: ...i impieghi L impiego di prolunghe e adattatori sconsigliato se questi non garantiscono la potenza sufficiente per i corretto fuinzionamento degli apparati connessi E alters importante che vengano semp...

Page 8: ...s are subject to change without notice AMPLIFIER SECTION TRM10 1 Free Field Frequency Response 27Hz 110Hz 2dB 25Hz 110Hz 2dB Peak Acoustic Output 112dB w music 2m 115dB w music 2m Total Harmonic Disto...

Page 9: ...sitivity 11 Low Pass Crossover 11 Phase Control 12 AC Line 13 LED Indicator 13 Break In and Warm Up 13 Cleaning and Maintenance 13 SERVICE REFERENCE PC Board Layout 14 Parts List 15 TRM10 1 TRM12 1 Fu...

Page 10: ...result in superior sound quality The amplifier features an auto turn on off circuit that eliminates the need for a conventional power switch Input sig nals can be fed into the amplifier via Balanced X...

Page 11: ...er transistors at ultrasonic frequencies This allows amplifier performance similar to trans nova which is highly stable and linear while utilizing the advantages of a non floating power supply THE RES...

Page 12: ...power handling by efficiently dissipating heat Subsonic Filter The TRM series uses a Subsonic Filter to prevent the woofer from reproducing inaudible frequencies Subsonic frequencies known as infrason...

Page 13: ...side Heatsink Front Panel View Front Panel View Rear Panel View Rear Panel View RCA Input Gain Low Pass Crossover Bal Unbal Input Switch Phase Control XLR Input AC Line Fuse 12 Subwoofer located insid...

Page 14: ...5 SCHEMATIC DIAGRAM NOTES Unless specified otherwise 1 All resistors in ohms 2 All capacitors in microfarads...

Page 15: ...6 Qualified Service Personnel Only Input Circuit Power Supply Schematic...

Page 16: ...7 SCHEMATIC DIAGRAM NOTES Unless specified otherwise 1 All resistors in ohms 2 All capacitors in microfarads...

Page 17: ...8 Qualified Service Personnel Only Output Circuitry...

Page 18: ...ire the subwoofer downward FIG 1 or fire the subwoofer directly facing for ward FIG 2 In either application keep the subwoofer cabinet at least 5 12 7 cm away from any wall INSTALLATION FIG 1 Downward...

Page 19: ...onductor being a ground drain In this configuration noise common on both phases of the signal is effectively canceled out The second method is an XLR Unbalanced Input using 2 conductor cable with the...

Page 20: ...t level the input circuit is more sensitive to the amplitude of the input signal LOW PASS CROSSOVER The Low Pass Crossover is used to set the electrical cutoff point of the subwoofer enclosure The Cro...

Page 21: ...RM10 1 TRM12 1 and the full range speakers 4 From the listening position alternate between the TRM10 1 TRM12 1 and the full range speakers and adjust the levels until they have the same acoustic outpu...

Page 22: ...for system troubleshooting The LED will illuminate GREEN if signal is present at the subwoofer s input The LED will turn off and the amplifier will go into sleep mode if signal is not present BREAK I...

Page 23: ...14 PC B OARD L AYOUT Qualified Service Personnel Only...

Page 24: ...4 821C R36 3 3M OHM 1 10W 5 RM 10 335B R37 10 OHM 1 10W 5 RM 10 100B R38 300 OHM 1 10W 5 RM 10 301B R39 300 OHM 1 10W 5 RM 10 301B R4 47K OHM 1 10W 5 RM 10 473B R40 20 0K OHM 1 10W 1 RM 10 2002B R41...

Page 25: ...PN SS 0792 Q18 XSTR MMBT3906LT1 PNP SS 0791 Q19 XSTR NPN MPSA06 SS 102A Q2 XSTR MMBT3904LT1 NPN SS 0792 Q2 Regulator LM317 WP 2350 Q21 XSTR MPS A56 SS 101A Q23 XSTR MMBT3906LT1 PNP SS 0791 Q3 Regulato...

Page 26: ...ances Buffer U3B unloads the attenuators and provides 6dB of gain with R25 and R73 PHASE CONTROL CIRCUIT The output signal of U3B goes directly to U4B if DS2 is left open 0 degrees phase shift If onl...

Page 27: ...nd Q21 drives the negative output MOSFET Q10 Local feedback components C47 and R86 help to sta bilize this output stage At low output voltages current flows to the woofer from the lower voltage rail L...

Page 28: ...stage of the detection circuit amplifies the WOOFER signal by 40dB to ensure that even the smallest input signal is detected and high pass filters it to eliminate DC offset errors This amplified sign...

Page 29: ...s remove the jumper TP1 and connect an ammeter across the exposed pins Adjust trimpot R9 fully counter clockwise before reapplying power to the unit After the Soft Start turn on has settled note the a...

Page 30: ...connect the transformer secondary molex FIG 1 6 Follow steps 1 5 in reverse order to install amplifier CAUTION Reconnect wires as indicated in diagram WOOFER REPLACEMENT 1 Remove 8 screws from woofer...

Page 31: ...than Hafler or an Authorized Hafler service center 3 Any product purchased outside the United States please contact your local dealer 4 Shipping charges to get the unit to Hafler 5 Any product which...

Page 32: ...s product is designed developed and assembled in the USA by a dedicated group of American workers The majority of the components used in the con struction of this product are produced by American comp...

Reviews: