15
OPERATION MANUAL
3.5 TEST RUN
Once the assembly is complete, test run your machine to make sure it runs properly and is
ready for regular operation.
The test run consists of verifying that the motor powers up and the machine runs correctly.
When operating correctly, the machine runs smoothly with little or no vibration or rubbing
noises. If, during the test run, you cannot easily locate the source of unusual noise or vibration,
stop using the machine immediately, then review the Troubleshooting section on Page 23.
If you still cannot remedy a problem, contact your distributor
4. OPERATION
4.1 BASIC CONTROLS.
The following descriptions will help you to become
familiar with the basic controls of your machine.
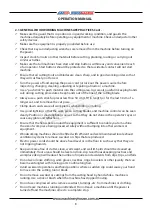
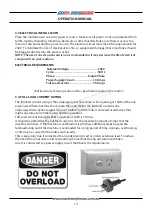
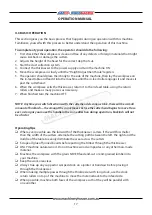
ON/OFF Switch:
Starts/stops the spindle and the
drive rollers of the Thicknesser. (Fig. 4.1)
Overload Reset Button:
This machine has a motor
thermal overload protection switch, which will trip if
the motor becomes too hot. To reset the switch, move
the ON/OFF switch to OFF, wait a few minutes to allow
the motor to cool, then press the reset button.
F
ig
. 4.1
on/oFF b
utton
r
eset
b
utton
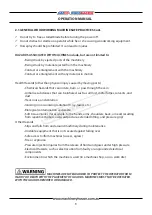
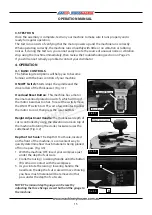
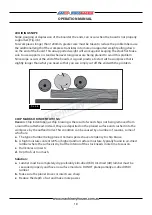
Height Adjustment Handle:
The thicknesser depth of
cut is controlled by using the elevation crank on top of
the machine. Rotating the crank clockwise raises the
cutterhead. (Fig. 4.2)
F
ig
. 4.2
h
eight
aDjustment
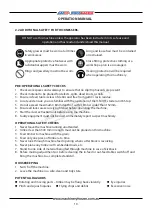
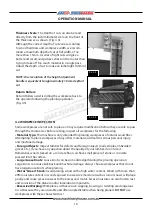
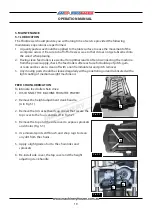
Depth of Cut Scale:
The Depth Of Cut Scale, located
on the front of the machine, is a convenient way to
quickly determine how much material is being planed
off in one pass. (Fig. 4.3)
1. With the machine OFF, insert your workpiece just
under the depth of cut scale
2. Crank the raising / lowering handle until the button
(B) comes in contact with the workpiece.
3. As you rotate the raising / lowering handle, the
needle on the depth of cut scale will move showing
you how much material will be removed in that
pass under the depth of cut scale.
NOTE: The manual depth gauge can be reset by
adjusting the three fixing screws that hold the gauge to
the machine.
F
ig
. 4.3
A
B


