17
OPERATION MANUAL
6.4 CLEANING OR REPLACING THE FILTERS
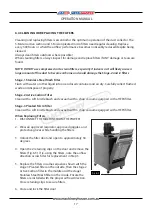
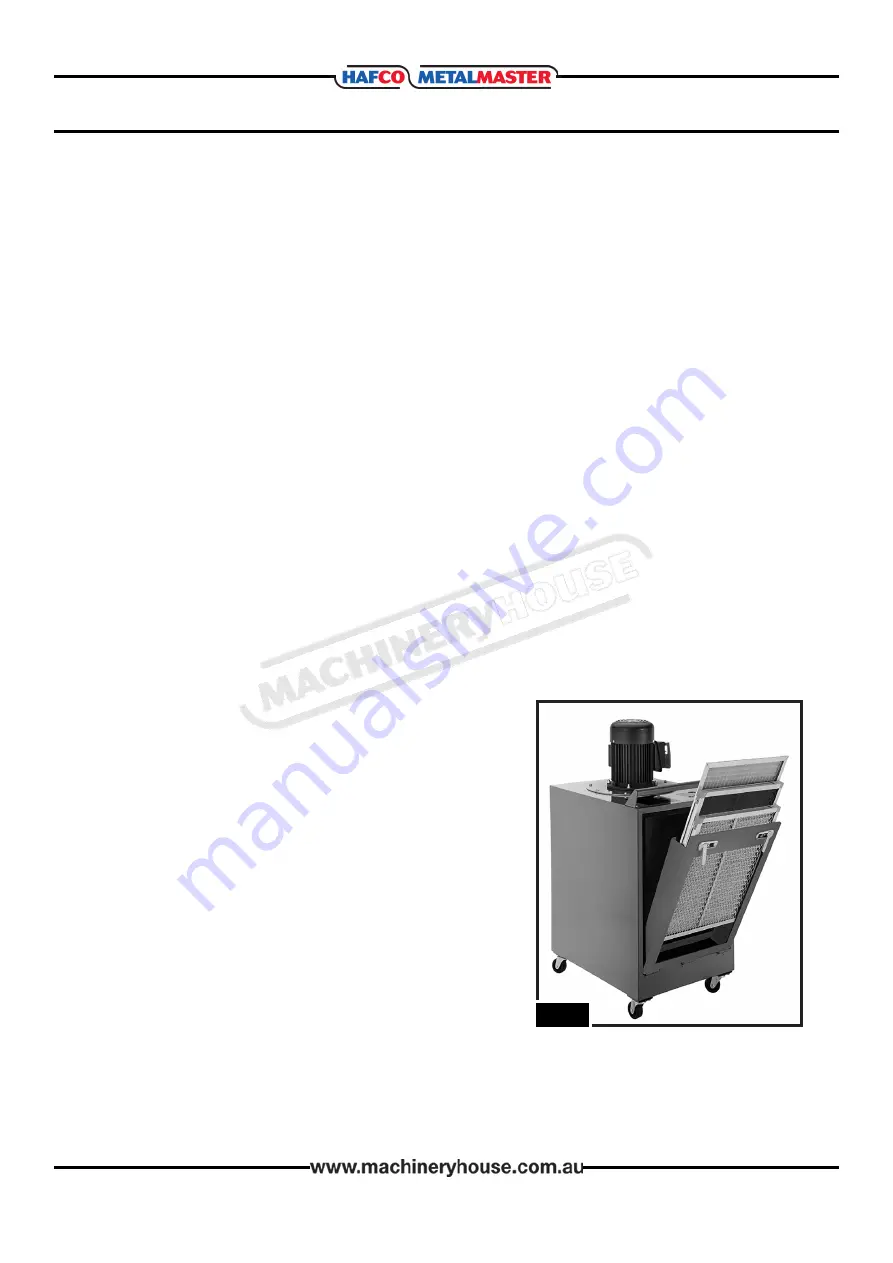
F
ig
. 6.3
Cleaning and replacing filters is essential for the optimum operation of the dust collector. The
5-Micron active carbon and 1-Micron pleated micro filters need regular cleaning. Replace
every 300 hours or when the airflow performance becomes noticeably reduced despite being
cleaned.
Always clean filters outdoors where possible!
When cleaning filters, always inspect for damage and replace filters if ANY damage or tears are
found.
NOTE: DO NOT use compressed air to clean filters, especially if indoors as it will likely cause a
large amount of fine dust to become airborne and could damage the Stage-2 and -3 filters
Stage-1 Stainless-Steel Mesh Filter
Flush with water or other liquid into an enclosed container and air dry. Carefully collect flushed
waste and dispose of properly.
Stage-2 Active Carbon Filter
Clean with a soft bristle brush and vacuum with a shop vacuum equipped with a HEPA filter.
Stage-3 Pleated Micro Filter
Clean with a soft bristle brush and vacuum with a shop vacuum equipped with a HEPA filter.
When Replacing Filters
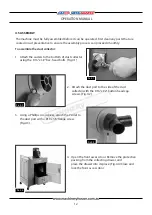
1. DISCONNECT THE MACHINE FROM THE POWER!
2. Wear an approved respirator, approved goggles, and
protective gloves while handling the filters.
3. Unlock the filter door and open to approximately 30
degrees.
4. Open the 2 retaining clips on the door and remove the
filters (Fig. 6.3). If re-using the filters, note the airflow
direction across filter for replacement in Step 5.
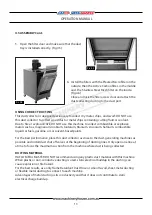
5. Replace the filters in same sequence shown with the
stage 3 Pleated filter on the outside, then the stage 2
Active Carbon filter in the middle and the stage 1
Stainless Steel Mesh filter on the inside. Ensure the
filters are installed with the proper airflow direction.
Close retaining clips to secure filters.
6. Close and lock the filter door.


