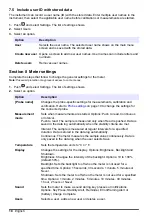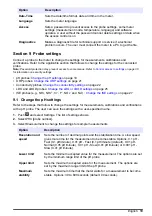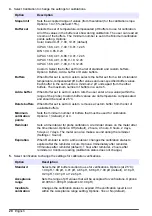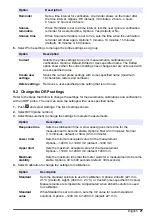
12.1 Clean the instrument
Clean the exterior of the instrument with a moist cloth and a mild soap solution and then wipe the
instrument dry as necessary.
12.2 Replace the battery
Replace the battery when the battery does not charge or does not hold a charge. Use only the
battery and the battery charger that are supplied by the manufacturer. Refer to
on page 8.
12.3 Prepare for shipping
The instrument contains a lithium-ion battery, which is regulated as a hazardous material and must
comply with hazardous goods regulations for all types of transport. Use the procedures that follow to
send the instrument for repair or maintenance:
• Disconnect the probes before shipping.
• Clean and decontaminate the instrument before shipping.
• For the best safety, remove the lithium-ion battery from the device and do not send the battery. If
the battery must be sent, keep the battery installed in the battery enclosure but do not attach the
battery enclosure to the instrument. Put the battery enclosure with the installed battery in separate
packaging to prevent contact with electrically conductive materials (e.g., metals).
• Ship the instrument in the original packaging or ship the instrument in an alternative protective
packaging.
Section 13 Troubleshooting
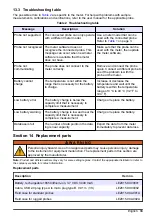
13.1 Use the on-screen troubleshooting instructions
The user interface has troubleshooting instructions to help correct problems that can occur during
measurements, calibrations and verifications. When a problem occurs, the display shows the error
or warning icon with a short description of the problem. Push the right arrow to see the
recommended procedures to correct the problem.
13.2 Export a diagnostic file
If technical support or service requests a diagnostic file, use the diagnostics option to export a file
with diagnostic records and system logs. The diagnostic file is password-protected and can only be
opened by technical support or service.
1.
Push
and select Settings. The list of settings shows.
2.
Select Diagnostics. The diagnostic data is automatically sent to the SD card in the meter.
3.
Connect the USB cable to the meter and to the PC. A File Explorer window opens.
4.
In the File Explorer window, look for a drive with the name "HQ-Series".
5.
Expand the drive and open the folder with the meter name (e.g., HQ4300).
6.
Open the diag-backup subfolder and find the exported zip file.
7.
Use the instructions from the support technician to send the file for analysis.
32
English
Summary of Contents for HQ1110
Page 2: ......
Page 12: ...Figure 4 Connect to the USB power adapter or a PC 10 English...
Page 37: ......

