background image


B-3 

Printing Labels 

The contents can be printed or written on the labels. Printing is recommended for the sake of high 

efficiency and eye-pleasant layout. 

Template for the printing 

The Word-form template is available for label printout. You can get the template from H3C local office.  

When using the template, you can directly modify the contents on the template, and the following should 

be observed:  

z


The settings of centered characters, direction, and fonts should not be changed. 

z


When there are too many characters to be filled in, zoom out the characters, but make sure the 

printouts are clear and legible. 

Cells merging on the template 

To merge the cells, you should first recover the table structure (if gridlines are displayed, you can start 

from Step 3 directly). 

1)  Select the menu item [

Edit/Select All

].  

2)  Select the menu item [

Format/Borders and Shading/Borders

]. Select 

Box

 and click <

OK

>. 

3)  Drag the mouse to select the cells to be merged and select the menu item [

Table/Merge Cells

]. 

If two merged cells are still not enough to accommodate the characters, use multiple lines. 

Requirements on the printer 

To print the labels, laser jet printer must be used, although there is no restriction on the model of the 

printer. Before printing the label, set up the page and try the printing on ordinary blank paper (both sides 

are blank): 

1)  Cover the blank paper onto the whole page of label paper, and check whether the page setup 

conforms to the requirement. 

2)  Make sure the printer properties, such as "paper size" and “direction”, have been set correctly.  

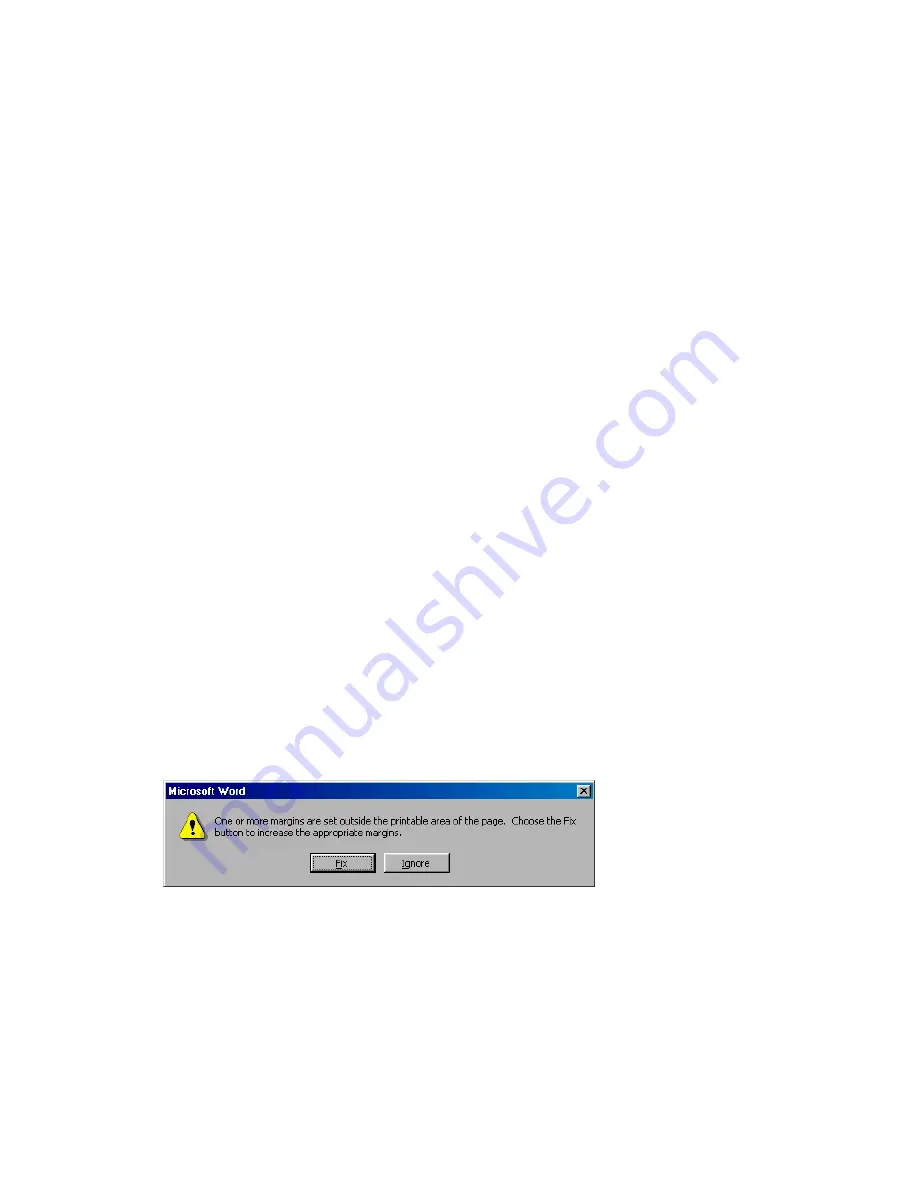
3)  If the warning prompt as shown in Figure B-3 appears before printing, click <Ignore> to continue 

the printing. 

Figure B-3 

Warning prompt before printing 


If the printout conforms to the requirement, print it to label paper. If the printout does not conform, adjust 

the page setup and try the printing again, until the correct printout is produced. The method of adjusting 

the page setup is as follows: 

1)  Select the menu item [

File/Page Setup

]. 

2) Select 

the 

Margins

 tab page. 

3)  Select Left for Gutter Position. 

4) Set 

Header

 and 

Footer

 as 0, and adjust the values of 

Top

Bottom

Left

, and 

Right

Summary of Contents for S12500 Series

Page 1: ...H3C S12500 Series Routing Switches Installation Manual Hangzhou H3C Technologies Co Ltd Manual Version 5PW110 20091216...

Page 2: ...ecPoint SecEngine SecPath Comware Secware Storware NQA VVG V2 G Vn G PSPT XGbus N Bus TiGem InnoVision and HUASAN are trademarks of Hangzhou H3C Technologies Co Ltd All other trademarks that may be me...

Page 3: ...AC Power Introduces the installation of lightning arrester for AC power of S12500 series Compliance and Safety Manual for S12500 Describes the compliance and safety specifications of the S12500 series...

Page 4: ...Series Routing Switches Operation Manual It includes Product Overview Access Volume IP Service Volume IP Routing Volume IP Multicast Volume MPLS VPN Volume QoS ACL Volume Security Volume System Volume...

Page 5: ...services are offered to fill resource gaps and ensure the success of your networking projects More information on 3Com maintenance and Professional Services is available at http www h3cnetworks com Co...

Page 6: ...at http www h3cnetworks com under support Repair Replacement Request First time users will need to apply for a user name and password Contact Us 3Com offers telephone e mail and internet access to tec...

Page 7: ...ne cards 1 12 Front Panel and LEDs 1 13 Switching Fabric Modules 1 16 Front Panel and LEDs 1 17 Interface Specifications 1 18 Console Port 1 18 Network Management Interface 1 19 AUX Port 1 19 USB Inte...

Page 8: ...ystem IPS firewall IPSec and distributed denial of service DDoS to meet the requirements of intelligent IP networks The S12500 series are mainly deployed z core layer and distribution layer of large s...

Page 9: ...e front panel 3 Power frame slot 4 Power switch 5 Upper cabling rack 6 LPU slots slots 2 to 9 7 Lower cabling rack 8 Air filter You can open the power frame front panel upwards so that you can see the...

Page 10: ...10 to 18 7 Cover plate 8 Air filter 9 System air intake vents 10 Grounding screw z The S12508 provides two MPU slots eight LPU slots and nine switching fabric module slots z The chassis top provides o...

Page 11: ...s 4 Power switch 5 Upper cabling rack 6 LPU slots slots 2 to 19 7 Lower cabling rack You can open the front panel upwards so that you can see the power supply air filter and power supply slot The air...

Page 12: ...frames to accommodate up to 2 6 PSUs z The rear of the chassis has two fan trays into which fans can be inserted horizontally The fan on top exhausts air and the one below it draws in fresh air Backp...

Page 13: ...Us the serial numbers indicate the slot numbers 7 Power monitoring module 8 Power frame switch Table 1 1 Description of power monitoring module indicators Indicator Color Status Description On The pow...

Page 14: ...mally Table 1 3 AC power module specifications Item Description Rated input voltage range 100 VAC to 120 VAC 200 VAC to 240 VAC 50 Hz or 60 Hz Max input voltage range 90 VAC to 264 VAC 47 Hz to 63 Hz...

Page 15: ...ation speed automatically according to the operation situation of the device The speed of each fan group four fan groups each having three fans is controlled to reduce noises and energy consumption ef...

Page 16: ...he chassis Main Processing Unit Specifications As the core of an S12500 switch a main processing unit MPU implements the following functions z Calculating routes and maintaining forwarding tables z Pr...

Page 17: ...Specifications Power consumption 45W to 70 W Figure 1 9 LST1MRPNC1 front panel 1 SMB coaxial clock interfaces reserved 2 MCC GE interfaces and the LEDs reserved 3 Console port 4 AUX port 5 Network ma...

Page 18: ...The MPU is faulty SFC green red Off The MPU is faulty Blinking green All the interface boards are working normally Blinking red At least one interface board is faulty On The MPU is faulty LC green re...

Page 19: ...Mbps SFP LC optical interface 10 100 1000 Mbps autosensing RJ 45 electrical interface 10GBase R SFP LC optical interface Power consumpti on 210 W to 280 W 233 W to 300 W 103 W to 135 W 115 W to 150 W...

Page 20: ...interface LEDs LED Color Status Description Off No link is present LINK Green On A link is present Off No data is being transmitted or received through the interface ACT Orange Blinking The interface...

Page 21: ...to that of the LST1XP4LEB1 For description of the interface LEDs and the board RUN LED refer to Table 1 10 and Table 1 11 respectively For the supported SFP modules and their specifications refer to...

Page 22: ...LST1GP48LEC1 Figure 1 13 LST1GP48LEB1 front panel 1 GE SFP LC optical interfaces 48 in total 2 Interface LED 3 RUN LED of the interface board The appearance of the LST1GP48LEC1 is similar to that of...

Page 23: ...abric Modules A switching fabric module is installed in the middle part of the rear end of the chassis and is responsible for exchanging data between chips The console port and 10Base T interface on a...

Page 24: ...le 1 15 Description of the interface LEDs LED Color Status Description Off No link is present LINK Green On A link is present Off No data is being transmitted or received through the interface ACT Ora...

Page 25: ...Network Management Interface z AUX Port z USB Interfaces z CF Card Slot z 10G XFP Transceiver z 10G SFP Transceiver z Gigabit SFP Transceiver z 10 100 1000 Mbps Electrical Interface Console Port The c...

Page 26: ...ir cable with a maximum transmission distance of 100 m 328 08 ft Supported services Device software upgrade and network management AUX Port The AUX port adopts an RJ 45 connector As the backup port fo...

Page 27: ...ations Item Specification Number of CF card slots 1 Supported CF card capacity 256 MB 512 MB 1 GB 256 MB by default CF card functions It can be used to record logs store multiple program files and con...

Page 28: ...125 m multimode optical fiber 550 m 1804 46 ft SFP GE SX M M850 A 850 nm 62 5 125 m multimode optical fiber 275 m 902 23 ft SFP GE LX S M1310 A 10 km 6 21 miles SFP GE LH40 SM1310 1310 nm SFP GE LH40...

Page 29: ...tly the SFP FE SX MM1310 GE only supports an interface speed of 100 Mbps 10 100 1000 Mbps Electrical Interface A 10 100 1000 Mbps electrical interface adopts an RJ 45 connector which connects with a c...

Page 30: ...MPU model LST1MRPNC1 Number of LPU slots 8 18 LPU models z LST1XP8LEB1 LST1XP8LEC1 z LST1XP4LEB1 LST1XP4LEC1 z LST1XP32REB1 LST1XP32REC1 supported on Release 1221 or above z LST1GP48LEB1 LST1GP48LEC1...

Page 31: ...Damage Prevention 2 2 Handling Safety 2 2 Laser Safety 2 3 Examining Installation Site 2 3 Weight Bearing Requirements 2 3 Temperature Requirements 2 4 Humidity Requirements 2 4 Cleanness Requirement...

Page 32: ...and equipment damage please read the following safety recommendations carefully before installing the S12500 series The recommendations do not cover every possible hazardous condition General Safety R...

Page 33: ...onic printed circuit boards z Hold the edges of the PCB when necessary Do not touch any electronic components or printed circuit Take the following steps to use the ESD preventive wrist strap 1 Wear t...

Page 34: ...Examining Installation Site The S12500 series can only be used indoors To ensure that the switch works normally and to prolong its service lifetime the following requirements should be met in terms of...

Page 35: ...0 Storage humidity noncondensing 5 to 95 Long lasting high humidity in the equipment room is prone to poor insulation or even leakage of the insulating material Sometimes the mechanical performance de...

Page 36: ...rces no matter whether outside or inside the system affect the switch in use through capacitive coupling inductive coupling electromagnetic radiation common impedance including the grounding system co...

Page 37: ...quirements z Height It is recommended to use a cabinet that is over 2 2 m 86 61 in in height z Weight bearing and power The cabinet should be sturdy enough to support the switch and installation acces...

Page 38: ...ng pliers wire punch down tool Meters Multimeter 500 V Meg ohmmeter used for measuring the insulation resistance error detector optical power meter earth resistance tester The instruments and tools ar...

Page 39: ...unding Environments 3 6 Installing a PSU 3 8 Installation Procedures 3 8 Installation Preparation 3 8 Installing a PEM 3 8 Installing a PSU 3 9 Installing a Fan Tray 3 10 Installation Preparation 3 11...

Page 40: ...g cable Install the fan tray Install an LPU Install the PSU Connect port cables Verify the installation End Install the switch to the specified position Prepare for installation Install the switch on...

Page 41: ...Installing the Switch in a Rack Installing the mounting brackets Attach the mounting brackets onto the left and right sides of the switch as shown in Figure 3 2 Figure 3 2 Install the mounting bracke...

Page 42: ...to fix the mounting brackets to the rack posts as shown in Figure 3 3 Figure 3 3 Install the switch in a standard 19 inch cabinet Verifying Installation After installing the switch check the installa...

Page 43: ...0 8 m 2 62 ft of clearance around the device for heat dissipation Step1 Carry the switch at both sides with another person to the place in front of the workbench slowly Step2 Lift the device a little...

Page 44: ...grounded The resistance reading between switch chassis and the ground must be less than 1 ohm Connection in Generic Grounding Environment Generally cabinets are equipped with a grounding strip You ca...

Page 45: ...Connection in Other Grounding Environments Following are some methods for grounding the switch in different grounding environments that you are likely to encounter when installing the switch at diffe...

Page 46: ...4 Grounding strip z If an area with exposed earth is available nearby where a grounding conductor can be buried hammer a 0 5 m 1 64 ft or longer angle iron or steel tube into the earth Weld the yellow...

Page 47: ...z Put on an ESD preventive wrist strap and make sure that the ESD preventive wrist strap is properly grounded z Remove the blank panel if any from the slot to be used Hold a PEM or PSU by the bottom...

Page 48: ...evenly on an S12518 z Before inserting or removing an AC PSU make sure that the device is sturdy enough Because the device is relatively high avoid incline of the device when inserting or removing a P...

Page 49: ...position The PSU installation is complete as shown in Figure 3 12 Figure 3 12 Complete installation of the PSU When hot plugging PSUs make sure that the insertion interval is no less than 30 seconds...

Page 50: ...ottom when moving it Do not lift the module by the handle otherwise the module may be damaged z Cooperation with a partner is recommended because the fan tray is heavy Operate the fan tray with cautio...

Page 51: ...he chassis LST1XP32REB1 and LST1XP32REC1 respectively have three areas that are designed on their integrated circuit boards and marked as HAND OPERATION AREA as shown in Figure 3 14 Hold the two LPUs...

Page 52: ...the captive screws that fix the MPU to the protective box with a Philips screwdriver z Pull the MPU out of the protective box gently Step2 Move the ejector levers of the MPU outwards hold the MPU by t...

Page 53: ...cabling racks on chassis sides and then routed up or down to pass through the chassis top or the raised floor depending on the available equipment room condition that is signal cables are routed into...

Page 54: ...CD 5 SG 5 GND 5 SG 6 RXD 3 TXD 7 DSR 4 DTR 8 CTS 7 RTS Connection procedures Step1 Plug the DB 9 female connector of the console cable to the serial port of the PC or terminal where the switch is to...

Page 55: ...k cables are shipped with the switch You need to purchase one if needed Introduction to RJ 45 connector The 10 100 1000Base T ports of the S12500 series support MDI MDI X auto sensing They are connect...

Page 56: ...d the fiber matches the adopted optical port z Before connecting a fiber make sure that the optical power at the receiving end does not exceed the upper threshold of the optical receive power of the o...

Page 57: ...is 20 D and the minimum static bend radius is 10 D D indicates the outer diameter of fiber jackets z If the fiber has to pass through a metallic board hole the hole must have a sleek and fully fillete...

Page 58: ...through the right part of the clip as shown in Figure 3 19 Step2 Insert one end of the AC power cord accompanied with the switch into the socket on the PSU Step3 Install the right part of the clip an...

Page 59: ...d fasten the screws to fix the OT terminals of the power cables as shown in Figure 3 21 Figure 3 21 Connect the power cable to the PEM 2N 1 Group 1 of 25 A single phase power cables for PSUs in Slot 1...

Page 60: ...must be normal Table 3 4 Installation checklist Result Item Yes No Remarks The PGND cable is correctly grounded Fan trays are correctly installed and have a tight contact with the backplane PSUs are...

Page 61: ...3 22 Result Item Yes No Remarks Switching fabric modules are correctly installed and have a good contact with the backplane The console cable is correctly connected...

Page 62: ...ng Up Configuration Environment 4 1 Setting Up Configuration Environment 4 1 Setting Terminal Parameters 4 1 Powering On the Switch 4 4 Checklist for Switch Power On 4 4 Powering on the Switch 4 4 Ver...

Page 63: ...uses a PC running Windows XP HyperTerminal as an example Step2 Select Start Programs Accessories Communications HyperTerminal to access the HyperTerminal window Click in the window to set up a new co...

Page 64: ...rial port parameters Set the bits per second to 9600 data bits to 8 parity to none stop bits to 1 and flow control to none Figure 4 3 Set serial port parameters Step5 Click OK after setting the serial...

Page 65: ...Select Properties in the HyperTerminal window to access the Properties window Click Settings in the Window as shown in Figure 4 5 select VT100 for terminal emulation and click OK You are recommended...

Page 66: ...he switch label z The console cable is correctly connected the console terminal or PC is powered on and the terminal parameters are properly configured Before powering on the switch learn where the po...

Page 67: ...will be output at the console terminal when you power on the switch DDR2 SDRAM test successful System is starting Booting Normal Extend BootWare The Extend BootWare is self decompressing Done H3C S125...

Page 68: ...is given in this example Starting to get the main application file flash switch bin The main application file is self decompressing Done System is starting Starting application at 0x00100000 TLB init...

Page 69: ...7 H3C The S12500 series provide abundant command views For more information about the configuration commands and the command line interface CLI see H3C S12500 Series Routing Switches Operation Manual...

Page 70: ...ng and Cleaning the Air Filter 5 2 Removing an LPU 5 4 Removing a Fan Tray 5 5 Removing the Interface Cover on the MPU 5 6 Software Update 5 7 Recommended Update Procedure 5 7 Updating Applications on...

Page 71: ...arts with a high voltage hazard sign Follow these steps to remove the PSU Step1 Remove the PSU Step2 Remove the PEM Removing the PSU Step1 Press the clip at the bottom left corner of the PSU to releas...

Page 72: ...ver to loosen the captive screws on the front panel of the PEM Step2 Pull the PEM out slowly along the slide rails as shown in Figure 5 2 Figure 5 2 Remove a PEM Replacing and Cleaning the Air Filter...

Page 73: ...er Step1 Hold the air filter by two edges and position it closely to the right place Step2 Fasten the captive screws on the air filter Figure 5 4 Install the air filter of an S12508 1 Lower fan tray 2...

Page 74: ...air filter of an S12518 Removing an LPU Fabric switching modules LPUs and MPUs for the S12500 are hot swappable Removal procedures for these three types of boards are similar This section describes ho...

Page 75: ...stop rotating Keep your hands away from the spinning fan blades when removing the fan tray z Do not keep the switch working without a fan tray for a long time to ensure normal operation of the switch...

Page 76: ...n case you may use these SMB coaxial clock interfaces when they are supported Step1 Remove the MPU and lay it on a workbench or table Stand behind the module with its front panel facing the same direc...

Page 77: ...terface CLI z When loading the BootWare and host software make sure that the BootWare version matches the software version You need to load the correct BootWare only if the software version to be load...

Page 78: ...ting Normal Extend BootWare The Extend BootWare is self decompressing Done H3C S12500 BootWare Version 1 00 Copyright c 2004 2008 Hangzhou H3C Technologies Co Ltd Compiled Date May 20 2008 CPU Type MP...

Page 79: ...Parameters in the display information are for reference only After pressing Ctrl B you can see the prompt for entering user BootWare password Enter the correct password superman by default and the sys...

Page 80: ...ck mode negotiation After passing the negotiation the sender is allowed to send the first data packet Upon the receipt of the complete packet the receiver checks the packet using the agreed checking m...

Page 81: ...te Main Application File 3 Update Backup Application File 4 Update Secure Application File 5 Update User Private File 6 Modify Serial Interface Parameter 0 Exit To Main Menu Enter your choice 0 6 2 z...

Page 82: ...net port TFTP z Introduction to TFTP Trivial file transfer protocol TFTP is well suited to the file transfer between a server and a client that do not need complex interaction In TFTP the transmission...

Page 83: ...ownload Application Program To SDRAM And Run 2 Update Main Application File 3 Update Backup Application File 4 Update Secure Application File 5 Update User Private File 6 Modify Ethernet Parameter 0 E...

Page 84: ...s will not be covered here Updating software through management Ethernet port FTP z Introduction to FTP The S12500 series applications can also be updated through the Ethernet port using FTP Following...

Page 85: ...boot Enter your choice 0 9 4 File CONTROL Note the operating device is cfa0 1 Display All File s 2 Set Application File type 3 Delete File 0 Exit To Main Menu Step2 Select 2 to enter the interface for...

Page 86: ...Special Operation 0 Reboot Enter your choice 0 9 9 PRODUCT SPECIAL OPERATION 1 Modify Chassis ID Operation 2 Modify Working Mode 3 Modify PCL Key 4 Skip Current System Configuration 0 Exit To Main Me...

Page 87: ...ION 1 Modify Chassis ID Operation 2 Modify Working Mode 3 Modify PCL Key 4 Skip Current System Configuration 0 Exit To Main Menu Step2 Select 2 to enter the submenu for modifying the system working mo...

Page 88: ...ge memory of the switch such as the Flash or CF card using FTP Suppose the IP address of the FTP server is 10 10 110 1 20090101 bin is to be downloaded to the switch but has its name renamed as SWITCH...

Page 89: ...gic software is lst1xp4 app Step1 Update the BootWare program running on a certain board H3C bootrom update file flash swv1r1 btw slot 0 Step2 Specify the next boot program H3C boot loader file flash...

Page 90: ...m loading fails or you cannot register for a long period z Check LPU type to see if this type is supported on the current host program z Check whether LPUs and MPUs are well seated z Insert an LPU to...

Page 91: ...i Table of Contents Appendix A Cable Management A 1 Correct Use of Labels A 1 Cable Management Requirements A 1...

Page 92: ...nt cables power cord signal cable PGND wire etc should be cabled and bound separately rather than together in the cabinet If they are close to each other you can cable them in cross shape For parallel...

Page 93: ...where the cables will not affect the operation of the device or impair the device or be damaged z The power cords cannot be tied on the guides of any mobile components z Reserve some redundancy for th...

Page 94: ...e power cords of the same type and in the same direction should be bound together and kept neatly and straight The following table lists the requirements in the binding with cable ties Table A 1 Tie b...

Page 95: ...ixing Labels B 5 Information Carried on Labels B 7 Remarks B 7 Engineering Labels for Ethernet Cables B 8 Engineering Labels for Optical Fibers B 9 Labels for the Fiber that Connects Two Devices B 9 L...

Page 96: ...l cables of alarm box Ethernet cables optical fibers trunk cables and subscriber cables excluding the antenna feeders In case there is special requirement from the user of the equipment on the descrip...

Page 97: ...label when affixing it to the cable and its size is 1 0mm 2 0mm There is a mark TO upside down in the figure at the lower right corner of the label The mark is used to identify the opposite end of th...

Page 98: ...item Table Merge Cells If two merged cells are still not enough to accommodate the characters use multiple lines Requirements on the printer To print the labels laser jet printer must be used although...

Page 99: ...e printout the dividing lines and the mark TO should not be covered by the printed characters z When the cells are merged and the printouts are made in multiple lines avoid covering the mark TO when p...

Page 100: ...ows the method to affix the label when the cable is laid horizontally The label is affixed 2cm from the connector on the signal cable In special cases for example to avoid cable bent or affecting othe...

Page 101: ...it to the identification plate on the cable tie The label should be stuck to the rectangular flute and should be stuck to only one side of the identification plate Make sure to affix the labels on th...

Page 102: ...e location information of local end of the cable z Area 2 with the mark TO contains the location information of the opposite end of the cable z Area 3 has been folded up inside the label Figure B 9 Pr...

Page 103: ...ft right order with two digits for example 01 MN Cabinet number For example B02 MN Z Z Location number Valid location number of the terminal device onsite If the cable is connected to a router in a ca...

Page 104: ...interfaces on the boards in a frame or on the device boxes There are two types of labels for optical fibers one is for the fiber that connects the optical interfaces on two devices the other is for t...

Page 105: ...room G01 01 01 01 T indicates that the opposite end of the optical fiber is connected with Optical Transmitting Interface 01 on Slot 01 Frame 01 in the cabinet on Row G Column 01 in the machine room L...

Page 106: ...cates that the local end of the optical fiber is connected with the optical receiving terminal on Row 01 Column 01 of the ODF in Row G Column 01 in the machine room A01 01 05 05 R indicates that the o...

Page 107: ...ven in similar methods Example of the label Make sure that labels are affixed in correction direction That is after the cable ties are bundled onto the cable the identification plates with the labels...

Page 108: ...V AC cables and related PGND and BGND cables are covered with insulating sheath so the labels only need to contain the words of AC and the cabinet number The labels for AC power cables are affixed to...

Page 109: ...s the label on the power socket side which carries the information about the position of the cable on the loaded cabinet side On the loaded cabinet side the label marked with A01 AC indicates that the...

Page 110: ...i Table of Contents Appendix C Installation of Lightning Arrester for AC Power C 1...

Page 111: ...C power on the cabinet workbench or the wall of equipment room Figure C 1 Diagram of lightning arrester Mainboard Grounding and polarity indicator red On means that the lines are wrongly connected eit...

Page 112: ...und wire of the arrester is not well grounded or because the live and zero wires are connected in reverse direction You may check that in the following way When the red LED is on use a multimeter to e...

Page 113: ...anada regulatory compliance D 3 ICES 003 D 3 Japan regulatory compliance D 3 VCCI D 3 CISPR 22 compliance D 3 Appendix E Safety Information Sicherheits informationen E 1 Overview berblick E 1 Conventi...

Page 114: ...55022 CLASS A AS NZS CISPR22 CLASS A CISPR 24 EN 55024 EN 61000 3 2 EN 61000 3 3 ETSI EN 300 386 GB 9254 GB 17625 1 Safety UL 60950 1 CAN CSA C22 2 No 60950 1 IEC 60950 1 EN 60950 1 A11 AS NZS 60950...

Page 115: ...d the expenses incurred therefrom shall be covered by the customers This equipment has been tested and found to comply with the limits for a Class A digital device pursuant to Part 15 of the FCC Rules...

Page 116: ...ion Technology Equipment ITE Warning If this equipment is used in a domestic environment radio disturbance may arise When such trouble occurs the user may be required to take corrective actions CISPR...

Page 117: ...r all safety precautions that should be followed They are only the supplements to the safety precautions for operations as a whole Therefore the personnel in charge of the installation and maintenance...

Page 118: ...den nationalen Sicherheitsvorschriften W hrend der Arbeit mit den Produkten sind deshalb grunds tzlich alle Sicherheitsvorschriften und spezifischen Sicherheitshinweise genau zu beachten Das f r die...

Page 119: ...orderlich die folgenden Regeln zu beachten z Read all the instructions before operation z Lesen Sie alle Anweisungen sorgf ltig durch bevor Sie mit dem Arbeiten beginnen z z The unit system must be in...

Page 120: ...phase conductors all current carrying conductors z Dieses Produkt muss so installiert werden dass es gegen Kurzschluss berstrom abgesichert ist Stellen Sie sicher dass die Sicherungswerte auf allen Ph...

Page 121: ...Installation der Wechselstromversorgung sind die rtlichen Sicherheitsbestimmungen zu beachten Das Personal muss besonders qualifiziert sein f r das Arbeiten mit Hochspannung und Wechselstrom z AC z C...

Page 122: ...gung von Leitungen und Verbindungen den rtlichen Anforderungen und Sicherheitsvorschriften entsprechen Arbeiten mit Hochspannung d rfen nur von qualifiziertem Fachpersonal durchgef hrt werden AC Power...

Page 123: ...mer ob das von Ihnen verwendete Kabel den Anforderungen entspricht z For DC power supplied equipment please use 10 mm2 or 6 AWG minimum power supply cord For AC power supplied equipment please use 2 5...

Page 124: ...zen ist eine ordnungsgem e Erdung erforderlich AC Lithium Battery Lithiumbatterie There is danger of explosion if battery is incorrectly replaced Replace only with the same or equivalent type recommen...

Page 125: ...n auf keinen Fall durch Verbrennen Fuse Sicherung For the safety of continuous operation please replace the fuse with that of the same type and rating if necessary Ersetzen Sie die Sicherung bei Bedar...

Page 126: ...sem Laser ausgehende Gefahr entspricht der Kategorie 1 1 When performing installation and maintenance operations of optical fibers you should not stand close to or look into the optical fiber outlet d...

Reviews: