background image

7

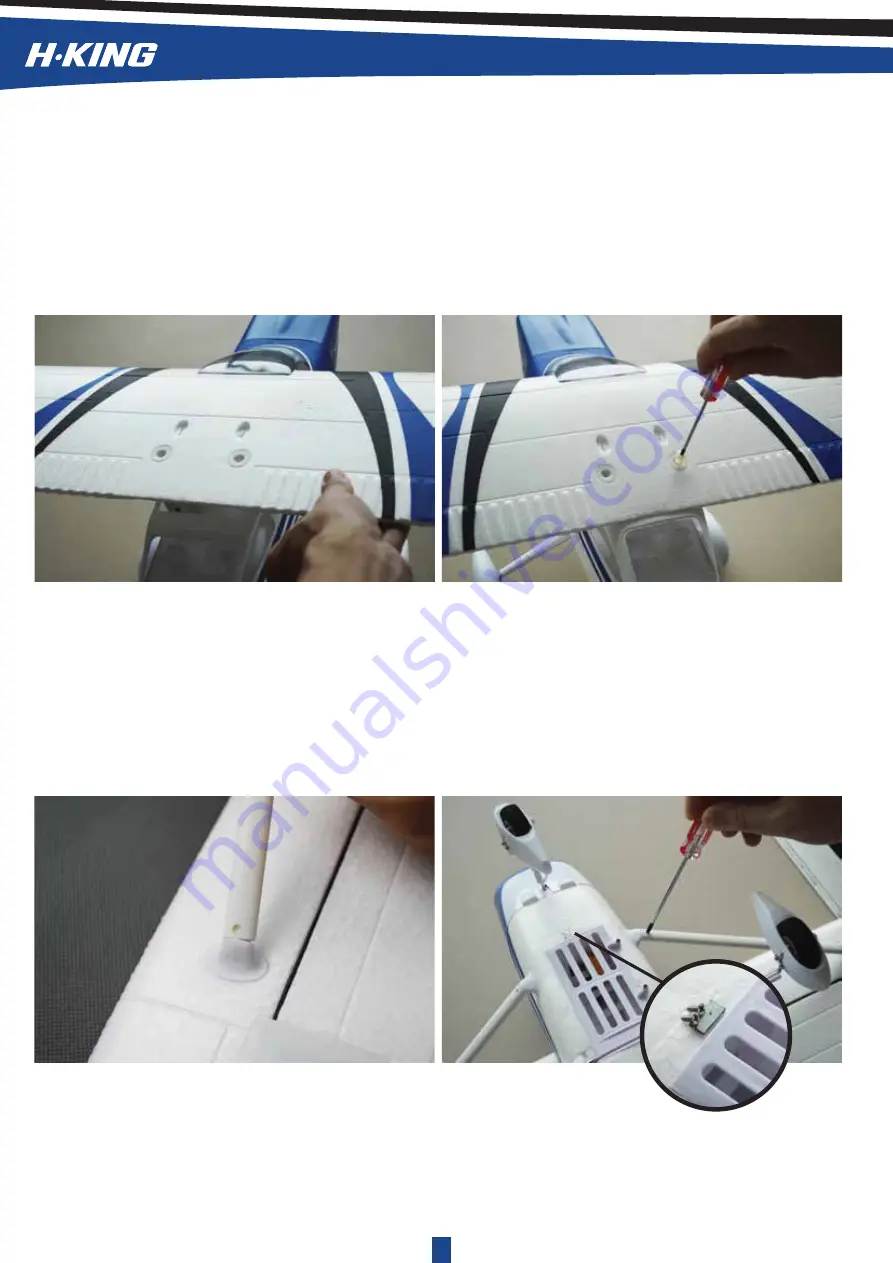
11. You may install the wing onto the fuselage now. Align the plastic dowel on the wing leading 

edge to the wing saddle bulkhead. Install the nylon wing bolts on the wing as shown. Screw the 
nylon bolts until the wing is fully seated on the wing saddle. The aileron servos and navigational 
lights are all hooked up at the same time. Thanks to the new quick and easy PCB connector 
design!

12. Install the wing structs into place as shown. First install one side of the struct to the wing 

and then install the other side to the fuselage as shown. Use the metal sheet screws to lock 
it in place. We have installed a small magnet just at the front of the battery compartment to 
collect the mounting screws. This design which comes in handy when you are going to 
setup the plane at the field.

Summary of Contents for Cessna Skyline

Page 1: ...instruction manual H King R C scale model series...

Page 2: ...y cause damage to the plane or serious injuries to your body 5 Do not fly in the thunderstorm strong wind or bad weather 6 Never fly R C planes where there are power lines overhead automobiles airport...

Page 3: ...A Brushless ESC Recommend R C System 2 4GHz 4Ch Radio and up Servo 9g x 4pcs Propeller 7045 3 blade prop 1 Fuselage 2 Main wing 3 Horizontal tail 4 Rudder 5 Main undercarriage with plastic fairings 6...

Page 4: ...on t apply beyond the width of the tail Align the horizontal tail to the fuselage and ensure it is squared and levelled 1 Install the main undercarriage by slightly holding either side of the landing...

Page 5: ...wn in red line and leave it aside for glue set GLUE 3 Connect the plastic clevis to the control horn Ensure the servo horn is in 90 degree angle to the pushrod and elevator is in level position Adjust...

Page 6: ...udder fin is squared and perfectly perpendicular to the horizontal tail 8 Connect the plastic clevises to the rudder control horn Ensure the servo horn is in 90 degree angle and rudder is in level pos...

Page 7: ...pond to the channels on your receiver 10 Then tuck the receiver into the compartment and install the cockpit floor back into place Ensure that the placement of the receiver will not interfere with the...

Page 8: ...ights are all hooked up at the same time Thanks to the new quick and easy PCB connector design 12 Install the wing structs into place as shown First install one side of the struct to the wing and then...

Page 9: ...8 13 Wing structs setup as shown 14 Apply glue to both of the plastic antennas and stick it on top of the wing...

Page 10: ...ith a lock nut supplied in the kit Note Use loctite on all screws and mounting bolts to prevent from loosening during flights Install the plastic spinner on the motor shaft 15 First install the propel...

Page 11: ...10 17 Done 18 45 48mm Check the center of gravity and make sure that the CG of the plane should be within the range as indicated 12 15mm 12 15mm 12 15mm 12 15mm Aileron 12 15mm 12 15mm...

Page 12: ...t this level of product This is not a toy only for adult Age under 14 should be supervised with adult Please read this manual carefully before using this product for the sake of safety Hobbyking model...

Page 13: ...12 20A ESC Input Voltage Programmable lost...

Page 14: ...13...

Page 15: ...14...

Page 16: ...15 7...

Page 17: ...16 8 9 Low Voltage Cutoff Type...

Page 18: ...17...

Page 19: ...18...

Reviews: