background image


Guru GX

19


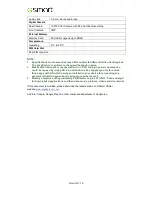
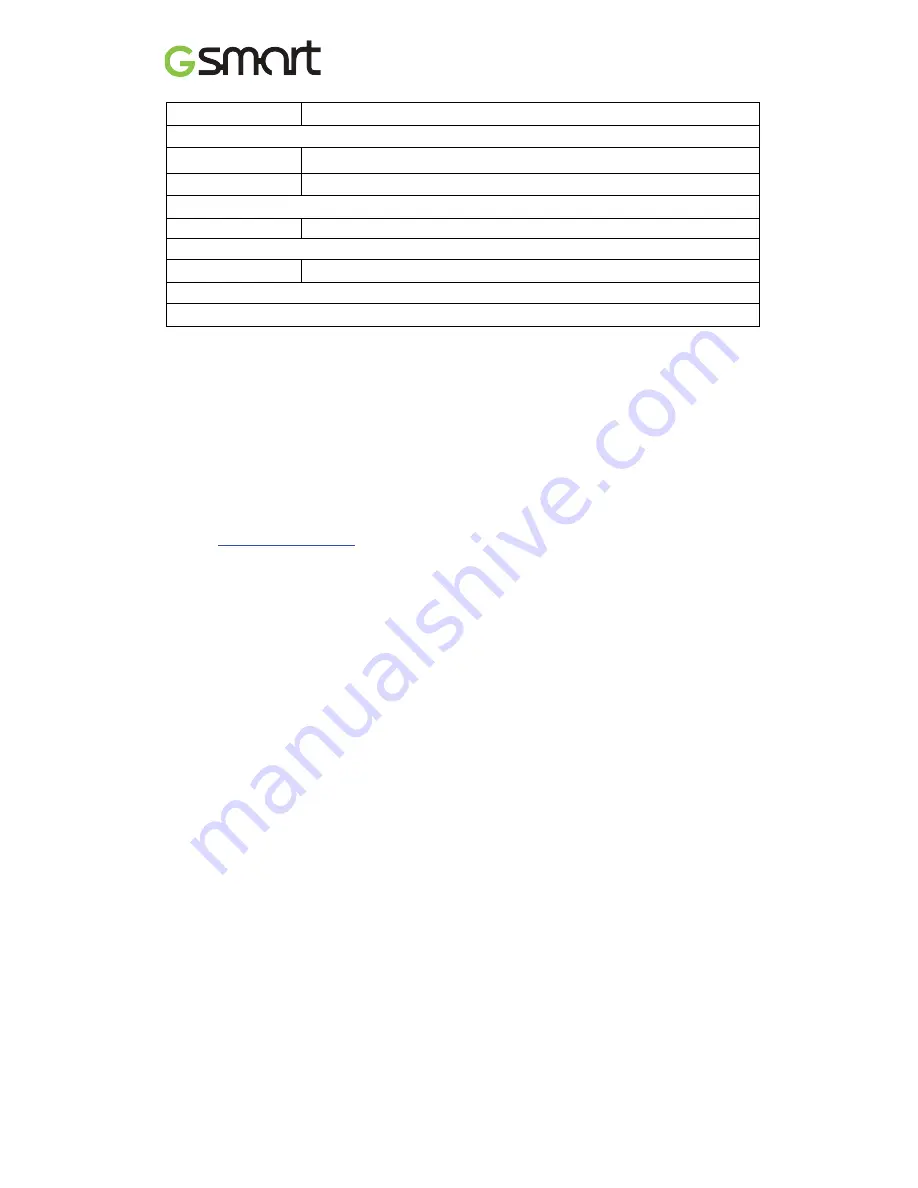
Audio Jack 

3.5 mm stereo audio jack 

Digital Camera 

Rear Camera 

13MP Color Camera with AF and Video Recording


Front Camera 

5MP


External Memory


Memory Card 

Micro SD supports up to 64GB 

Temperature


Operating 

0°C to 40°C 

SIM Card Slot 

Dual SIM card slot. 


NOTE:   

1.  Specifications and accessories may differ subject to different SKUs or/and regions. 

The specification is subject to change without prior notice. 

2.  Mobile data interruption, unexpected error in CPU and high power consumption 

could be caused by in-app AD in Android phone. We suggest you try to remove 

those apps with AD which had been installed in your device for preventing any 

abnormal situation happens and saving more power as well. 

3.  Memory comprises of approximately 5 GB firmware, plus 27 GB of “Phone storage” 

for downloaded applications and their data, music, pictures, videos and documents. 


If this document is modified, please download the latest version on GSmart official 

website.

www.gigabytecm.com 


Android, Google, Google Play and other marks are trademarks of Google Inc. 

Summary of Contents for Guru GX

Page 1: ...GSmart Guru GX User Manual ...

Page 2: ...oftware text music and pictures are owned by or authorized by original manufacturers to GIGA BYTE COMMUNICATIONS INC Reproduction transfer distribution or storage of part or all of the contents in this document in any form without the prior written permission of GIGA BYTE COMMUNICATIONS INC is prohibited GIGA BYTE COMMUNICATIONS INC ...

Page 3: ...xcessive pressure on them and remove the device from your pants pocket before you sit down It is also recommended that you only use the stylus or your finger to interact with the touch screen It is not covered by the warranty that you crack the touch screen because of the improper usage When you use the device for a long time such as talking on the phone browsing online or charging the battery the...

Page 4: ... Off 6 1 5 Lock Unlock 6 1 6 Contacts 7 1 7 The Home Screen 7 2 Phone Functions Messages 11 2 1 Voice Calls 11 2 2 Creating and sending a text message 11 2 3 Multimedia Message 12 3 Wi Fi Bluetooth 13 3 1 Wi Fi 13 3 2 Bluetooth 13 4 Multimedia Applications 14 4 1 Camera 14 4 2 Music 15 5 Pre Installed Programs Introduction 16 6 Managing Your Phone 17 6 1 Protecting Your Phone 17 6 2 Reset Your Pho...

Page 5: ...peaker 8 Home 17 Main MIC 9 Return 18 Micro USB Port 1 2 Installing or uninstalling the SIM Card Battery and Memory Card To install the SIM card There are two SIM card slots SIM1 use with Micro SIM card and SIM2 use with Nano SIM card 1 Hold the phone face up 2 Insert the tip of the tray eject tool into the tray eject hole next to the SIM card slot 3 Push the tip all the way into the hole until th...

Page 6: ... certain apps to the storage card if the apps support this feature The Memory card slot is same slot with SIM2 To install the memory card 1 Hold the phone face up 2 Insert the tip of the tray eject tool into the tray eject hole next to the microSD card slot 3 Push the tip all the way into the hole until the microSD card tray ejects 4 Pull the microSD card tray out and place the microSD card contac...

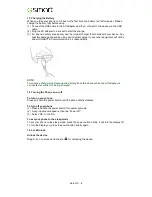
Page 7: ...mmunication Inc s responsibility NOTE To ensure safety do not remove the battery from the phone while the AC adapter is connected or while it is being charged 1 4 Turning the Phone on or off To turn on your phone Press and hold the power button until the phone shortly vibrates To turn off your phone 1 Press and hold the power button for several seconds 2 A pop up window appears then tap Power off ...

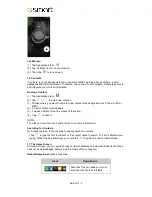
Page 8: ... screen appears 5 Tap each field to fill out the contact information 6 Tap to save it NOTE The SIM card contact can t add picture to contact information Searching for Contacts On Contact Screen follow the step to easily search for contacts Tap to type the first few letters of the contact name to search The list is filtered when typing When finishing searching you could tap to go back to the contac...

Page 9: ...om of the home page have different functions Self defined Home Screen You can add the shortcuts and widgets Tap to launch Application Drawer Icons Functions Tethering or hotspot active Tap to turn on off network Enable disable Wi Fi Enable disable Bluetooth Enable disable Google Location Service Enable disable Data Synchronization Tap to adjust the brightness ...

Page 10: ...tery is charging Network and Connection Maximum signal strength Fewer bars indicate lower signal strength Left icon is SIM1 signal WCDMA GSM 4G Right icon is SIM2 signal GSM GPRS EDGE 3G HSPA 4G is in progress SIM1 supports GPRS EDGE 3G HSPA 4G networks SIM2 supports GPRS EDGE networks Wi Fi is connected Wi Fi is in progress Wi Fi Network is activated Airplane mode Portable Wi Fi hotspot is activa...

Page 11: ...Guru GX 10 Types Icons Descriptions General notification FM radio is on Playing a song Downloading an application ...

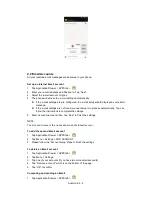
Page 12: ... with the ring volume is turned on A notification message will appear on the screen Ending a call Tap It s the end icon to end a call 2 2 Creating and sending a text message Your phone offers several ways to create and send a new text message From Message screen 1 Tap Applications tab 2 Tap to create a new message 3 In the Type name or number field enter the recipient s phone numbers or tap to add...

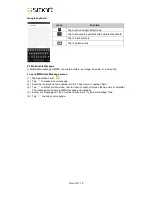
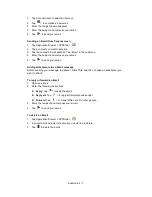
Page 13: ...pient s phone numbers in the Type name or number field 4 Tap to attach picture video record audio contact pictures videos audio or calendar The message converts to a MMS message automatically 5 Enter your message with the on screen keyboard in Type text message filed 6 Tap to send your message Icons Function Tap to active Capital letter mode Tap to activate the symbols and numerical keyboard Tap t...

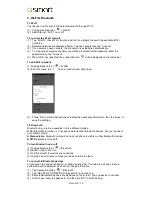
Page 14: ...r the necessary information then tap Save to save the settings 3 2 Bluetooth Bluetooth on your phone operates in three different modes On Bluetooth is turned on Your phone detects other Bluetooth devices but your phone is not visible to others Discoverable Bluetooth is turned on and your phone is visible to other Bluetooth devices Off Bluetooth is turned off To turn Bluetooth on or off 1 Tap Appli...

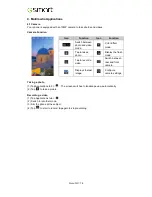
Page 15: ...Tap to take a photo Display the flash mode Tap to record a video Switch between rear and front camera Displays the last image Configure camera settings Taking a photo 1 Tap Applications tab The screen switches to landscape view automatically 2 Tap to take a picture Recording a video 1 Tap Applications tab 2 Switch to recorder mode 3 Aim the phone at the subject 4 Tap to start to record tap again t...

Page 16: ...dio files saved in the storage card of your phone Tap Applications tab Playback screen Displays the playback area with the playback controls Icon Function To adjust the volume Slide to go forward or backward To play the song To pause the song Previous song Next song To switch play mode To share the song Add the song to favorites file ...

Page 17: ...dio File Manager Manages all files Gmail Web based e mail service Gallery Views and edits photos and videos Google Settings Shortcuts to your Google settings Maps Latitude Location Search and Ads Google Google Now service Hangouts Instant messaging program Google Checks friends updates and post updates of your own Messaging Sends and receives all types of messages Play Music Listening to your musi...

Page 18: ...pplications tab Security Screen lock PIN 2 Enter your PIN and then tap Continue Confirm your password then tap OK 3 If you want to disable screen lock security please tap Application Drawer APPS tab Security Screen lock Confirm your PIN and then tap Continue Tap None to disable it Set up Unlock Pattern You can further secure your data by locking the screen and requiring a screen unlock pattern eve...

Page 19: ...t phone Erase everything to reset the phone NOTE Before resetting your device please remember to back up all your data and information 7 Specifications System Information Platform Android 4 4 Processor 1 5GHz Octa Core Memory ROM 32GB RAM 2GB Display Size 5 Resolutions 1920 x 1080pixels Size Dimensions 139 x 69 x 7 mm L x W x H Weight 115 grams with battery Power Battery Li ion pack 2300mAh Power ...

Page 20: ...e data interruption unexpected error in CPU and high power consumption could be caused by in app AD in Android phone We suggest you try to remove those apps with AD which had been installed in your device for preventing any abnormal situation happens and saving more power as well 3 Memory comprises of approximately 5 GB firmware plus 27 GB of Phone storage for downloaded applications and their dat...

Page 21: ...Android 4 4 KitKat Introduction ...

Page 22: ...nd Videos 11 4 2 Music 14 Chapter 5 Programs 14 5 1 Browser 14 5 2 Calculator 14 5 3 Calendar 14 5 4 Sound Recorder 15 5 5 Gmail 15 5 6 Maps 15 5 7 Clock 16 5 8 Play store 16 5 9 YouTube 16 5 10 Google search 17 5 11 Downloads 17 5 12 File Manager 17 5 13 FM Radio 17 5 14 Google 18 5 15 Connecting your phone to a computer 18 5 16 Screenshots 18 Chapter 6 Managing Your Phone 20 6 1 Managing Basic S...

Page 23: ...112 and tap SIM1 or SIM2 to make the emergency call To make international calls 1 Go to the Phone screen 2 Tap and hold 0 until the is displayed which is international prefix code 3 Enter the country code area code and phone number 4 Then tap SIM1 or SIM2 to make the international call To accept or reject an incoming call To accept a call slide to on the screen To reject a call slide to on the scr...

Page 24: ...ation requires text input such as messaging and writing e mails The keyboard input method is activated by the default settings Using on screen keyboard Use the keys on the on screen keyboard Tap the keys to enter the characters Setting the Input Method from Settings Screen 1 Tap Application Drawer APPS tab Language input 2 Tap Default There is a pop up window will show 3 Select an input method you...

Page 25: ...to create a new message 3 Type the recipient s phone number or tap to add from your contacts 4 Type your message and tap to send your message NOTE If you exit Messaging before sending unsent message will be saved as a draft automatically From People screen 1 Tap Application Drawer APPS tab 2 Tap a contact to display the contact information 3 Tap to send the message 4 Compose your message and tap t...

Page 26: ...elete all messages in this message box To delete a message thread 1 Tap Application Drawer APPS tab 2 Long press a message thread you want to delete 3 Tap to delete the message thread To delete a message within a thread 1 Tap Application Drawer APPS tab 2 Choose a message you want to delete 3 Tap and hold it until a Message options list shows 4 Tap Delete to delete the message To create a voice me...

Page 27: ...p is in process automatically You can follow the instructions to complete the settings 5 Enter Account name and then tap Next to finish the settings NOTE The Account name is the name shown on the Email screen To add the second Email account 1 Tap Application Drawer APPS tab 2 Tap Menu Settings ADD ACCOUNT 3 Please follow the Account setup steps to finish the settings To delete an Email account 1 T...

Page 28: ...ur email 5 Tap to send your email Adding attachments to an Email message Before sending your message tap Menu Attach file and then choose an attachment you want to attach To reply or forward an Email 1 Open an e mail 2 Refer the following instructions Reply Tap to reply the email Reply all Tap to reply all recipients and sender Forward Tap to forward the e mail to other people 3 Enter the recipien...

Page 29: ...d for the password Enter the password and then tap Connect 5 When Wi Fi is connected the connection icon will be displayed on the status bar To add Wi Fi network 1 Tap Application Drawer APPS tab Wi Fi 2 On Wi Fi screen tap And an on screen window will pop up 3 Follow the on screen instructions and enter the necessary information then tap Save to finish the settings To configure Wi Fi settings 1 T...

Page 30: ...ur phone is not visible to others Discoverable Bluetooth is turned on but your phone is not visible to other Bluetooth devices Off Bluetooth is turned off To turn on off Bluetooth 1 Tap Application Drawer APPS tab Bluetooth 2 Switch or tap to turn it on 3 Tap Bluetooth to view the menu options 4 Tap the device s name to make your device visible to others Connecting to Bluetooth Devices A connectio...

Page 31: ...e image tap Menu Set picture as Contact photo 2 Choose a contact to add image 3 Drag your finger to select the crop area 4 Tap CROP to save the image as the contact photo To edit an image While viewing the image to edit an image To crop tap Menu Crop Drag your finger to select the area you want to keep Tap CROP to save the image To add effects tap Menu Edit Using effects on the bottom to apply to ...

Page 32: ...lists To start or close shuffle function To repeat the current song all songs Changing Playback options While playing music tap Menu button on the bottom of screen Tap Party shuffle to play all songs in shuffle order Tap Add to playlist to add the song Tap Use as ringtone to set up your personal ringtone Tap Delete to delete the song which is playing Tap Library to see all playlists To edit music ...

Page 33: ... specific playlist or create a playlist 1 Tap Application Drawer APPS tab 2 In Songs tab long press a song you want to add then tap Add to playlist in the pop up submenu 3 Tap New to create a new playlist The song will be added to the new playlist automatically 4 You may check this new playlist in Playlists tab To remove a music file from the playlist 1 Tap Application Drawer APPS tab 2 In Songs t...

Page 34: ...ookmark label and other information if needed 3 Tap Add to to save the bookmark to Home screen Bookmarks or Other Folder 4 Tap OK to save your settings Managing Bookmarks On a web page tap Menu Bookmarks History You can view BOOKMARKS HISTORY and SAVED PAGES 5 2 Calculator With Calculator you can perform basic arithmetic functions on your phone 1 Tap Application Drawer APPS tab 2 In Calculator scr...

Page 35: ... to record Tap to end recording Then Tap to play 3 Tap Discard to delete an audio file Tap Save to store an audio file To play an audio file 1 Tap Application Drawer APPS tab Playlists My recordings 2 Tap an audio file to play 5 5 Gmail Gmail is Google s web based email service Gmail can be configured when you set up your phone for the first time Depending on your settings of the synchronization G...

Page 36: ...ct the time in different cities Tap Settings adjust CLOCK ALARMS settings 3 Tap to use Timer function Tap to use Stopwatch function Tap to back to Clock function 5 8 Play store Google Play store allows you to find and download applications and fun games to your phone 1 Tap Application Drawer APPS tab 2 If you do not log in your Google Account tap NEW to create an account or tap Existing to sign in...

Page 37: ...ation Drawer APPS tab You can also see the Google search bar on the Home screen 5 11 Downloads Files and other items you downloaded in Email or Browser are stored You can view reopen or delete what you ve downloaded 1 Tap Application Drawer APPS tab 2 Choose Sort by size or Sort by date 5 12 File Manager File manager helps you manage the files in your phone and in your SD card 1 Tap Application Dr...

Page 38: ...le Account tap NEW to create an account or tap Existing to sign in the Google account Please follow the on screen instruction to log in 5 15 Connecting your phone to a computer Tap and drag down Status Bar and tap Connected as USB Storage on your device Please choose one of modes to connect with your computer 5 16 Screenshots Please press the and hold Volume Down Key and Power Key at the same time...

Page 39: ...ettings 6 Check Use 24 hour format if you want 7 Tap Select date format to select the date format you want Setting Alarms You can set up many alarms on your phone To set the alarm 1 Tap Application Drawer APPS tab 2 Tap to set up a new alarm 3 Tap to adjust the hour and the minute You can switch AM PM Tap OK to save the settings 4 Tap Repeat to select a day to sound the alarm 5 Tap CESIUM to set u...

Page 40: ...the new audio profile on the settings screen 6 2 Managing your SIM cards Setting SIM card background color You can change the SIM1 and SIM2 background colors It helps you identify SIM1 and SIM2 quickly 1 Tap Application Drawer APPS tab SIM management 2 Tap a SIM card from SIM INFORMATION list 3 Tap Set background color to select one of colors Setting the default SIM for Voice call Messaging If you...

Page 41: ...nserted 3 Select Lock SIM card Input the PIN and then tap OK Change the PIN of the SIM card 1 Tap Application Drawer APPS tab Security Set up SIM card lock 2 Tap SIM1 or SIM2 If SIM2 inserted 3 Tap Change SIM PIN Type the old PIN Then tap OK 4 Type the new PIN Then tap OK 5 Re type the new PIN Then tap OK to change the PIN Set up Password Protection 1 Tap Application Drawer APPS tab Security Scree...

Page 42: ...reset your phone the data stored in your phone may be erased 1 Tap Application Drawer APPS tab Backup reset 2 Tap Factory data reset Reset phone Erase everything to reset the phone NOTE Before reset your device please remember to back up all your data and information Check IMEI on the phone You may check IMEI on the phone please choose the below instructions Input 06 IMEI will automatically appear...

Page 43: ...Android 4 4 22 ...

Reviews: