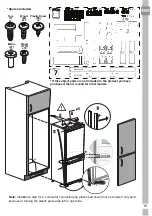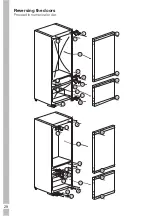
Note:
Installation step for 2, screws for connecting top plastic part should not be screwed very hard,
because of moving the plastic part easily left or right side.
* Spares Included
Torx
(T)
x
2
Wood
(W)
x2
7
Plastic Sheet
(PS)
x4
Wood
(1TW)
x10
(
2
T)
x
2
Metric
* If the subject parts are not included in the product
you have
purchased, then it is valid for other models.
x 27
x10
x 2
x 4
'2T' x 2
*
*
7
90
°
1
PS
1
3
4
2
16
Summary of Contents for GKNEMI573
Page 1: ...Refrigerator Installation User instructions GKNEMI573 ENG...
Page 16: ...71 mm 40 mm 200 cm2 629 mm 1001 mm 16 mm 1778 1788 mm min 200 cm2 4 mm 15...
Page 18: ...17 1 A 1 B 1 C...
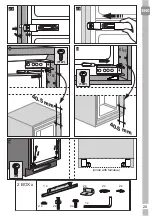
Page 19: ...1 D 40 5 mm 1 E 40 5 mm 1TW 1 F 1 F 1 G 1 H 1 2 click 2 click 1 1 F 2T 18...
Page 20: ...T 2 A 2 B 40 5 mm 40 5 mm 1TW 2 C 2 C 2 2 D 19...
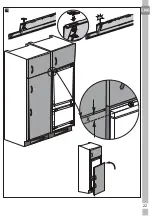
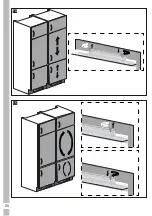
Page 22: ...8 5 8 5 6 7 8 9 21...
Page 23: ...10 22...
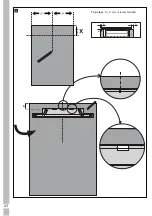
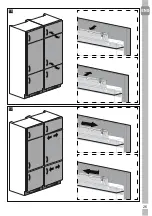
Page 24: ...A A E Top view A 2 mm is recommended 11 23...
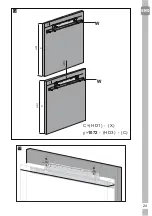
Page 25: ...X X W y W C HD1 X y 1072 HD3 C HD3 C HD1 C HD1 12 13 24...
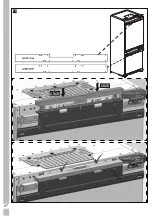
Page 26: ...14 15 25...
Page 27: ...16 17 26...
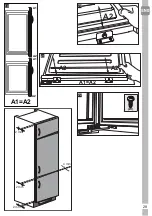
Page 28: ...18 click click 27...
Page 29: ...W A2 A2 A2 A1 A2 A1 A2 A1 A2 A1 A2 19 20 21 22 2 mm 2 mm 2 mm 4 mm 28...
Page 35: ...Notes 34...

