If you have the Motordome Camera connected directly to the Keyboard, you will need to set up the protocol and
the baud rate of the Motordome Camera in the keyboard. To change the protocol of the CAM mode, you will need
to get administrator access to the keyboard first. Press [ID] and afterwards [ON], then enter the admin password
123456 and press [Enter] afterwards. Select the camera for which you want to change the protocol by pressing
the Camera ID and [Enter] afterwards and change the protocol by pressing the key [Protocol] until the used
protocol appears on the display, then press [Enter] to confirm. To adjust the baud rate, press the [Baudrate]
button until the used baud rate appears on the display. Press [Enter] to confirm the selected baudrate.
You can also use the [Search] button to automatically search for the protocol and baud rate. Follow the
instructions on the display to find the correct protocol and baud rate. Leave the administrator mode after you
have set up the protocol and baud rate by pressing [ID] and [Off] afterwards.
5.8. DVR Protocol Setup
Under DVR mode the keyboard is set automatically to the GRUNDIG proprietary DVR protocol that should work
straight away. If you need to change the protocol or baudrate of the DVR mode, just enter the administrator mode
(the procedure is similar to the one for CAM mode).
5.9. Keyboard Setup in a GRUNDIG DVR
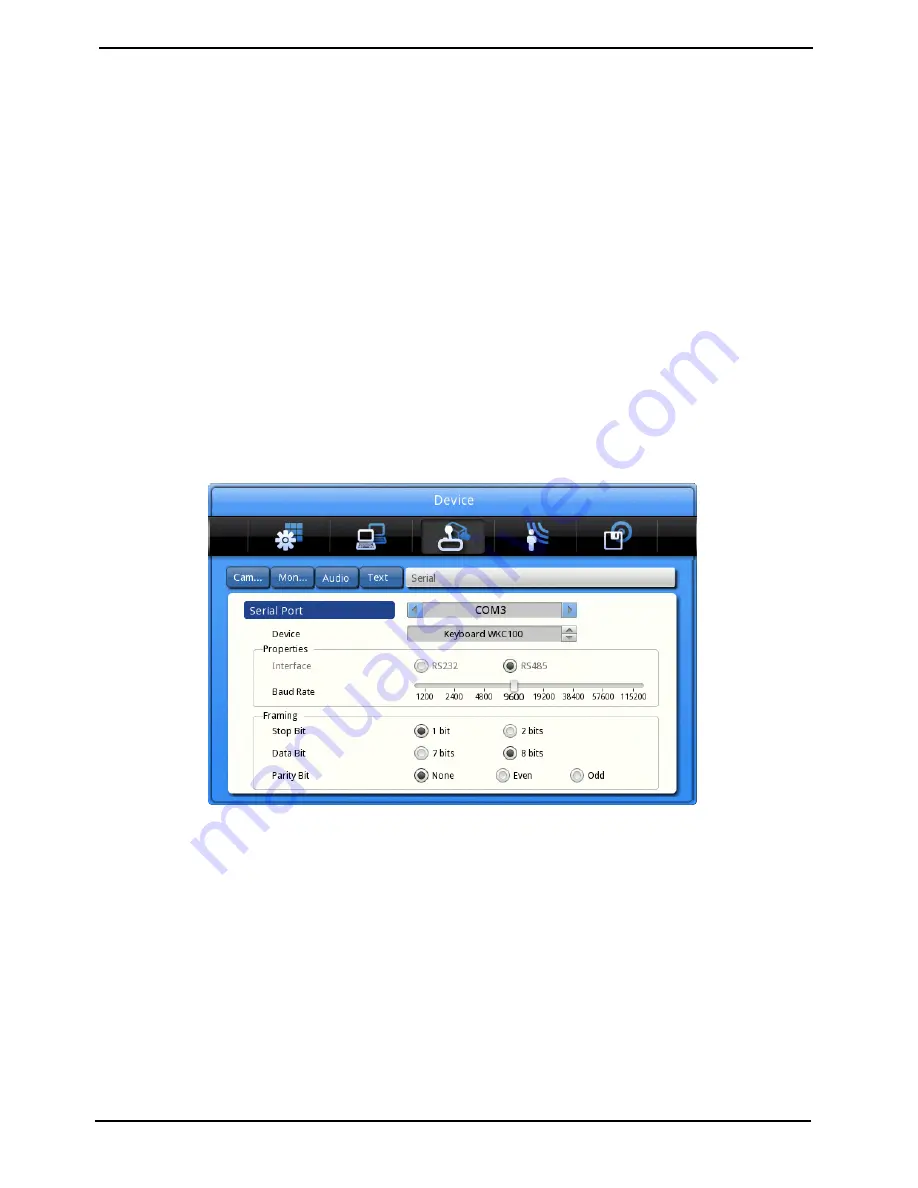
The Keyboard needs to be configured in the Main Menu of the DVR under Device > Serial. It can be configured for
each Serial connection (Com1 (RS232), or Com2 and Com3 (RS485)). Just select the serial connection to which
the keyboard is attached to and change the protocol to WKC100 or GKB-A0110M (depending on the firmware
version). Under default settings the baud rate is set to 9600. If you have changed the baudrate of the keyboard
under DVR mode, please adjust the DVR correspondingly.
Picture: Default settings for the Keyboard in the DVR
6. DVR Control
The System Keyboard can take over all the functions on the front panel or the On-screen Menu of the DVR.
Therefore all the buttons that are named the same as a button on the front panel will execute the same
functionality. Please check the DVR manual for reference what these buttons do.
The Joystick will perform the Up, Down, Left & Right functionality of the direction keys and can also execute the
[Esc] and [Enter] button if you turn it counter- or clockwise.
To select a DVR, please enter the DVR mode by pressing the button [DVR]. Then select the ID of the DVR by
pressing [ID], then pressing the number and [Enter] in the end (in the table, ID+No+Enter). The ID of the DVR can
be changed in the system menu of the DVR under System> Utilitiy> Keyboard ID.
To select the Single Channel View, press the dedicated number of the channel and then press [Enter] (No+Enter,
in the table - for example, 3+Enter for Channel 3 or 1+2+Enter for channel 12).
9
English
Summary of Contents for GKB-A0110M
Page 2: ......
Page 5: ...5 Installation 5 1 Part Names and Functions Top View 3 English...
Page 6: ...4 English...
Page 7: ...5 English...
Page 13: ...11 English...
Page 15: ...13 English...


