background image

ENGLISH

35

Creating a music program

This function allows you to select your favourite titles from audio CDs in order to
create your own music program.
The program may contain up to 20 titles, which are displayed in a program list.
When a title is played back it appears in the first place in the program list. If you
add a new title and the program list is already full, the last title in the list is
automatically deleted.

Selecting a title

1

Open the disc compartment, insert the CD and close the disc compartment
again.

2

Switch DVD the player to ”STOP” by pressing »

7

«.

3

Select the »

track

« line by pressing »

.

.

«.

4

Select the titles which you wish to save in the title memoryy using »

4

« or

»

3

« and press »

OK

« to confirm.

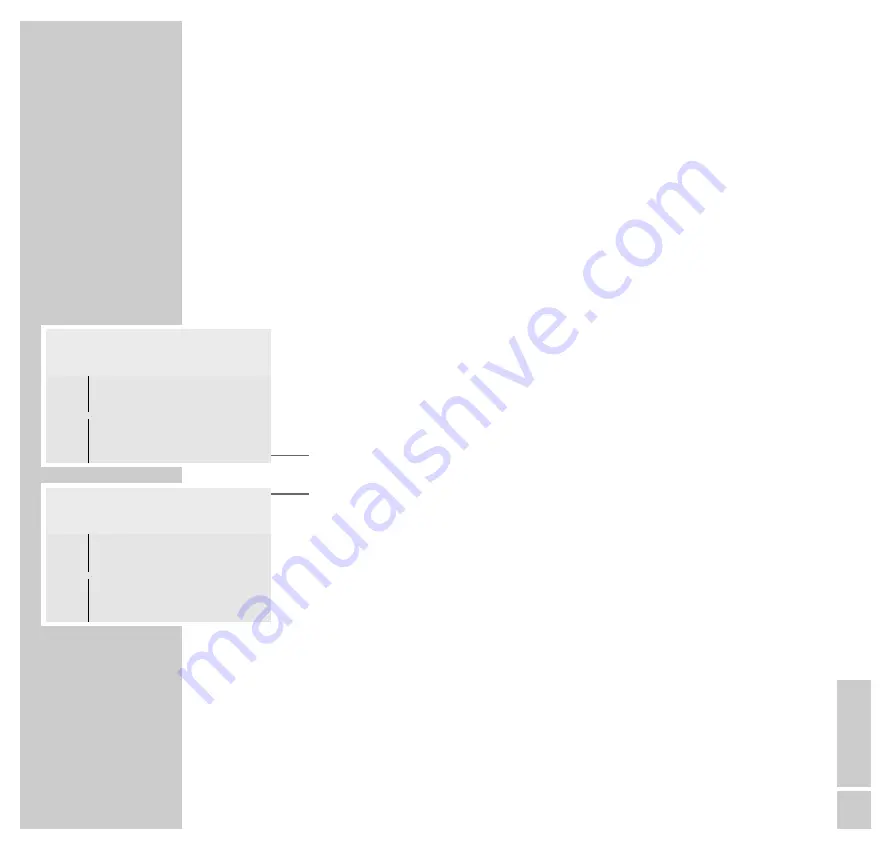
– The title numbers (»

program 2 4 6

«), the total number of titles (» 

3 total tracks

«)

and the playing time of the music program (»

0.15.32 total time

«) are

displayed.

5

Save the music program by pressing »

8

«. Playback starts automatically.

Playing back a music program

1

Open the disc compartment, insert the CD and close the disc compartment
again.

2

Press »

8

« to start playback of the music program.

3

End playback of the program by pressing »

7

«.

AUDIO CD PLAYBACK

______________________________________________________________

Audio Disc Mode

7

- -

-.- -.- -

16

1.16.58

stop

track

time

total tracks

total time

fts

On

Off

track

1

s

2     3     4     5     6     7     8     9     >

program

Clear all

A

Audio Disc Mode

7

- -

-.- -.- -

3

0.15.32

stop

track

time

total tracks

total time

fts

On 

Off

track

1     2     3     4     5     6 

a

7

s

8     9     >

program

2    4    6

Clear all

A

Summary of Contents for GDV 200

Page 1: ...DVD PLAYER GDV 200 1 ENGLISH 72010 540 4000 3104 125 23661 ...

Page 2: ...status display Using the OSD menu 17 Connection and preparation Connecting to a television Connecting to a HiFi system with analog two channel stereo sound Connecting the mains cable Inserting batteries in the remote control 20 DVD Video CD playback DVD and Video CD features Special features of DVDs Before playback Calling up the function display Playing back a title Selecting titles or chapters I...

Page 3: ...external devices Connecting to a HiFi system with digital two channel stereo sound PCM or to a digital multi channel audio receiver Connecting to an analog multi channel audio video amplifier 44 Sound settings 49 Picture settings 52 Custom settings 54 Remote control of external devices television or video recorder remote control satellite receiver remote control Programming the remote control for ...

Page 4: ...btitle language and various camera recording angles In addition to DVDs your DVD player can also play all other video and audio CDs DVDs and CDs can be identified by one of the logos shown to the left Your DVD player is designed for DVDs with region code 2 Packing contents 1 DVD PLAYER OK P P DVD TV VCR EXT 3 1 2 4 5 6 7 8 9 0 TV GUIDE VOL REPEAT ANGLE TE L E PI LOT 80V RETURN SHUFFLE SUBTITLE OSD...

Page 5: ... least two hours before you insert a DVD The DVD player is designed for use in dry rooms If you do use it in the open please ensure that it is protected from moisture such as rain or lawn sprinklers Place the DVD player on a hard level surface Do not place any objects such as newspapers on the DVD player or any cloth or similar articles underneath it Do not place the DVD player close to heating un...

Page 6: ...ed to prevent dust from collecting on the laser optics This DVD player is designed to the highest technological and environmental standards Only ecologically compatible high quality materials have been used The batteries included are free of mercury and cadmium The range of materials used has been deliberately restricted and all the larger plastic parts have been labelled This means that the DVD p...

Page 7: ... LED around the button displays the current operating status Red Stand by Green On Caution Switching the DVD player off does not completely separate it from the mains Compartment for DVDs CDs Display OPEN CLOSE Opens and closes the disc compartment B A TRACK TITLE SCAN TIME TRACK TOTAL CHAPTER CD SHUFFLE CHAPTER TITLE TRACK V REPEAT O N O F F O P E N C L O S E DVD VIDEO CD CD PLAYER The front of t...

Page 8: ...CD Video or audio CD inserted I TITLE Number of the title on a DVD 0I CHAPTER Number of the chapter on a DVD or CD I TRACK Number of the scene on a DVD or the track on a music CD 1 Lights up when a remote control command is received FTS Function is activated TOTAL TIME 0 00 00 Total playing time in hours minutes and seconds TRACK TIME 0 00 00 Length of the track in hours minutes and seconds REPEAT...

Page 9: ...ections MULTICHANNEL AUDIO OUT LEFT REAR Audio output sockets for connecting to RIGHT REAR Surround loudspeakers CENTER Audio output socket for connecting to a middle loudspeaker SUBW Audio output socket for connecting to a subwoofer LEFT FRONT Audio output sockets for connecting to RIGHT FRONT front loudspeakers MAINS CVBS Y C VIDEO OUT S VIDEO OUT DIG OUT OPT OUT RIGHT SUBW REAR RIGHT FRONT L R ...

Page 10: ...necting to a television with a video socket Y C S VIDEO OUT Video output socket for connecting to a television with an S VHS socket I AUX VCR IN Audio video input output socket for connecting a video recorder II TV OUT Video audio output socket for connecting to a television Caution Do not connect any devices while the DVD player is switched on Never touch the inside of the sockets and plugs of th...

Page 11: ...ch to the DVD position The yellow LED briefly lights up 9 Switches the DVD player to and from Stand by mode The LED around the button on the DVD player indicates the current operating status Red Stand by Green On 1 0 AV Numeric keys for various inputs Select various functions in the menus OK Confirms menu entries F F E E During playback switch the video search forwards or backwards at different sp...

Page 12: ...layback select the next or previous title or chapter when pressed longer activates the forwards or backwards picture search SHUFFLE Plays back all titles on a DVD or CD in random order ANGLE Selects various camera angles for certain scenes or passages on the DVD during playback REPEAT Repeats chapters or titles DVDs or CDs during playback RETURN Returns to the previous DVD menu Note For details on...

Page 13: ... to call up the menu line and 3 to scroll to the right The illustrations show the options presented by the menu line Ö Settings menu P Select title K Select chapter Select audio track I Select subtitles language R Select camera angle k Activate zoom function B Select colour settings _ For programming scenes Z Select sound type Select slow motion speed N Select video search speed L Select section t...

Page 14: ...uage menu containing the following functions Audio Subtitle Menu Ü Special functions menu containing the following functions Access control Status window Low power standby The dialog line The dialogue line displays information about the operating condition Function not available Parental lock activated Parental lock off Camera angle for scenes Playback resumed resume 2 2 R safe H locked G x Ö Ö P ...

Page 15: ...apsed running time of the DVD or video CD 2 05 30 Total running time 0 15 00 Elapsed running time The current function is also displayed DVD DVD inserted VCD Video CD inserted reading Reading DVD no disc No DVD or video CD inserted opened Disc compartment open closing Disc compartment closed 1 error Error message 8 play Playback 7 stop End playback I I pause Pause playback E W x 4 x 32 Video searc...

Page 16: ...e required menu item in the example Ö by pressing 4 or 3 and then press to activate it The main menu is displayed 3 Select the desired menu in the example U by pressing or and then press 3 to open it The language menu is displayed 4 Select the function in the example Subtitle by pressing or and then press 3 to activate it 5 Select desired setting using the or buttons Note You can switch back to th...

Page 17: ...ON AND PREPARATION_______ MAINS CVBS Y C VIDEO OUT S VIDEO OUT DIG OUT OPT OUT RIGHT SUBW REAR RIGHT FRONT L R AUDIO OUT LEFT CENTER MULTICHANNEL AUDIO OUT REAR LEFT FRONT DIGITAL AUDIO OUT PCM MPEG2 AC3 DTS STEREO OUT VIDEO OUT I AUX VCR IN II TV OUT MAINS CVBS Y C VIDEO OUT S VIDEO OUT DIG OUT OPT OUT RIGHT SUBW REAR RIGHT FRONT L R AUDIO OUT LEFT CENTER MULTICHANNEL AUDIO OUT REAR LEFT FRONT DI...

Page 18: ... played back through a HiFi system 1 Plug the cinch cable supplied into the R AUDIO OUT L socket on the DVD player and into the appropriate sockets on the HiFi Caution Do not connect the DVD player s R AUDIO OUT L sockets to the PHONO sockets record player input on the HiFi system Note For information on connecting to a HiFi system with digital two channel stereo sound or a digital multi channel r...

Page 19: ...polarity marked on the base of the battery compartment Note If the DVD player no longer reacts properly to remote control commands the batteries may be flat Always remove flat batteries No liability is accepted for damage resulting from leaking batteries Environmental note Batteries including those which are heavy metal free may not be disposed of with household waste Please dispose of used batter...

Page 20: ...le and the passages they contain Some of the DVD player s functions such as slow motion freeze frame and auto play can also be controlled by the DVD itself It is therefore possible that the freeze frame function for example cannot be selected during certain scenes Many DVDs have audio tracks recorded in up to eight languages This enables you to select the language you prefer Many DVDs are recorded...

Page 21: ...r The disc tray opens 2 Insert the DVD video CD into the compartment with the labelling facing upwards 3 Press OPEN CLOSE or gently push the front of the disc tray The status display reads reading and READ appears on the DVD player playback starts automatically After a short time a menu appears containing information on the DVD Note If the parental control lock is activated and the DVD video CD ha...

Page 22: ...ay press OSD again Playing back a title When you close the disc tray playback starts automatically 1 To pause playback freeze frame press I I 2 Resume playback by pressing 8 3 To end playback press 7 Note Depending on the DVD or video CD you are using you may have to select a title or chapter from the DVD or video CD s table of contents Use the or button to select it and then press OK to confirm I...

Page 23: ...s directly by entering the number of the title or chapter using 1 0 using the title menu of the DVD video CD The title menu of the DVD video CD may contain selection options for titles sections or scenes 1 Call up the contents of the DVD video CD by pressing MENU If the DVD video CD has a title menu it will appear on the screen 2 If the selection options are numbered select the desired title and s...

Page 24: ...nterrupting and resuming playback Playback of a DVD or video CD can be interrupted at any point and then resumed from the same place This function can be used with the last four DVD or video CDs that you have played 1 Press 7 to interrupt playback 2 Resume playback at the point where it was interrupted by pressing 8 twice Ending playback Playback of a DVD or video CD automatically stops at the end...

Page 25: ...sing 4 or 3 and press OK to confirm 4 To resume playback press 8 Frame by frame playback 1 Press II to switch to freeze frame playback pause 2 During the freeze frame playback pause press I I repeatedly The picture is advanced to the next frame 3 To resume playback press 8 Playing back all chapters of a title Shuffle If the title contains several chapters these are played back in random order 1 Pr...

Page 26: ... and then press to confirm 3 Select the video search speed using 4 or 3 4 To resume playback press 8 Note When the slow motion freeze frame and video search functions are employed the sound is muted Repeating a chapter a title or a DVD These functions repeat the currently chapter title or the entire contents of the DVD 1 Press REPEAT once twice or three times during playback The DVD player display...

Page 27: ...available in this example 3 as well as the angle which is currently set in the example 1 1 Start playback by pressing 8 2 Press ANGLE to select the angle function R1 3 in the dialog line and R1 3 in the menu bar show the camera angle in this example 1 3 To directly select another angle enter the number of the appropriate angle using 1 0 or 4 Quit the function by pressing the OSD button The R2 3 ic...

Page 28: ...the centre of the screen 5 Move the screen section using or 4 or 3 Note The display can be hidden by pressing OK 6 To resume playback press 8 Selecting colour settings 1 Start playback by pressing 8 2 Display the menu line by pressing OSD 3 Select the B item colour settings towards the right of the menu line using 4 or 3 and press to confirm 4 Select the desired colour setting using or and press O...

Page 29: ...3 and select the off option by pressing or Changing the dubbed language If the current DVD offers alternatives you can change the preset dubbed language 1 Display the menu line by pressing AUDIO The menu item is active 2 Select the desired dubbed language with or 3 Quit the menu line by pressing OSD The menu line automatically disappears after a short time Note When the playback sound is changed f...

Page 30: ...s which you wish to save in the title memory using 4 or 3 and press OK to confirm The numbers of the titles and chapters are shown in the program and the Off display changes to On 7 Quit the title memory by pressing OSD Playing back titles or chapters 1 Open the disc tray insert the DVD or video CD and close the tray again 2 Start playback of the program by pressing 8 3 End playback of program by ...

Page 31: ... to STOP by pressing 7 2 Call up the menu line with the OSD button 3 Select the _ item Favourite Track Selection towards the right of the menu line using 4 or 3 and press to confirm 4 Select the Clear all line using 5 Delete the titles chapters by pressing OK All titles chapters are deleted from the title list 6 Conclude the setting by pressing OSD The menu display is switched off DVD VIDEO CD PLA...

Page 32: ...n and select the channel for the DVD player 2 Switch on the HiFi system and select the audio input for the DVD player 3 Press ON OFF to switch the DVD player on The DVD player display reads NO DISC Inserting a DVD video CD 1 Press OPEN CLOSE on the DVD player 2 Insert the audio CD in the disc compartment with the labelling facing upwards 3 Press OPEN CLOSE or gently push the front of the disc tray...

Page 33: ...in 3 To end playback press 7 Selecting a different title 1 To select the next title press s 6 briefly during playback 2 To select the beginning of the current title briefly press 5 a 3 To select the previous title press 5 a briefly again during playback 4 To directly select a title enter the number of the title in question as one or two digits using 1 0 Audio Disc Mode 8 1 0 01 07 16 1 16 58 play ...

Page 34: ... track 2 Resume playback by pressing SHUFFLE again Repeating a title or a CD Repeat These functions repeat the title which is currently running or the entire CD 1 Press REPEAT during playback The DVD player display reads REPEAT TRACK and the current title is repeated 2 During playback press REPEAT twice The DVD player display reads REPEAT and the entire CD is repeated 3 To quit this function press...

Page 35: ...wish to save in the title memoryy using 4 or 3 and press OK to confirm The title numbers program 2 4 6 the total number of titles 3 total tracks and the playing time of the music program 0 15 32 total time are displayed 5 Save the music program by pressing 8 Playback starts automatically Playing back a music program 1 Open the disc compartment insert the CD and close the disc compartment again 2 P...

Page 36: ...ry 4 Save music program by pressing 8 Playback starts automatically Deleting all titles 1 Switch the DVD player to STOP by pressing 7 2 Select the Clear all line using 3 Delete the titles by pressing OK All titles are deleted from the title memory Audio Disc Mode 7 3 0 15 32 stop track time total tracks total time fts On Off track 1 2 3 4 5 6 7 8 9 program 2 a 4 s 6 Clear all A S Audio Disc Mode 7...

Page 37: ...t the Ö Ö item Settings using 4 or 3 and press to confirm 3 Select the Ü line Special functions using and press 3 to confirm 4 Select the Access control line using or and press 3 to confirm 5 Enter the four digit code number using the 1 0 buttons Note When the code number is entered for the first time the display changes to Confirm code Enter the four digit code number again using the 1 0 buttons ...

Page 38: ...itled Rectifying minor problems on Page 63 Changing the code number 1 To change the code number repeat steps 1 to 5 from the section entitled Activating the parental control system of the DVD player 2 Select the Change code line using or and confirm by pressing 3 3 Enter the new four digit code number using the 1 0 buttons Enter the four digit code number again using the 1 0 buttons 4 Press OSD to...

Page 39: ... Insert the DVD or video CD in the disc tray The Access control menu is displayed on the screen 2 Select the Play one line using or for once only playback or select the Play always line using or 3 Enter the four digit code number using the 1 0 buttons Playback starts automatically De activating the Play always function 1 Insert the DVD or video CD in the disc tray Playback starts automatically 2 P...

Page 40: ...the Ü line Special functions using and press 3 to confirm 4 Select the Access control line using or and press 3 to confirm 5 Enter the four digit code number using the 1 0 buttons 6 Select the Parental level line using or and activate by pressing 3 7 Select the rating from 1 to 8 using or 8 Conclude the setting by pressing OSD Access control Status window Low power standby Enter code On Off Ö Ö P ...

Page 41: ...rm 5 Enter the four digit code number using the 1 0 buttons 6 Select the Change country line using or and activate by pressing 3 7 Select the country using or 8 Conclude the setting by pressing OSD Ö Ö P K I R k 1 2 1 off no off O U Ü Access control Status window Low power standby Child lock Parental level Change country Change code 5 a S Ö Ö P K I R k 1 2 1 off no off O U Ü Access control Status ...

Page 42: ...puts on the DVD players to connected audio devices on Pages 44 to 47 MAINS CVBS Y C VIDEO OUT S VIDEO OUT DIG OUT OPT OUT RIGHT SUBW REAR RIGHT FRONT L R AUDIO OUT LEFT CENTER MULTICHANNEL AUDIO OUT REAR LEFT FRONT DIGITAL AUDIO OUT PCM MPEG2 AC3 DTS STEREO OUT VIDEO OUT I AUX VCR IN II TV OUT DIGITAL AUDIO INPUT MAINS CVBS Y C VIDEO OUT S VIDEO OUT DIG OUT OPT OUT RIGHT SUBW REAR RIGHT FRONT L R ...

Page 43: ...s equipped with its own amplifier then use that socket Note Suitable sound settings must be selected on the DVD player When doing this observe the settings in the chapter entitled Adapting the digital or analog outputs on the DVD players to connected audio devices on Pages 44 to 47 MAINS CVBS Y C VIDEO OUT S VIDEO OUT DIG OUT OPT OUT RIGHT SUBW REAR RIGHT FRONT L R AUDIO OUT LEFT CENTER MULTICHANN...

Page 44: ...gs are carried out in the Tonmenü The necessary settings are listed in the table 1 Select the Digital output line using or and activate by pressing 3 Note Select the required setting see the table by pressing or 2 Select the Analogue output line using or and activate by pressing 3 Note Select the required setting see the table by pressing or Ö Ö P K I R k 1 2 1 off no off O U Ü A S 8 Digital outpu...

Page 45: ...aker Subwoofer Bass loudspeaker Connected television Setting in menu Sound audio device Digital output Analog output Television or amplifier with Off Stereo or analog two channel stereo sound Virt Surround 3D Television or amplifier with Off Dolby Surround analog Dolby Surround Amplifier with digital On PCM only Stereo two channel stereo sound Digital amplifier with multi channel On All formats St...

Page 46: ...er for how to calculate the delay time 4 Click OK to save the setting 5 Press OSD to quit the menu Calculating the delay time The DVD player is set by the manufacturer to play back correctly synchronised Digital Surround Sound The listening range is defined so that the Surround loudspeakers are located approximately 150 cm closer to the listener than the front loudspeakers and that the middle loud...

Page 47: ...ance to front loudspeakers 180 cm Distance to Surround loudspeakers 120 cm 060 cm 60 cm 30 2 milliseconds If the middle loudspeaker is on a line with the front loudspeaker then no further setting is necessary If the middle loudspeaker is nearer to the listener s central position then measure the distance from the front loudspeakers to the middle loudspeaker and divide the result by 30 This gives y...

Page 48: ...he menu with the OSD button Switching karaoke on and off Activate this function when you are playing a DVD with multi channel karaoke sound 1 Select the Karaoke vocal line using or and activate by pressing 3 2 Press or to switch karaoke on or off 3 Quit the menu with the OSD button Ö Ö P K I R k 1 2 1 off no off O U Ü Digital output Analogue output Night mode Karaoke vocal Speakers On Off a A Ö Ö ...

Page 49: ...at 4 3 you can select 4 3 letterbox for wide screen playback with black bars on the top and bottom edges of the screen or 4 3 panscan for wide screen playback using the full height of the screen but with the left and right edges of the picture cropped 1 Select the TV Shape line using or and activate by pressing 3 2 Select the picture format 16 9 4 3 panscan or 4 3 letterbox by pressing or 3 Quit t...

Page 50: ...osition The ex works setting centres the picture on the screen This option enables you to move the picture on the screen to the left or right 1 Select the Video shift line using or and activate by pressing 3 2 Shift the screen position using 4 or 3 press OK to save 3 Quit the menu with the OSD button Ö Ö P K I R k 1 2 1 off no off O U Ü TV Shape Black level shift Video shift Colour settings Person...

Page 51: ...choose your own colour brightness and contrast settings 1 Select the Personal colour line using or and activate by pressing 3 2 Choose the setting saturation brightness contrast using or and press 3 to confirm 3 Set the saturation brightness or contrast using or and press OK to save the setting 4 Switch off menu with the OSD button Ö Ö P K I R k 1 2 1 off no off O U Ü TV Shape Black level shift Vi...

Page 52: ...ct is not on the DVD the first dubbed language available is automatically selected 1 Select the Audio line using or and activate by pressing 3 2 Select the desired dubbed language by pressing or 3 Quit the menu with the OSD button Selecting the language of the DVD player s screen menus 1 Select the Menu line using or and activate by pressing 3 2 Select the desired language for the screen menus by ...

Page 53: ...itched on and off during playback by pressing SUBTITLE Switching on off the DVD player s status display 1 Display the menu line by pressing OSD 2 Select the Ö Ö item Settings using 4 or 3 and press P to confirm 3 Select Ü Ü Special functions using or and then press 3 to confirm 4 Select the Status window line using or and then press 3 to confirm 5 Switch the status display on or off by pressing or...

Page 54: ...r the three figure page number F F E E Volume setting lower higher In menu mode cursor left cursor right OK Activates and changes functions calls up data confirms and saves data Select TV channels up down In menu mode cursor up cursor down i 7 Calls up the DIALOG CENTER or switches to menu mode TV GUIDE Switches on the TV Guide for information on the current programe TXT Switches between teletext ...

Page 55: ...ngen menu In teletext mode Calls up the next topic 5 a s 6 Brightness setting 5 a darker s 6 brighter PIP Press once Double Window Funktion TV picture and teletext in separate halves of the screen Press twice Picture in Picture Call up Help FORMAT Change picture format AUX Preset button for various functions OK P P DVD TV VCR EXT 3 1 2 4 5 6 7 8 9 0 TV GUIDE VOL REPEAT ANGLE TE L E PI LOT 80V RETU...

Page 56: ...irms and saves data Select TV channels up down In menu mode cursor up cursor down Stop l1 Pause during recording freeze frame during playback e Playback RECORD Recording VCR MENU Switches between the menu and the TV image SHOWVIEW Activates ShowView recording 5 a Backward frame search during playback Tape rewind in Stop mode s 6 Forward frame search during playback Fast forward in Stop mode REPEAT...

Page 57: ...remote control at the satellite receiver 8 8 Switches the satellite receiver on and off stand by F F E E In menu mode cursor left cursor right OK Activates and changes functions calls up data confirms and saves data Select TV channels up down In menu mode cursor up cursor down OSD VCR MENU Switches between the menu and the TV image RETURN AUX Deletes data activates settings OK P P DVD TV VCR EXT 3...

Page 58: ...the TP 80 V cannot learn the functions of the other device Programming function levels 1 Slide the switch to the function level TV VCR EXT that you want to program The indicator for the selected function level lights up for about three seconds 2 Simultaneously press AUX and 3 until the indicator for the selected level lights up continuously 3 Point the two remote controls at each other at a distan...

Page 59: ...tor flashes twice Resetting a function level You can restore the remote control to the condition it was delivered in 1 Slide the switch to the function level TV VCR EXT that you want to reset 2 Simultaneously press AUX and 6 until the indicator for the selected level flashes twice Resetting all function levels except DVD 1 Slide the switch to the DVD position 2 Simultaneously press PIP and 6 until...

Page 60: ...VD Video Video CD Audio CD Multi standard PAL NTSC CD R CD RW DVD disc format Diameter ø 12 cm and ø 8 cm Playing times ø 12 cm One layer one sided approx 2 15 hours two sided approx 4 00 hours Two layer one sided approx 4 30 hours two sided approx 8 00 hours Video format Signal Digital Digital compression MPEG2 for DVD MPEG1 for VCD DVD 50 Hz Horiz resolution 720 pixels Vert resolution 576 lines ...

Page 61: ...ened or serviced by trained personnel This product contains components which are covered by certain U S patents or for other reasons are considered intellectual property of the Macrovision Corporation and other proprietors Use of this protected technology must be approved by the Macrovision Corporation and is only permissible for private presentation at home or for other limited applications where...

Page 62: ...efitted If the fuse cover is lost or damaged the lead and plug must not be used until a replacement is obtained Replacement fuse covers should be obtained from your dealer If a non rewireable plug or a rewireable 13 Amp BS 1363 plug is used it must be fitted with a 5 Amp ASTA or BSI approved BS 1362 fuse If any other type of plug is used it must be protected by a 5 Amp fuse either in the plug or a...

Page 63: ...te control signal Check or replace the remote control batteries Switch the remote control to DVD Check the video connection Make sure that there are no fingerprints on the DVD CD follow the cleaning instructions on Page 62 Check if the DVD CD labelling is facing upwards Clean the DVD CD Check if the DVD CD is damaged by testing out another DVD CD Check the audio connections Try another playback so...

Page 64: ... 1 8 15 81 11 GRUNDIG Kundendienst Centre Dudenstraße 45 53 D 68167 Mannheim 49 6 21 33 76 70 GRUNDIG PORTUGUESA Comércio de Artigos Electrónicos Lda Rua Bento de Jesus Caraça 17 P 1495 Cruz Quebrada Lisboa 3 51 1 4 19 75 70 GRUNDIG ESPAÑA S A Solsonés 2 planta baja B3 Edificio Muntadas Mas Blau E 08820 El Prat De Llobregat Barcelona 34 93 4 79 92 00 GRUNDIG NORGE A S Glynitveien 25 Postboks 234 N...

Reviews: