background image


7.4.


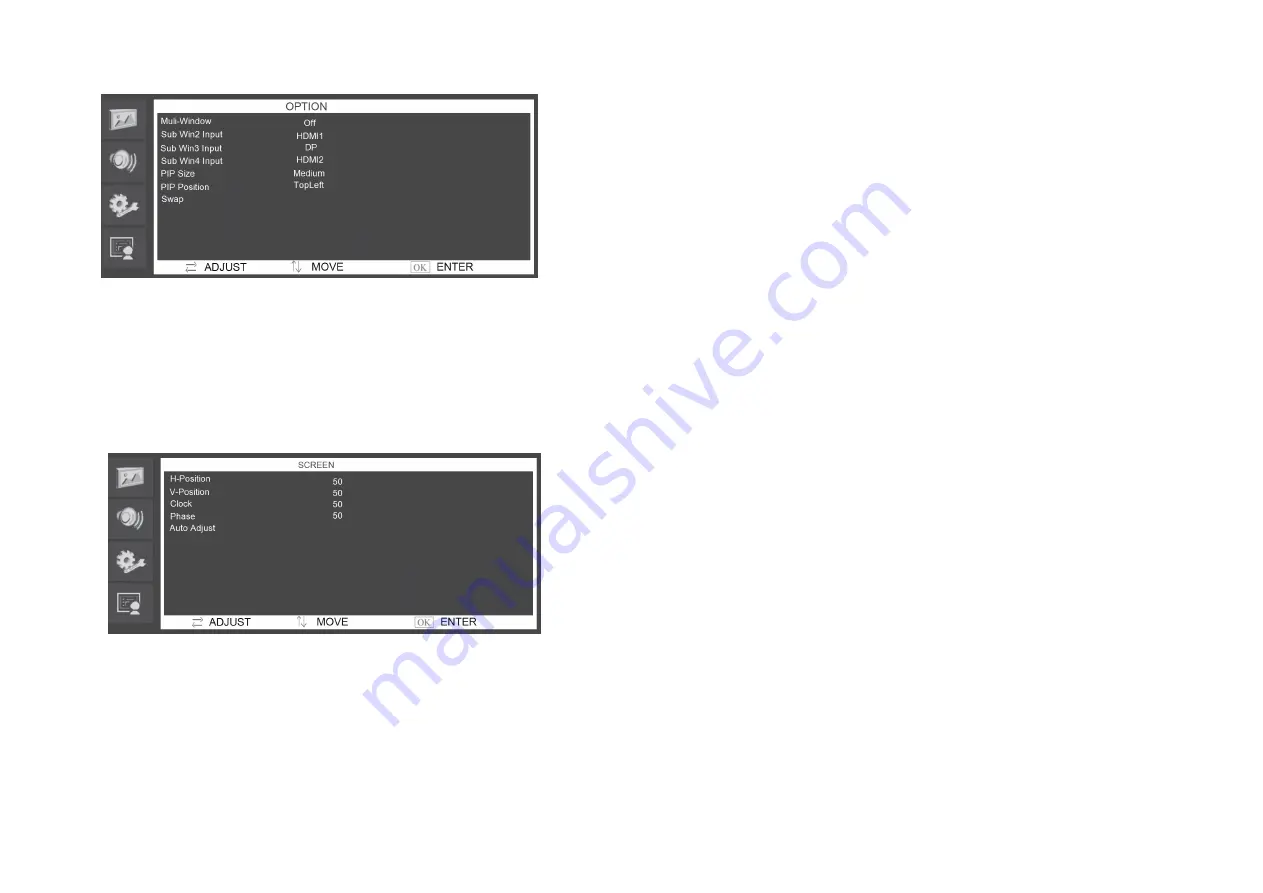
Screen


In


the


Screen


menu


can


adjust


the


H

position,


V

position,


clock,


phase


and


you


can


automatically


adjust


the


position


of


the


image


within


the


unit.


Press


the


\/or


/\


button


to


adjust


the


value


when


an


item


is


selected.


8.


Frequently


Asked


Questions


The


Power


button


does


not


respond:


‐ 

Check


the


power


cord


to


ensure


that


it


is


securely


plugged


into


the


monitor


base


and


also


into


the


electrical


outlet.


‐ 

Ensure


that


there


is


electrical


power


coming


from


the


AC


outlet.


Use


another


device


to


check


the


power.


‐ 

Unplug


the


power


cord


of


the


monitor


from


the


AC


outlet,


wait


a


few


minutes


then


plug


the


power


cord


into


the


AC


outlet


again.


This


will


reset


the


monitor


and


power


supply.


No


image


on


the


screen:


‐ 

Ensure


that


the


(HDMI,


DB

15,


CVBS)


signal


cable


is


properly


connected


to


the


display


card/computer.


‐ 

Check


the


(HDMI,


DB

15,


CVBS)


signal


cable


connector


on


both


ends


for


bent


or


pushed

in


pins.


‐ 

The


display


card


should


be


properly


seated


in


its


card


slot.


‐ 

Ensure


that


the


computer's


power


switch


is


ON.


‐ 

Ensure


that


the


monitor's


power


switch


is


ON.


‐ 

Unplug


the


power


cord


of


the


monitor


from


the


AC


outlet,


wait


a


few


minutes


then


plug


the


power


cord


into


the


AC


outlet


again.


This


will


reset


the


monitor


and


power


supply.


The


Power


LED


is


red


(with


no


image


on


the


screen):


‐ 

Check


the


(HDMI,


DB

15,


CVBS)


signal


cable


to


ensure


that


it


is


properly


attached


to


the


graphics


display


card.


‐ 

Check


the


(HDMI,


DB

15,


CVBS)


signal


cable


on


both


ends


for


bent


or


pushed

in


pins.


11

10 

Summary of Contents for GD-ML-AP4360UHD

Page 1: ...echs GmbH Content___________________________________________ 1 Important Safety Instructions 2 2 Installation Instructions 3 3 Package Content 5 4 Connections 5 5 How To Connect Your Monitor 6 6 OSD M...

Page 2: ...s that are not recommended by GRUNDIG Do not modify the product in any way If the product starts to smell or smoke comes out of the device immediately stop using the product and disconnect it from the...

Page 3: ...st before attempting cleaning with a damp cloth To clean the plastic case a mild detergent may be used to clean the surface But please do not use too much detergent or water as this could leak into th...

Page 4: ...pplication s VGA connector 3 Plug the monitor s power cable into the power supply 3 Press the Power ON OFF button After pressing the Power button it will take approximately 6 sec until the monitor is...

Page 5: ...lected 7 2 Sound In the Audio menu you can set the sound to mute and set the volume Press the or button to adjust the value when an item is selected 7 3 Option In the Option menu you can adjust the OS...

Page 6: ...again This will reset the monitor and power supply No image on the screen Ensure that the HDMI DB 15 CVBS signal cable is properly connected to the display card computer Check the HDMI DB 15 CVBS sign...

Page 7: ...cable should be connected to the line out on the audio card and the line in on the monitor Ensure that the audio cable is properly connected Inspect the audio cable for any apparent damage Double che...

Reviews: