background image


Step 8: Tighten the back focus ring’s retaining screw to fix the ring.

4.4. Power Connection

For the camera with 230V power supply, please put the power cable in

to

 the camera. 

For the camera with 12V DC/24V AC power supply, connect the power terminal block.

5. OSD Control Keys


- OK key (in the middle): Accesses the 
menu mode or confirms the setting.


- UP / DOWN: Chooses the desired menu.


- LEFT / RIGHT: Sets up the value of the 
selected menu and changes the settings.

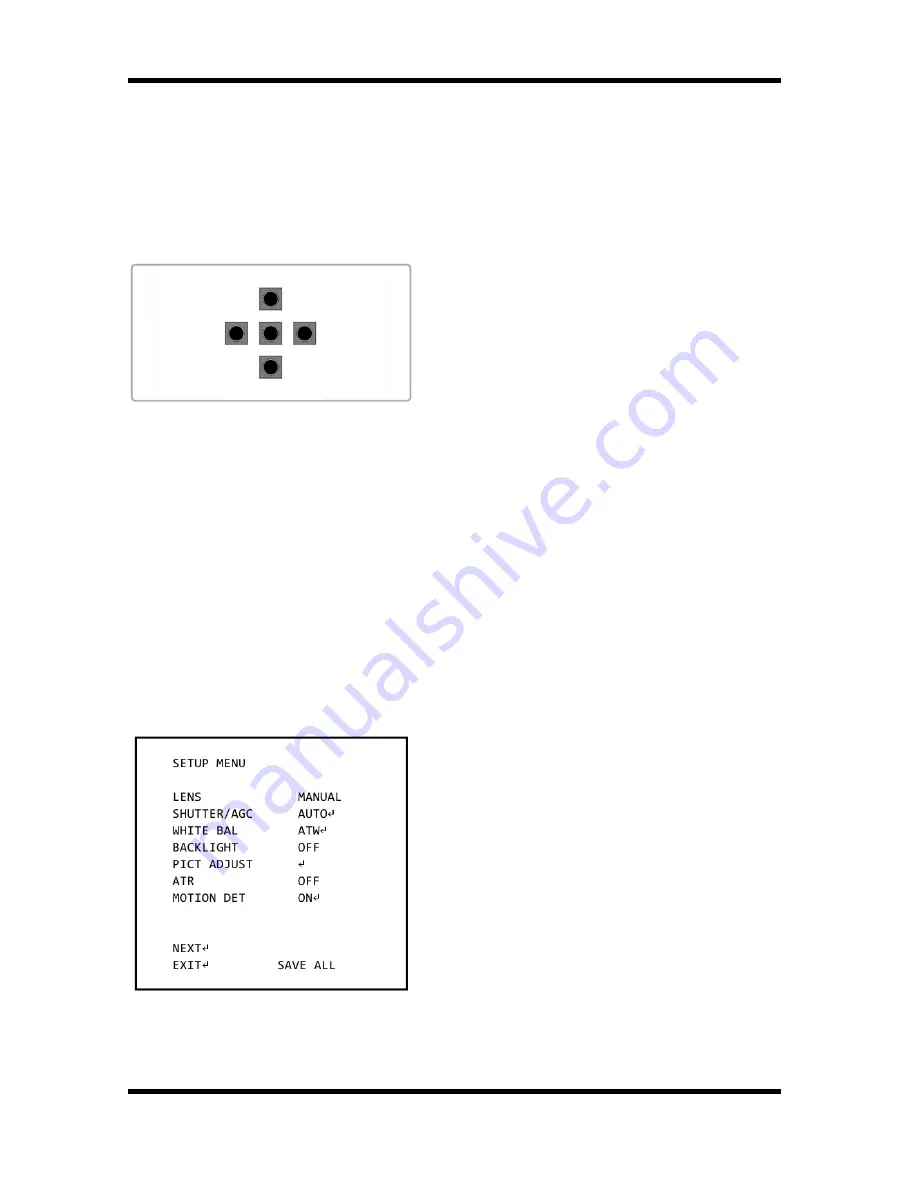
6. OSD Menu

1. Press the OK key and hold it for a while to access the menu mode.
2. Select the desired feature by using the UP/DOWN keys. 
3. If there is a setting for this feature on the the right side of the screen, use the 
LEFT/RIGHT keys to switch between the settings and confirm your choice by pressing 
the OK key. If an ENTER arrow (

) is displayed, press OK to access the according 

submenu.
4. When the settings are completed, go to SAVE ALL and press the OK key to save the 
settings. If you have not done this and the power is turned off, the changes in the 
settings will not be kept.
5. In the sub-menus, please press with the OK key on RETURN to return to the previous 
menu.
6. Please press with the OK key on NEXT or BACK to switch between the SETUP 
MENU pages. 
7. To exit the menu, please press with the OK key on EXIT in the main menu.

LENS: Here you can configure the lens 
setting.

SHUTTER/AGC: This function is used to 
control the light exposure.

WHITE BAL: You can control the white 
balance under different lighting conditions 
here.

BACKLIGHT: You can control the backlight 
compensation here.

5

English

Summary of Contents for GCA-B0002B

Page 1: ...GCA B0002B 52 1 14 06 2012 Owner s Manual EN ASP AG Cameras Domes GCA B0002B 1 3 CCD Colour Camera 650L 230VAC GCA B0302B 1 3 CCD Colour Camera 650L 12VDC 24VAC...

Page 2: ......

Page 3: ...wer Connection 5 5 OSD Control Keys 5 6 OSD Menu 5 1 LENS 6 2 SHUTTER AGC 7 3 WHITE BAL White Balance 8 4 BACKLIGHT 10 5 PICT ADJUST Picture Adjustment 10 6 ATR Adaptive Tone Curve Reproduction 11 7 M...

Page 4: ...connect the power source and contact the service center Continued use in such a condition may cause fire or electric shock If this product fails to operate normally contact the nearest service center...

Page 5: ...02B 230V AC Connector For GCA B0302B DC 12V AC 24V Connector 5 OSD Control Keys 4 2 Lens Mounting Lens Mounting for C CS Mount Lens Model It is possible to attach all CS Mount lenses with manual or DC...

Page 6: ...re it is advised to keep the environment in low light condition To open the automatic lens completely please use a neutral density filter With this filter it is possible to simulate a low light condit...

Page 7: ...EFT RIGHT keys to switch between the settings and confirm your choice by pressing the OK key If an ENTER arrow is displayed press OK to access the according submenu 4 When the settings are completed g...

Page 8: ...when the brigthness level of the ambient environment is low NR This noise reduction function is to decrease the noise which can be generated under low light conditions CAMERA ID Here you can assign a...

Page 9: ...depending on the lighting conditions or you can choose MANUAL for the manual iris lens here you can set up the electronic shutter speed and the AGC value manually AUTO Here you can set the auto exposu...

Page 10: ...e AGC 6 00 12 00 18 00 24 00 30 00 36 00 42 00 44 80 As the AGC value increases the overall screen gets brighter but the level of noise is also increasing 6 3 WHITE BAL White Balance This function is...

Page 11: ...a is installed outdoors this is mainly for sunlight conditions it means ATW is set to High Colour Temperature cool PUSH Adjusts the white balance regardless of the ambient conditions USER1 This mode i...

Page 12: ...ure 6 4 BACKLIGHT This function is used for backlight compensation Please choose from OFF BLC and HLC BLC Back Light Compensation This function is used to counterbalance the screen image by increasing...

Page 13: ...ion is used to adjust the colour tone of the displayed image GAIN 000 255 This function is used to adjust the saturation of the displayed image 6 6 ATR Adaptive Tone Curve Reproduction ATR ON OFF When...

Page 14: ...set to ON you can choose in this setting with the OK key areas where the motion detection in block format should not be displayed Using this option is only possible when MONITOR AREA is set to ON To e...

Page 15: ...ed mask area BOTTOM Sets the bottom side of the selected mask area LEFT Sets the left side of the selected mask area RIGHT Sets the right side of the selected mask area COLOR 1 8 Choose one of 8 colou...

Page 16: ...OLOR mode regardless of the ambient conditions B W BURST IR OPTIMIZER MODE LEVEL If set to B W the camera will be fixed to B W mode regardless of the ambient conditions BURST Set this option to ON to...

Page 17: ...unction is used to improve the picture quality by filtering the noise which is generated under low bright light conditions You can set up Y luminance C chroma and Y C mode as well as adjust the filter...

Page 18: ...tters and numbers out of CHR1 The option CHR2 has no function in this camera model 6 12 SYNC This camera model is set to fixed INT Internal Syncronisation 6 13 LANGUAGE The camera supports 8 different...

Page 19: ...sec auto BLC BLC HLC off AGC Off On x0 25 x0 5 x0 75 x1 Digital Noise Reduction DNR Off On 2D Additional Features H Reverse High Light Compensation Motion Detection On Off OSD Yes DE EN ES FR RU PT J...

Page 20: ...Dimensions 18 English...

Page 21: ...products meet the standards in the following relevant provisions EC EMC Directive 2004 108 EC Low Voltage Directive 2006 95 EC Applied harmonised standards and technical specifications EN 61000 3 2 E...

Reviews: