GV 29…, GV 9000…, GV 9300…
Allgemeiner T
eil / General Section
GRUNDIG
Service
1 - 13
SETTINGS
____________________________________________________________________________________
5
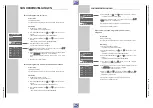
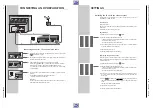
Press the »
OK
« button.
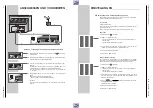
– The » CLOCK« table appears on the picture screen.
Check the time and the date.
Note:
If the time has not been updated automatically, it must be set manually, see
chapter “Setting the Time and Date” on page 34.
6
Press the »
OK
« button to end the setting.
Note:
Further settings such as manual channel search, changing the order of the
channels at a later date, clearing TV channels from the station table, or
assigning station names, are described from page 30 on.
SETTINGS
____________________________________________________________________________________
Channel programming with the automatic tuning
system ATS euro plus
The recorder has a built-in receiver. It can therefore receive and record television
programmes independently of the TV set.
For this, you must programme the TV channels on the video recorder.
When carrying out this function, the time is automatically updated, provided a TV
programme with teletext is received on programme position 1.
88 programme positions are available which can be assigned as desired to TV
channels received via the aerial or the cable system.
Preparation
Switch the TV set on.
Select the »AV« programme position for video playback on the TV set.
Programming
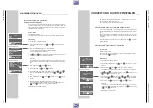
1
Press the »
D
D
« button.
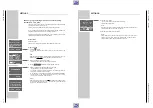
– The »AUTO INSTALLATION« table appears on the picture screen of the
TV set.
Help:
If the »AUTO INSTALLATION« table does not appear, press the»
q
« and »
w
«
buttons on the video recorder at the same time until the table appears.
2
Initiate programming with the »
OK
« button.
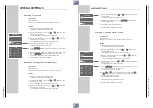
– The »LANGUAGE« table appears on the picture screen.
3
Use the »
C
C D
D F
F E
E
« buttons to select the desired language.
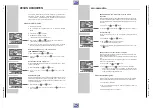
4
Press the »
OK
« button to start the automatic tuning system.
– »AUTO« flashes in the video recorder’s display.
– The recorder searches all channel numbers for TV stations, then sorts and
stores them. This can take several minutes.
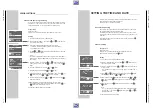
– When the search is completed, the message »AUTO-SETUP COMPLETED!«
and the number of the output channel appear on the picture screen.
»OK« appears in the video recorder’s display.
Note:
If the video recorder and the TV set are not connected with a EURO-AV cable,
you must repeat the setting on page 11 and tune the TV set to the channel
(e.g.»
CH 27
«) indicated in the table.
AUTO INSTALLATION
PRESS OK KEY TO START.
AUTOMATISCHE EINSTELLUNG
ZUM START DIE OK TASTE
DRÜCKEN.
OK :ENTER
INFO:EXIT
LANGUAGE
ENGLISH
DENMARK
DEUTSCH
SVENSKA
FRANÇAIS
FINLAND
ITALIANO
ESPANOL
NEDERLANDS PORTUGUESE
‹›
&&%%
: SELECT
OK :ENTER
INFO:EXIT
CLOCK
TIME DATE
YEAR
9:03
0
5/
0
2
99
*
ADJUST
*
:AUTO
- :OFF
‹›
:SELECT
&&%%
:CHANGE
OK :ENTER
INFO:EXIT
AUTO-SETUP COMPLETED!
VCR OUTPUT CHANNEL
WILL CHANGE TO CH 27.
OK :ENTER
INFO:EXIT
AUTOMATIC SORTING
PLEASE WAIT
. – – – – – – – – – – – – – – – – – –
INFO:EXIT


