- Switch off the power supply until the indicator lights are off.
- Switch the external start and stop input off and then on again.
- Use Grundfos GO Remote.
- Use the digital input if you have set it to
Alarm resetting
.
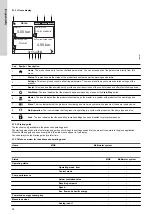
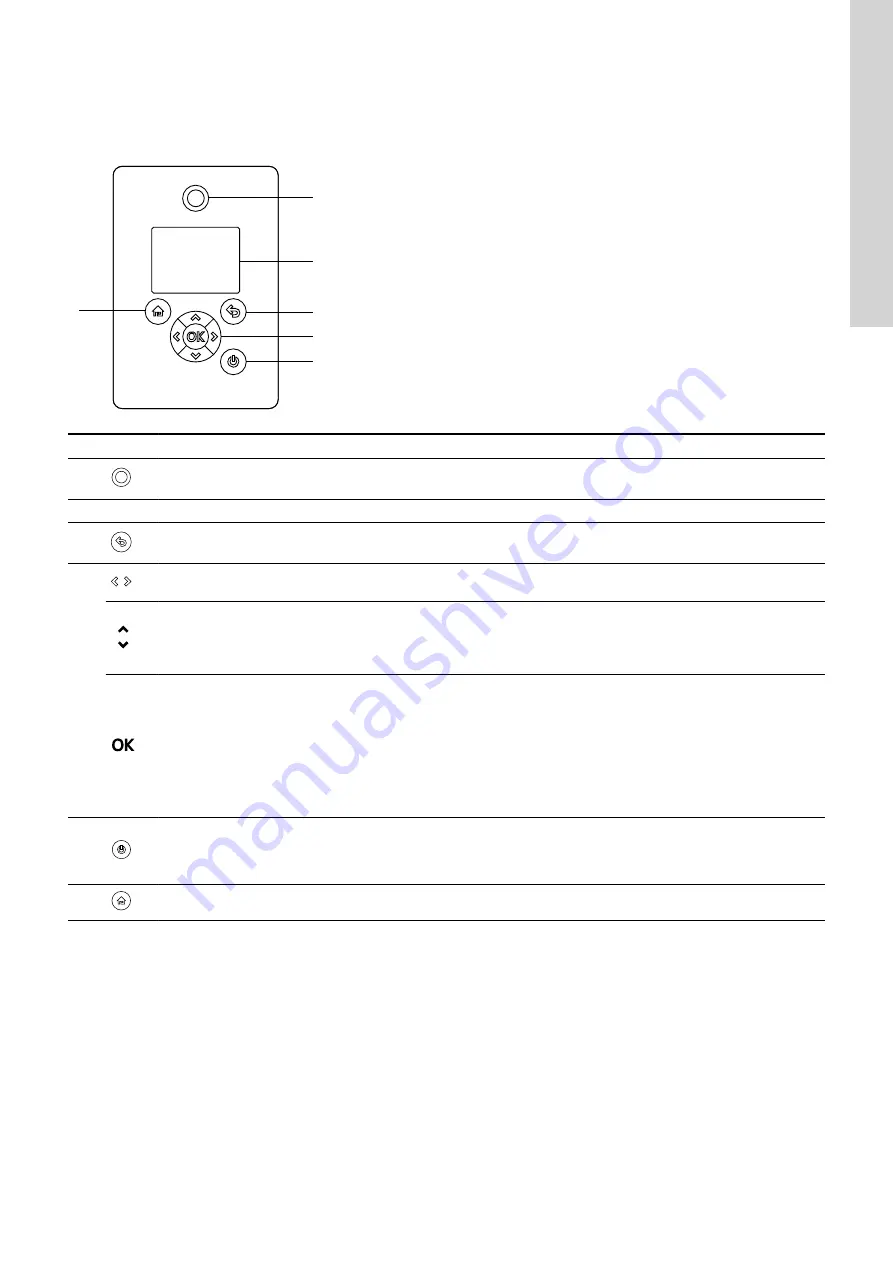
5.1.3 Advanced operating panel
1
2
3
4
5
6
TM054849
Pos. Symbol Description
1
Grundfos Eye:
The indicator light shows the operating status of the product.
2
-
Graphical colour display.
3
Back
:
Press the button to go one step back.
4
Left
/
Right
: Press the buttons to navigate between main menus, displays and digits. When you change the menu, the
display shows the top display of the new menu.
Up
/
Down
:
Press the buttons to navigate between submenus or change the value settings.
If you have disabled the possibility to make settings with the
Enable/disable settings
function, you can enable it again
temporarily by pressing these buttons simultaneously for at least 5 seconds.
OK
:
Press the button to do as follows:
•
save changed values, reset alarms and expand the value field
•
enable radio communication with Grundfos GO Remote and other products of the same type.
When you try to establish radio communication between the product and Grundfos GO Remote or another product, the
green indicator light in Grundfos Eye flashes. In the controller display, a note states that a wireless device wants to connect
to the product. Press
OK
on the product operating panel to allow radio communication with Grundfos GO Remote and other
products of the same type.
5
Start/Stop
: Press the button to make the product ready for operation or to start and stop the product.
Start
: If you press the
button when the product is stopped, the product starts if no other functions with higher priority have been enabled.
Stop
: If
you press the button when the product is running, the product always stops. When you press the button, the stop icon
appears at the bottom of the display.
6
Home
: Press the button to go to the
Home
menu.
Related information
6.30 "Buttons on product" ("Enable/disable settings")
31
English (GB)
Summary of Contents for RADIOMODULE 2G4
Page 2: ......


