


Pict.5: Insterted selector plate
5.4. Cut-off lever installation
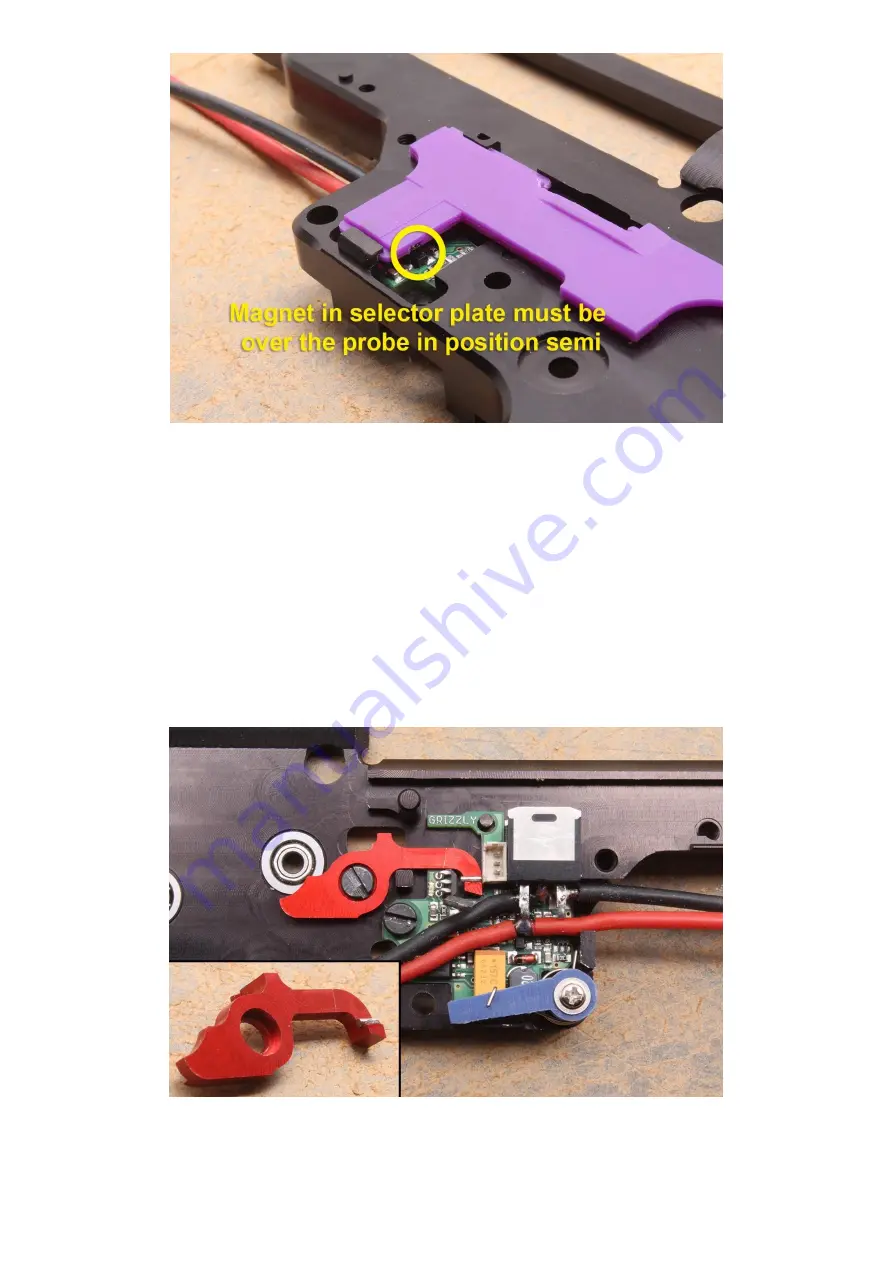
Place the magnet on your cut-off lever, so in its default position, magnet almost touches the probe (pict.6). It is
enough to use superglue. For correct installation, there is LED indicator on the unit (pict.8). For that to work
connect unit with laboratory power source and insert piston gear. By rotating it, cut-off lever should lift and return
and LED indicator should react by turning off and on again (pict.8 and 9). Is possible to use battery for the test,
but be very careful about battery polarity. If you connect battery incorrectly and cause short circuit, you can
damage the unit.
Test example: connect battery power source to power wires +(red) and –(black), LED indicator will light up for 5s (will make unit
check), then is possible to rotate piston gear and test cut-off lever function. LED indicator will turn on and off when magnet will
be closer or farther from probe.
Importatnt warning: if you press trigger with already installed magnet, you will deactivate test mode and LED indicator will not
react on cut-off lever move. For test mode reactivation you need to disconnect a connect again power source.
Pict.6: Cut-off lever inserted into gearbox (magnet almost touching the probe), magnet polarity doesn’t matter
Summary of Contents for PSJ-M2 gen3
Page 1: ......


