Manual UC1 © Grimm Audio
22
connected physical output. Mark that ‘Digital 1’ and
‘Digital 2’ are the two channels of the single XLR digital
output on the back. When monitoring these sources in
the UC1, the USB channel numbers are indicated in its
display.
The clock source can be set from the USB driver page.
The options are: Internal Clock, Word Clock, Digital 1|2
and Digital 3|4. When the UC1 is in master mode
(‘Internal Clock’), sample rates from 44.1 to 192 kHz can
be choosen. In slave mode the UC1 follows the sample
rate of the source, unless this function is disabled in the
UC1 menu. If your DAW is setup for it, the sample rate
can be changed from within the application so the UC1
will follow the sample rate of your project automatically.
Macintosh performance optimalization
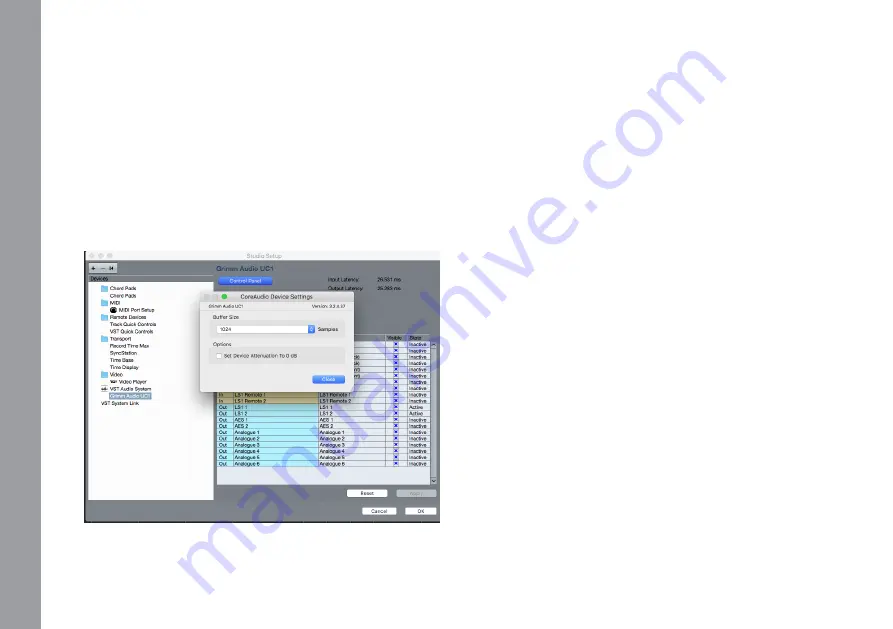
When using the UC1 with Cubase / Nuendo you may
experience a sudden volume increase when the app is
started. This is caused by a hidden setting in Cubase/
Nuendo. To change this behavior, please open the
‘Studio Setup’ under the Studio menu of Cubase/
Nuendo, browse to ‘Grimm Audio UC1’, open the
Control Panel and then disable the ‘Set Device
Attenuation To 0 dB’ option.
Some general ‘good practice’ remarks to optimize Mac
OS for use as a DAW are: disable Time Machine, disable
Spotlight indexing, disable screen saver and disable
energy saver.
Disable “Set Device Attenuation to 0 dB” in Cubase / Nuendo.
5.
O
pe
ra
tio
n


